

Here are 12 easy steps for installing a wired backup camera on a travel trailer. It is easy and you can do this yourself and takes around 2 hours.
How to Install Wired Backup Camera on Travel Trailer? Install a wired backup camera on the travel trailer with an electric wire connection. Always select the precise location with a straight electricity route. Adjust a monitor inside the travel trailer to gather the vast-angle and clear background view.
How to Install Wired Backup Camera on Travel Trailer?
More people are now using security cameras for their RVs. In this article, we have explained everything you should know about installing the wired backup camera on the travel trailer in few steps.
Tools required
- Screwdriver
- Backup camera
- Ladder
- Electric cables
- Wire connectors
- Monitoring device
- Camera cover
- Drill machine
- Non-permanent marker
- Paper
Access the backup camera
Check the backup camera before adding it inside the system. It is an essential step to check the quality and work efficiency of such tools.
Connect it with the RV wirings or any other electric system. You can carry out this step without any firm connection.
Handle the device in your hands during this process. These are secure electric tools and never harm human bodies.
Turn on the tool and check its mechanism for at least 2 to 4 minutes.
Once you adjust to the massive structure and it does not work, the situation becomes miserable.
It leads to time consumption and frustration due to improper devices.
Decide its location
Access and select an accurate location to install these backup cameras.
The RV offers various spots and suitable spots for such arrangements.
Select a spot according to the network of the electric wire system. Keep it near the monitor for signals, and Select a higher surface for a vast and uninterrupted angle.
In this way, you can get access to background views. Always select the location with cleanliness. The dirty spots lead to unstable connections.
Select the right route for wiring
Always select the route of electric wiring inside the RV. You cannot add these devices without these supporting mechanisms.
Keep it near the electric panels for easy setup, and use the appropriate passage. Always choose that electric path that has straight alignments.
It makes this procedure convenient, and you may not require professional help. There are minimum chances of errors due to straight electrical passages.
The identification of the device is convenient from the internal structure.
You can connect the camera directly to one electric port, and the direct electric supplies keep these devices under control. They work with maxim work efficiency with these electric connections.
Mark and drill holes
Use a non-permanent marker to mark spots on the selected location. It is an essential technique to support the device with screws.
These marker spots are suitable for the proper function of the drill machine. Use a drilling machine to make holes in the precise locations.
Keep the movements slow and smooth during the process. These holes are beneficial for the crossing of electric wires. Make holes in the direction of the setup because other wires can interrupt.
Drill hole according to the size of electric cables. Cross the wire to check their movements on both sides.
The openings may comprise some external corners. They can allow the entrance of different bugs, and it is not suitable.
Add sealant and other such materials to cover the surrounding of the hole.
Mount the backup camera on the travel trailer
Adjust the backup camera on the spot and the holes. Check its adjustment power on this particular location.
If it requires more support, then add more holes. Keep the drill machine near you during the process.
Observe the pattern from inside and outside of the massive vehicle. The checking of adjustments is essential before adding it permanently.
The modifications can lead to time consumption and frustration. Avoid such unfavorable events and identify the issues in the initial steps.
Adjust the camera angle
Adjust the angle of the background view through the backup camera. It is necessary to capture all the signals without any signal interruptions.
If it is not in the right direction, then settle it in the accurate passage.
It is beneficial to prevent time consumption in case of errors.
The angle is the built-in advantage of the backup camera, and you cannot avoid this feature because it leads to disasters.
The drive feels disappointed due to unclear images, and the system lacks work efficiency near the tricky turns and other sides.
The uninterrupted connection is stable with the vast angle of the view. Adjust the angle at least 4 to 7 times because it enhances security from errors.
Add screws to the device in the significant holes. Make it stable in a place with no movements.
Use a screwdriver to tight all the screws one by one. Check the device manually to find any issue of stability.
Connect its electric wires
Start the connections of electric wires between the backup camera and the internal electric panel.
Keep the electric cables away from the heating device and remove every such thing from the passage.
Use zip ties to adjust the wire with the wall surfaces. They are security tools for all types of electric cables.
Hide the remaining electric cable under the floor mats. Secure them with these hiding mechanisms, and it takes little effort.
Coil and gather the extra cord, and you can use it in the future. Never cut the electric cable from any end because it disturbs the internal electric wire system.
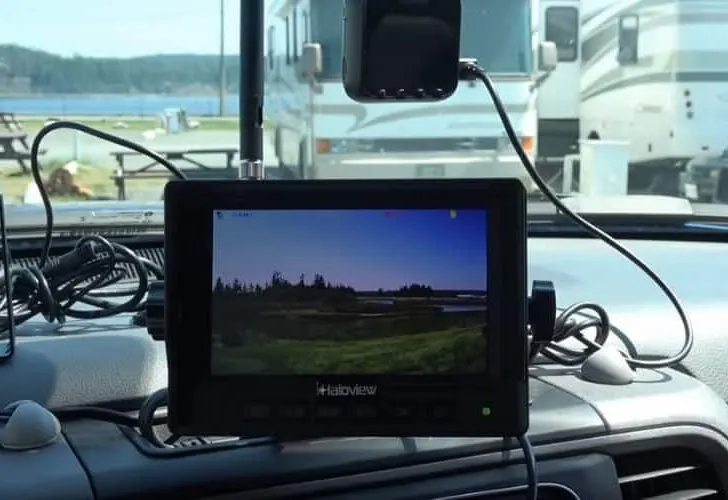
Settle its display screen
Adjust the monitoring device near the driver’s seat. It should offer clear visions of the entire backup camera’s information.
Mount the device nearest to the person who comprehends the directive signals. This electric equipment requires eclectic connections for its casual performance.
The tools comprise a vast screen that has adjustment ability. You can settle it inside the massive vehicle with various modifications, and it has ports and sides for the electric wire system.
Few designs of these monitoring devices comprise built-in wirings, and you can check it through an electric panel connection.
Connect the internal wiring after the test and observe the process to save time. There are minimum chances of errors due to these testing mechanisms.
Connect power source with screen panel
The cigarette lighter works as the power source of the backup cameras in travel trailers.
These power plugs have other connections as well. The security and stability depend on your capability to arrange them together.
Attach the electric wire to the socket of the cigarette lighter, and modify the monitor’s settings. Adjust it with the backside view and reversing conditions.
You have to adjust the backside lights in the same electrical passage, and the kits of the backup cameras offer different colors of electric wires.
The blue colors are usually efficient for the backlight connectivity in such arrangements. Adjust the electric wire end in the outlet of the cigarette lighter permanently.
Remove secondary tools
Remove the secondary tools from the system of backup camera and monitor.
Gather the unnecessary wires with a zip tie and keep them aside.
Settle the electric wire under the floor mat with different techniques. Make it a clear and vast system for the driver specifically.
Test and fix the backup camera angle
Test the monitor in collaboration with the external electric tools. Both devices should comprise the same connection.
They should acquire all the built-in features of the backup camera. Check the angle and acknowledge all the relevant information.
It is a testing procedure, and you can perform it during parking conditions. Keep the travel trailer static and check the internal views of the backside.
Observe the movements of backside lights with reversing conditions.
In those situations when the cigarette lighter of the RV is not working accurately, make changes. Adjust this outlet for the uninterrupted performance of both systems.
The angle of 129 to 130 degrees is one of the best for these travel trailers’ backup cameras.
Settle the angles on these dimensions to prevent the massive structure from various hazards.
How much does it cost to install a wired backup camera on a travel trailer?
The cost of installing a wired backup camera depends on time.
The procedure requires approximately 1 to 2 hours for the whole arrangement, and the professional person charges up to $75 to $99. These charges increase with various modifications.
If you require a new wiring network, then the cost can lead up to $80 to $149. It is an economical process because of its high performance.
Now you also have to add the price of the camera and other tools.
On average, it costs between $250 to $400 for installing a backup camera on your travel trailer.
You can install these devices without any professional help to save money. It can lead to few errors, and repairing costs are costly on the budget. The average rate of repairing is approximate $35 to $41.
Related Articles:
How to replace RV countertops?