

The AVS in-channel vent visors protect the internal environment of the truck cabs from rain splashes and hot rays of the sun. Moreover, it allows proper ventilation and maintains continuous airflow inside.
How to Remove AVS In-Channel Vent Visors? You can easily remove AVS in-channel vent visors by pulling them off after applying heat. Use a plastic scraper to remove the corners and rub the surface with a cloth pad after dipping in alcohol. Apply heat on the window guards using a hairdryer or a heating device to melt the glue. Next, use a sharp thread or a fishing line and move it in a back and forth motion below the vent visor. Remove the glue stains carefully by using an adhesive remover on a specific area to avoid paint removal. Moreover, it is essential to replace a window visor when it starts rattling and interferes with rolling up the window.
The vent visors become non-functional and sometimes lose the firmness to stick to the window channel.
Moreover, they need to be present in the truck windows because it avoids the entry of fumes and smoke inside.
Therefore, you need to replace them with new vent visors that can act as a rain guard and efficiently prevent the entry of UV rays.
In addition, it reduces the glaring effect due to sunlight that can interfere while driving.
What are AVS in-channel vent visors?
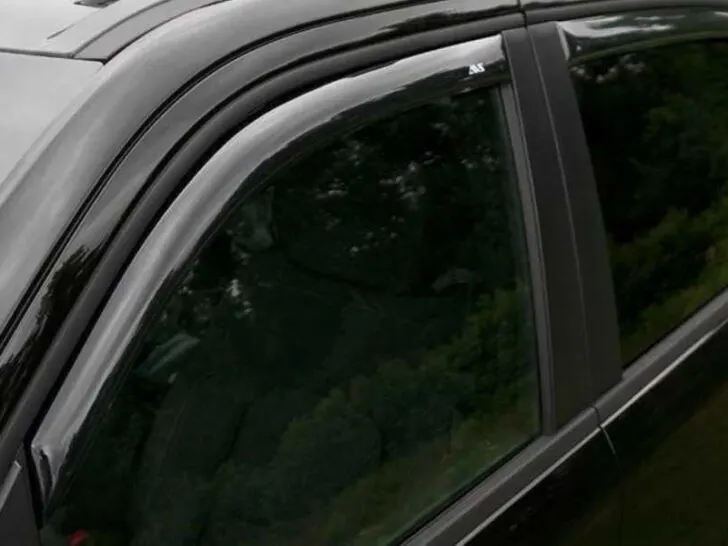
The AVS in-channel vent visors are the window guards that correctly fit in the window channel due to the curve shape.
Furthermore, they are made of acrylic material and give the truck a low-profile look. It allows the entry of fresh air inside and reduces interior heat.
The vent visors protect the vehicle against rain, wind, and sunrays. They channel rainwater away from windows and throw snow and dirt out.
Why would you remove the AVS in-channel vent visors?
It becomes essential to replace the damaged AVS In-channel vent visors with a functional one.
There are many reasons to remove the truck’s vent visors from the window channel. One of the main reasons is damage to the acrylic material, like scratches and wear and tear.
The old vent visors can interfere with the smooth functioning of the glass window, and an incorrect fitting of window guards in the channel can be the reason.
These channels sometimes fall out when they become loose and lose stickiness. In addition, you need to remove them when they begin to rattle and start making noise inside the pickup truck.
You can face bouncing back of the window due to internal faults. In addition, the debris accumulates if you do not clean them with a pad regularly.
It makes the window visors non-functional, and windows cannot roll up quickly, so you need to change them.
Easy steps to remove AVS in-channel vent visors
It is easy to remove the AVS-in channel vent visors, but you need to understand the method correctly. They are hard and adhere strongly, so you need to pull them with great strength.
These channels stick firmly with the window due to adhesives. So, it requires care while taking them off the vehicle surface as it can remove the paint.
Prepare yourself before removing AVS in-channel vent visors and collect the material. You need an adhesive remover, a cloth pad, a plastic scraper, alcohol, and a heating machine.
In addition, you need a sharp thread, and a pair of gloves is necessary to protect the hands from cutting.
Scrape the vent visor
First, you need to scrape the vent visor from a corner away from the side mirror.
A slight scraping on the edges of window visors by using a plastic scraper detaches it from the surface.
It makes the process easy to pull out the rain guards from the window surface.
However, do not pull it forcefully as it can damage the truck surface, and scratches can appear.
Rub the surface with a cloth pad
It is better to use a pad over the surface of the vent visor and avoid spraying alcohol on the specific area. It can reduce glue’s adhesiveness, but it also affects the paint.
You can use a rag or a cloth pad and dip it in alcohol or methylated spirits. Then, rub it slowly on the upper surface carefully as it can remove paint.
Apply heat
After applying alcohol, wait for a while and let it air dry. Then, use a heat gun and melt the glue between the device and the vehicle surface.
It helps in detaching the acrylic material smoothly and requires lesser effort. However, using a hairdryer or a heat gun is better to heat the window surface.
The ideal temperature for installing the in-channel vent visors is between 60 to 100 degrees Fahrenheit.
Applying heat is a good solution to remove the stubborn adhesives. However, heat decreases the solidity of glue and reduces its stiffness.
So, you need to maintain a slightly higher temperature to melt the glue and pull it off. Then, when the glue melts, you can use a knife to remove it by scraping it.
Use a sharp thread
You can use a sharp thread or a fishing line if the heating is insufficient to take the AVS vent visors off the truck windows. Twist it around the fingers of your hands and pass it in a back and forth motion from one end to another.
It removes the rain guards efficiently and leaves no room for more efforts to remove the vent visors. You can also use floss as an alternative to a fishing line.
Apply an adhesive remover
Some stains of glue may remain on the truck’s surface that can interfere with installing a new vent visor. Therefore, it is essential to remove all the stains on the spot so that you can use adhesive removers.
The adhesive removers break down the glue, and you can easily wipe it off the surface. Get a small piece of cloth and put it around your finger.
Put a little quantity of an adhesive remover on your finger wrapped in a cloth. Apply the remover on a small area to check whether it damages the surface or not.
Carefully apply the remover over the stains and rub them. This way, you can clean the surface and get rid of glue stains.
Install new In-channel Vent visor
Finally, you need to install a new in-channel AVS vent visor. It takes about 50 minutes to 1 hour to replace a damaged vent visor with a new one.
Clean it with a dry cloth and remove dirt from the glass. Next, wash the surface with soapy water or use a spray bottle for cleaning the window surface.
The installment of a vent visor is a quick process because you need to tape off it. Then, paste it on the window channel, and it’s all done.
However, you can use a heating machine to melt the glue to adhere well to the surface. So, it can protect your inner truck from rain and sun rays by providing shelter.
It requires no drilling and screws to fix these and does not damage the truck surface accordingly. They remain attached for longer if you fix them properly until they get loose.
What is an ideal temperature to fix an AVS in-channel vent visor?
When you fix an AVS in-channel vent visor, it is better to understand an ideal temperature for the perfect attachment.
A double-sided tape is present on the corner of a vent visor that attaches it to a window channel. It adheres best if the temperature is 60 degrees Fahrenheit or above it.
If the temperature of the external environment is lower than 60 degrees Fahrenheit, you can use a heating machine or a hairdryer to provide heat.
It melts the glue and reduces its stiffness, which provides better attachment to the window surface.
Can you reuse AVS In-channel Vent Visors?
Many people want to reuse the AVS in-channel vent visors because they do not want to re-invest in them. The vent visors adhere firmly to the window, and you have to pull them hard for removal.
They can break when you apply great force in pulling them out, so it is not good to think about their reuse.
Heating affects the quality of acrylic material; that’s why you cannot reuse them. Therefore, you can use floss or a fishing line for its removal if you want to reuse it.
A sharp thread can minimize the chance of its breakage by removing it smoothly.
What are people saying about AVS In-Channel Vent Visors?
I surveyed 629 people to know about the experience of truck drivers about the time taken and methods selected for the removal of AVS in-channel vent visors.
Out of 629 people, 483 people (77%) said it takes almost 50 minutes to remove the vent visors from the window surface. They added that they used only a plastic scraper and heating machine to remove the vent visors.
While 92 people (15%) said that it is challenging to remove vent visors from the window. They use scrapers, alcoholic pads, heating machines, and stain removers for effective removal.
The remaining 54 people (8%) said that they had not removed the AVS vent visors themselves, so they do not know how much time and effort it takes.
Related Articles: