
If you notice a crack in the RV hot water tank, you can fix it with these easy methods. We have added the required tools in this detailed guide.
How to Repair Cracked RV Hot Water Tank? You can repair a cracked RV hot water tank with high-quality material and heating. Conceal the crack with the polyethylene strips and add a sieve patch. Welding of the cracked water tank is one of the beneficial solutions.
How to Repair Cracked RV Hot Water Tank?
Many people complain about the cracks in the RV hot water tank. There are various reasons that can cause this problem. In this article, we have added 11 DIY methods to fix this problem.
Tools required
- Protective gloves
- Heat gun
- Sieve mesh patch
- Fiber-free cloth
- Sprit/alcohol
- Drill machine
- Polyethylene strips
- Pushing roller
- Resin and sand
- Protective gloves
- Goggles
- Mask
Access the cracks
The broken RV water tanks start leaking due to cracks. You have to access it to identify the severity of the issue.
It is easy to find cracks because they keep on leaking.
It is not suitable because the whole water tank can lose the volumes of water. Usually, the polyethylene or plastic water tanks cracks from the corners.
It may occur due to loose of external insulations. The old-age water tanks also lack beneficial qualities.
These cracks are from minor to massive sizes and are not favorable. They require instant solutions, and you can resolve his issue. Follow the stepwise guide and use proper instructions.
You cannot follow one step before the other, and minor negligence leads to disasters, and repairing cost is expensive.
You can perform this process in your garage. Removal of the tank from the camper is essential before leading to other steps.
Drain the RV hot water tank
Draining of water tank is essential because you cannot perform the process without it. The water containers can have gallons of water, and you cannot wait until it lacks the volumes.
Turn On the outlets and valves of this water tank and remove every droplet of water. It is necessary for the performance of the repairing material.
The crack’s dryness significant because the wet spots do not allow the addition of healing materials.
Clean the crack
Clean the crack and surrounding with spirit or alcohol. Add the liquid directly to the site of the hole and shower it with a spray bottle.
It has the maximum capability to enhance the spot of crack. You can find the start and end of the hole without any error.
These liquids are suitable for better comprehension of the problem. Use a fiber-free cloth and clean the spirit from the hole.
Rub it gently all over the surface and dry the substance. The drying of material also clarifies the spots and damages. You can access it and can lead to further repairing steps.
Make holes
Use a drill machine in this step and make holes in the tank. Make two equal-sized holes on both ends and sides of the crack.
You have to keep the drill smooth and firm while doing it. Never make massive holes because they can generate further damages.
These holes are small but efficient for maximum control properties. The repairing material attaches firmly to these spots because the holes are not stable.
You can add dots with a non-permanent marker before using the drill machine. It is a preventive step to save the water container from other damages.
Use Polyethylene strips
As the repairing method is about the polyethylene material that is used in the hot water tanks.
Carry out the repairing and healing with the strips of polyethylene. Make sure these are firm and plain.
The presence of grooves makes them inefficient, and they cannot heal the crack. Measure the strip 1 to 2 inches longer than the crack.
Adjust it on the broken part and mark the spot with a non-permanent marker. You can cut it before adding it to the hole.
Keep the measurements longer because the material shrinks on heating. You can also move from corner to corner and cut it latterly. Place it on the hole 1 – 2 times to check the proper control.
Use a heat gun
Use a heat gun in this step and attach the strip to the crack. Place one end of the material on the edge of the damage.
Move from one direction and proceed to the other end. Provide heat to the strip and crack simultaneously.
The heating power shrinks and melts the material, and the sticking ability increases. Place and adjust it on the crack slowly.
Take preventive measures like gloves and goggles before doing such welding procedures. Wear a mask to save the nose and breathing process.
Keep the heating pattern constant and never leave the material instantly. It can stick randomly, and then you have to remove it.
These procedures are time-consuming, and a person can feel frustrated. Follow the guidelines and keep the welding slow.
Attach the patch on the crack according to its broken direction. Use a cutter or increase the heat of the device. Cut the patch from one end and remove it.
The shrinking of material attaches to the crack and fills every corner. There is no chance of any water leakage and prevents massive damages.
Sieve mesh addition
It is an additional support mechanism and keeps the system firm. Take a sieve mesh patch of moderate size.
You can cut it according to the size and dimensions of the damage. You can also cut it into two halves for better pasting.
These meshes have steel texture, and you cannot mold them easily. The attachment on a polyethylene water tank and its surface is not casual.
It requires enough amount of heat to adjust accurately. Use a heat gun and a roller press of steel.
Make a direction of attachment with the pressure and provide heat to the same spots. Attach it over the repairing strip patch and settle accurately.
Heat the remaining corners and adjust them on the tank’s surface. Keep the heating slow and away from the damage. The excessive amount of heat can lead to more cracks in the water tank.
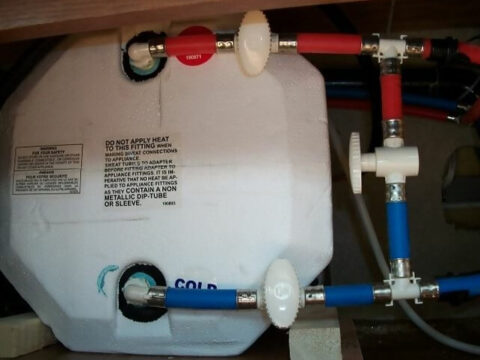
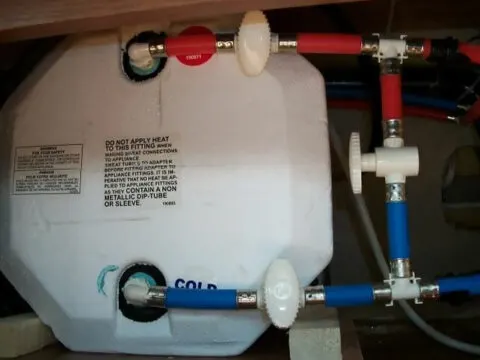
Repair the cracked outlet of the RV hot water tank
In this process, the outlet of the water tank does not work efficiently due to damages.
The steps are beneficial and less time-consuming. You can perform the repair at home or take professional help. There are minimum chances of error with professional expertise.
Empty the tank
Remove every droplet of water from the RV water tank. It is essential to carry out the process. The drying outlets are east to handle and support the system.
You can store the freshwater in another suitable tank. Always keep it for further use after the completion of the repairing process.
Clear the broken spot
The cleanliness of the broken part is essential to find out the severity. Take a non-fibrous piece of fabric and dump it in acetone.
It presents cracks and damages. Leave the system to dry for at least 2 – 4 minutes.
Repairing
Repair the broken outlet and all of its cracks with a nylon thread.
Never cut the nylon thread before swirling it around the outlet. Identify the crack and then make a loop at one end of the nylon material.
Put and attach it with the outlet crack and make circles. Keep the wrapping slow but tight, and observe the damage.
You can find out that the damages are joining together. The grip of nylon increases with every single layer.
Keep on doing it from bottom to top of the outlet. Never stretch the thread with excessive force because it can lead to broken nylon threads.
Make a thick layer around the outlet and cover the damage completely. Tie the ends of the nylon thread with 2 – 3 knots, and keep them tight.
Use silicon for further adherence and security. Take a silicone-filled gun, and you can also use a brush.
Add a small amount of silicon on every side of the nylon thread. Make another circle around the damaged area. Leave it for 3 to 7 minutes to dry.
In the case of silicon, shredding adds more material and repeats the drying process. Check the outlet manually and secure the system.
Install the new hot water tank in RV
Install the water tank back in the RB after the repair process. Attach the water container with the pressure pump and carry out the plumbing process.
You can add mew pipes and other such items to take advantage of such situations. Attach it firmly back into its position.
Leakage test
Fill it with water and test its leakage. It should not leak a single droplet of water. In case of problems, doing more repairs is beneficial.
How much does it cost to repair a cracked RV hot water tank?
The average cost of the repair depends on the severity of the crack. The bigger holes and damages require mega solutions.
The average cost to repair a small crack in the RV hot water tank is between $110 to $285. The damages like outlet breakage lead to the replacement of such items. It is a costly process and costs between $150 to $ 305.
The heater system stops working, and the replacement cost is up to $ 490 – $ 515. It is an expensive process in terms of the tank replacement and can lead to thousands of dollars.
Related Articles:
How to mount a flat-screen TV in an RV?
Can you run an RV generator overnight?
How long can you run RV furnace on a battery?