
Here are 7 easy methods to mount a flat screen TV in your RV. We have added the required tools in this detailed guide.
How Do You Mount a Flat Screen TV in an RV? Mount a flat TV screen in an RV through the wall and flat surface mounting. Use efficient tools to make proper connections in a ceiling or cabinet section of the RV. Carry out the process with expertise and guidelines. The supporting brackets are helpful in the firm and strong mountings.
How Do You Mount a Flat Screen TV in an RV?
Many people install flat screen TV in their RVs. You can watch TV channels or play games when you are camping with your family.
Tools required
- The new bracket
- Screws
- Pencil
- Plywood
- Non-permanent marker
- Hammer and drill
Install the TV Inside the RV shelves or cabinets
It is a suitable process for the small structures of the flat screen. It also depends on the availability of the cabinets and their sizes in the RV.
You can select a cupboard according to the dimensions of your flat screen.
You can settle the TV in a cabinet of the kitchen or bedroom storage compartments. Measure the shelves and then mount the TV.
Make modifications to adjust it accurately with appropriate tools. These are beneficial for those users that do not acquire enough space. They can settle the small light-emitting diode and other TV screens in cabinets.
Take measurements of the small screen and selected cabinet. Remove the central shelve for excellent mounting conditions.
Use a non-permanent marker and mark the spots according to dimensions. Make holes in the wooden cabinet, these will allow the electric wiring and another control mechanism.
Always select a cabinet near the electric passage. You can go through trouble if there is no electric supply near the cupboard.
It becomes a disaster after the complete mounting of the flat screen. It deforms the internal structure of the cabinet the TV loses its efficiency.
These cabinets can comprise the small fat screen never make modifications in the RV cabinets for the mega screens. The sides of the cabinets are suitable for the support of the system.
Make holes for the screws and settle the screen inside the cabinet. Pass the cable through the backside hole and connect the electric wire with the socket.
Tight all the relevant screws and provide support. Check the movement of the small screen with shaking and other such happenings.
It should not leave the mounting space when the RV is moving. The road jerks should not affect the screen due to accurate fixing conditions.
Fix the screen in the cabinet and allow the free flow of current. Check the normal function of TV in terms of signals.
Connect it with the signal-catching antennas and satellites. They provide all the local and other channels on the small setup as well. You can add more supporting screws if the small TV screen is moving.
Never allow the falling of the TV because it is vulnerable to damages. The repairing costs are immense, and they are heavy in the budget. You have to go through the whole mounting process after such damages.
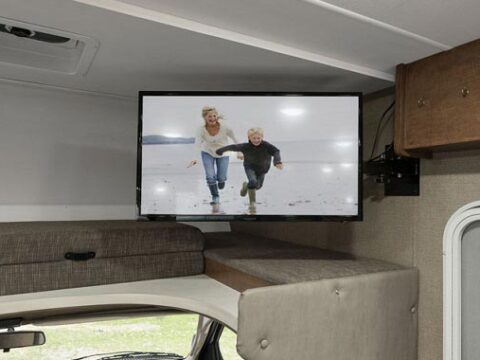
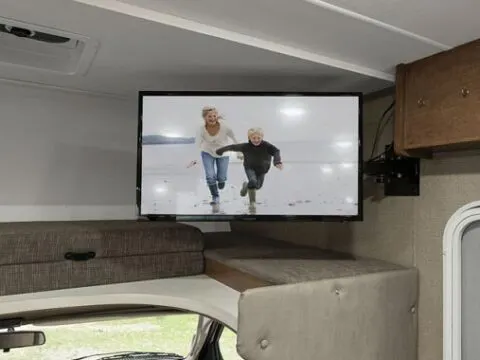
Wall mounting
It is a procedure of wall mounting of the TV in an RV. It sounds impossible, but with proper information and guideline, you can perform it.
The first essential point of this procedure is choosing the right wall for mounting a TV.
Selection of the wall position is necessary for all possible aspects. It should offer a clear and uninterrupted view.
The clear vision depicts the quality and performance of the TV. Choose a wall in terms of electric wire connections.
Always keep it near the electricity sockets, and it helps in simple mounting. There are few points in the RV walls that have a passage of electricity.
They have control and support simultaneously. You can find them with the manual or touch the wall manually. Find these spots for accurate mounting within one hour.
Use a pencil or non-permanent marker and draw spots. They help during the process because identification becomes casual.
Use a drill machine and make holes in the walls and mounting surface.
Mark these spots on the RV wall and then drill the surface. You cannot carry out the process without an accurate layout.
It leads to irreversible damages, and you can never mount the TVn on the wall.
Make holes of appropriate size according to the screws. Keep the drilling firm and insert it inside the wall. Keep checking the insertion and control of screws with the help of a drill machine.
You cannot adjust and secure a screen without bracket support and choose a fixed tool for maximum support, but other options are also available.
Use all the pieces and parts of the mounting bracket. Read the bracket manual and start adjustment. There is a rigid plate in the bracket box, and you should use it properly.
Adjust it on the backside of the TV, and attach it or tight the relevant screws. Connect the mounting section of the TV screen and the mounting plate directly.
Start the connections and make a proper electric wire system. Adjust the long cables with the sockets and turn on the power supply.
Check the function of the screen and then fix it permanently. Connect the antennas to the system to catch local and other television channels.
Use a satellite or other such signal catchers for better and constant signal flow.
You can enjoy a clear and uninterrupted vision from the front corners. You can rearrange the furniture to make it a sitting or living compartment.
In a box of TV
Few RVs comprise the TV boxes with sides. They have adjustment power to settle the flat-screen TV with modifications.
You have to add the wooden blocks on the sides and corners. They give more security to the television devices. It is a time-consuming process, and you require proper expertise.
Start the process of installation of flat screen Tv with small and efficient tools. You have to remove the old device from this compartment.
You have to understand the internal structure through a measuring tape. Make a layout on paper, and it helps in wood cutting in further steps.
Use a pencil of non-permanent marker and point the edges.
They help in accurate mounting positions, and fitting is suitable.
Take the measurements of the TV and cut blocks for it. Use a woodcutter and cut these pieces to adjust the screen accurately.
The box can accommodate the screen, but the settlement depends on fitting. Protect it from vertical and horizontal directions. It should not move when the vehicle is moving.
Use the wooden screws for the attachments of sides, and install them in the internal structure. Check and observe the fixation, and add supporting factors. Use the steel and wooden brackets to protect the screen horizontally.
Make holes in the wood compartment with a drill machine. Add screws and keep the covers massive as the original screw shapes.
Tight them with precise screwdrivers and fit them in position. Connect the top sides of the TV in the box with the screws and bolts, and install the TV box back into the wall section.
Support it with the brackets and screws one by one. Never leave a single corner, or it may lead to disaster.
Connect the electrical wiring with the sockets and make sure it is working. Small tools like plywood blocks and screes offer simple mounting spots.
Moveable positions
It is an expensive way of mounting a Tv in a massive vehicle like RV. It is an option with various corners, and you cannot avoid them.
They have maximum quality when they have better mounting positions. They are moveable but have security issues.
You have to hold the device in the worst road conditions. It can fall on the RV floor due to flexible support.
It has a mounting against any flay surface. You can mount it on a plain wall with essential expertise.
Read the manual and follow every step of the mounting guide. They have moveable positions, and you can pull them forward.
The approximate distance of the forward condition is 25 – 29 inches. You can change the direction of this TV. Access is easy when you are working inside a massive vehicle.
It is a tricky and heavy mounting procedure, and you cannot adjust it with causal steps. It requires multiple screws and other supporting devices.
The structure is massive, and it needs screws for adjustment. The fixing becomes efficient due to the addition of new bolts.
Make holes in the plain surface and then settle it. Add screws and tighten them with a screwdriver.
Keep the mounting setup moveable because it has a specific design. You can take the help of a friend during the process.
The heavy mass of the screen is not easy to handle without any side security. Connect the central parts.
Mount the TV in the bracket compartment. Tight all the screws and connect them with electricity. Settle the electric wires in the socket and enjoy the uninterrupted connections.
Attach the antennas to catch the signals of all TV channels. You can add a satellite dish tool to get the information from the surrounding.
It works with high efficiency even in those areas that do not acquire the signal sending capacities.
Mounting the TV on a flat surface
The mounting of TV on a flat surface is expensive and tricky. You cannot select any plain surface without any electrical connections.
Always choose a spot with an electrical supply passage. It must acquire enough size and dimensions to settle the TV.
You can select a flat cabinet or any other such surface. The wooden surface has maximum mounting capacities.
Follow the same guidelines of the installation, and make holes and tight all the screws. Connect the electric wires, and you cannot move such setups according to your desires.
Motion mounting
The structures remain in moveable conditions, and you can use them accordingly. The movements are manual, and they never lead to falling conditions.
You can move the TV screen up and down without any fear. The adjustment capacities are suitable for all those who have different arrangements.
Few people like to see the TV while working inside the vehicle. You can completely move the screen even to the opposite direction of mounting.
It gives chances to watch TV from any corner of the massive vehicle. The movements have no impact on the signals and image quality.
You have to adjust it properly so that it never falls on the floor. The screen can move without any directions and control when you leave it.
Support the system with brackets or mounting tools. The movements should depend on human choice and control.
Mount the TV on the wall with a smooth surface. Add a supporting bracket to hold it firmly.
You can settle it backward after use, and it is suitable for such moving devices. Take measurements and point the marks on the wall.
Use a pencil to create such spots for excellent mounting. Adjust and settle the supporting system before adjusting the device.
Make holes with a drill machine and add the supporting tool. Tight all the screws and then add a moveable device.
Attach the device to the backside of the TV. It allows the front and back movements to smooth.
Adjust and secure the central tool with multiple screws and background support. You cannot avoid this step, or the road bumps lead to structure falling.
It instantly breaks down into various pieces, and the repairing cost is immense.
It is a tricky mounting, and you can take professional help for such procedures. There are minimum chances of any errors due to professional expertise.
Install the TV on the RV ceiling
It is a tricky process and requires supporting devices. You can add a handle and bracket from the ceiling to the TV.
Connect them and make the setup firm. It should not move vigorously due to RV movement and road jerks.
Add a bracket around the flat-screen TV and move the electric wires with the walls. You can use the electric passage of the ceiling for such connections and mounting patterns.
Related Articles:
How to replace RV grab handle?