

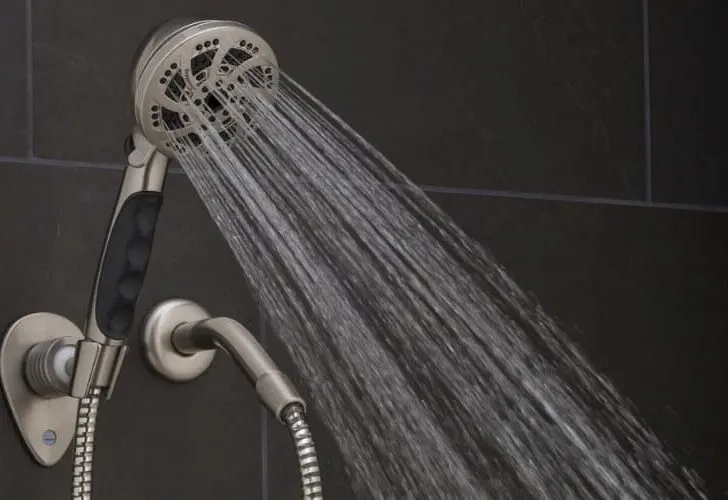
RV shower heads provide a constant water flow and are present in the majority of the RVs. The problem starts when they start leaking, and they must be repaired to prevent further damage.
Why Do RV Shower Heads Leak? RV shower heads leak due to cracked valves, broken seals, improper fixing, hose overflow, bursting of cold water sections, and broken pipes. The water dripping happens in dirty shower heads with various cracks.
The water leakage from the RV shower heads can cause a loss of water. The central water gallons of RV lose water slowly, but it is a dominant issue. Therefore, the shower heads of RV require instant repairing because it can lead to critical problems.
Why Do RV Shower Heads Leak?
Many people complain about the leaking of the RV shower head. I had the same issue last year, and I decided to find its causes.
I discussed with my fellow RVers, and we not only find the issues, but we came up with easy methods to fix this leaking.
Broken valves
The constant dripping of water from the showerhead is not suitable. It seems to drop one droplet every second, but it can remove thousands of water gallons.
The water removal and constant noise of this water dripping are not beneficial. It causes frustration in the RV owner, and they remove it.
Observe and identify the problem by checking the whole structure. Observe the internal parts and collect data about the errors.
They destroy with time and break into pieces due to corrosive conditions. These are pressure-controlling devices and can handle maximum limits.
In few cases, the pressure fluctuates, and the valves break down. However, it never tears apart in the initial stages. Then, the leakage occurs, and it becomes a problem.
Tighten the valve in such a situation of water leakage. Then, perform the replacement process with the help of a plumber.
Next, unscrew the valve handle and then discard it. Replace it with a new device that instantly stops the water from dripping.
Bursting of cold section
They have a control mechanism for a hot and cold shower. These water controllers work in coordination and enhance their standard performance.
These plumbing devices have handles and valves. A person can shut them off and can utilize them according to his needs.
In few cases, the person can turn on the hot and cold handles together. The process is necessary to mix the moderate quantities of both water conditions. In addition, it allows the flow of water at a balanced temperature.
After the showers, the passengers turn off both sides. The mixing of water stops, and it flows backward. There is a chance of hot and cold water mixing at this stage.
In some situations, the pressure of cold water is high than hot water. The high pressure crosses the limits, and the water gets in the position of cross flowing. A cold water blast occurs inside the structure and causes leakage.
The solution to these issues is a preventive measure. But, first, control its handles and never allow the cross-flowing of water.
Turn off one handle at one time, and it can prevent various problems. In case of issues, take the help of a plumber and remove the internal errors.
Cracked rubber seals
It comprises rubber seals for protection and control. They never allow water leakage from such structures. In addition, they have holding capacities and tolerate water pressures.
These are also known as washers in a showerhead, and time affects these rubber seals. The damages and cracks occur inside them.
In few situations, the cracks become big enough that water leakage occurs.
The water accumulates and flows inside the RV. The broken seal is repairable, and it requires instant solutions.
You can cover the seal with a thread or any other leather patch in emergencies. However, take permanent actions to reduce this type of leakage.
The replacement of the rubber seal is the only solution in such cases. Turn off the water supply to reduce the constant drop of water.
Remove its screws and detach it from the attachment point. Discard the seal manually or use a sharp cutter.
Install a new rubber seal and tighten it precisely, and add the device back and install the screws. Check the water dripping after such modifications.
Broken pipes
It contains a water arm or pipe for the free flow of water. These pipelines are sufficient to provide water to all parts at a constant speed.
However, in some situations, the internal structure of the pipe destroys. The corrosive material layers the inner body of these pipes.
The time also affects the standard efficiency of these central pipes. They wore out due to erosion and other brittle effects.
The pipeline damage sand it results in water leakage.
The replacement and repair of the pipe parts are essential to reduce such leakage issues. In addition, there is a ring of metal with the wall’s hole.
It loses the thread, and the water flow loses efficiency. Repair these metal rings or replace them with a new device.
If you can pull off the whole pipe, then it is an excellent move. Shut off the water supply during such a procedure. Negligence can cause a burst outflow of water.
Cover the broken parts of the pipe with a tape suitable for such activities. Teflon tapes perform such functions efficiently.
Overflow of RV shower head hose
It has a separate hose that stores water. It provides water to the showering parts and remains specific.
The balance remains constant, and it provides water when a person turns on the shower. They have a particular function to maintain the water levels.
In few circumstances, the passengers do not use the shower for multiple days. As a result, the hose keeps on filling, and pressure generates inside it.
It pushes water from the pipelines to the showerhead. As a result, it starts dripping without even use.
There are two ways to stop this leakage. First, cut off the water supply of significant RV water containers to the showerhead hose.
The other way is to utilize the shower hose water to reduce the pressured levels. In both directions, the leakage of water stops, and you can reduce the loss.
Improper fixing
The problem relates to plumbing technicalities. However, it also occurs due to human errors and negligence.
Its installation is a challenging process, and it requires professional guidance and expertise to fix it in its original state. However, few plumbers fail to perform the method efficiently.
It leads to the dropping of water droplets from the showerhead. It leads to the accumulation of water in the shower section.
The leakage can occur due to its improper attachment with the backside system. The water flows in these systems, but the performance is inappropriate.
Next, tighten the showerhead and then check the water leakage. You can perform this activity manually or use a tool to tighten it.
You can also wrap a thread around the ring area of the showerhead. Again, it is beneficial for those products that have a different size than the installing compartments. But, again, it occurs due to negligence during the purchase process.
Holes on its sides
The RV showers are similar to home showerheads. They have some designs and materials in their structures. Few of them have damages in these conditions.
The constant water flow and non-maintenance conditions can lead to other errors.
This is because the water not only flows from the standard openings but also a water loss.
The water drips from these holes constantly, and it requires repairing. In addition, negligence can lead to the generation of multiple holes in the steel structures. The holes are tiny, but they allow the free flow of water.
When a person turns it on, then water moves out inappropriately. As a result, the showering conditions become frustrating, and you need to resolve such situations.
Use Teflon tape to cover 2 to 3 holes of the showerhead. In case of enormous cracking, then replace the top plate of the showerhead. Next, remove screws and discard their plate.
Change it with a new and opening free tool. Install it back and adjust the front net. Tight the screws with a screwdriver and fix them firmly.
Dirty shower head
Dirty showerheads are a significant cause of water leakage. The internal structure of these devices gets worn out. They cannot perform sufficiently and drops water every second. It generates unwanted sounds and frustration in the passengers.
The clogging of the showerhead holes occurs due to various conditions. First, the presence of water and dirt combines. Then, the air and water interact, and a corrosive phenomenon happens.
It becomes inefficient to provide a constant and stable supply of water. The water accumulates behind clogged portions. It leads to leakage of water throughout the system.
The repairing in such cases involves cleaning. But, first, turn off the water handle and cut off the water supply.
Leave the system for some time and then start its removal. Remove screws and then take out the front net.
Discard the whole structure for appropriate cleaning, and make a solution of white vinegar and water. Dip the shower head and its parts in this bowl.
Leave it for at least 2 to 3 hours and remove clogging manually. Then, use a sharp pin of a knife to remove the clogged material.
Broken cartridge
The plastic cartridge is one of the essential parts of the showerhead that control the water flow.
They have a composition of hard plastic material and lies behind the handles. As a result, they never supply water when the handle is off.
In few cases, the cartridge cracks due to internal damages and other conditions. The worn-out cartridge becomes inefficient and allows water to seep.
Observe and check the standard performance of the cartridge in water leaking conditions.
The repairing of such small structures is a tricky process. Replace them with a new tool and enhance the workability.
First, take a screwdriver and then remove its front part. Next, remove the fancy plate covering of this structure.
Remove the screw of the shower handle and approach the cartridge. Next, remove the cover and stem cap and access the end of this structure.
Use pliers for the removal of cartridges and get are outwards. Adjust a new and similar cartridge in the same spit.
Take the help of a professional person to reduce errors. They can cost few dollars, but the chances of damages are negligible.
Related Articles:
How much does it cost to replace an RV shower?
How does a shower work in a motorhome?