
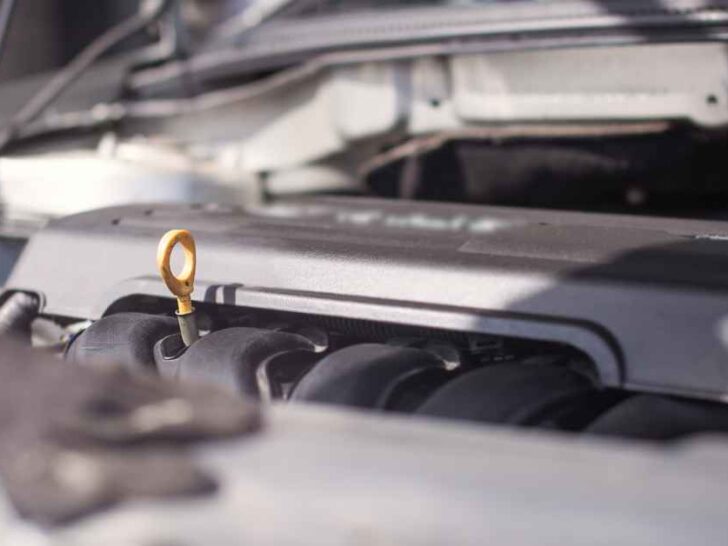
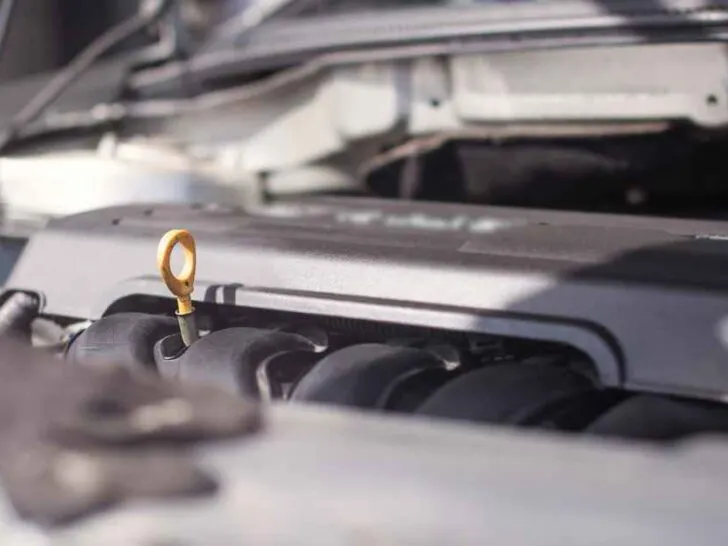
An oil dipstick can break due to additional pressure in the engine, sludge, and high heat. Broken dipstick removal requires patience to preserve to keep the engine components intact.
How Do You Remove a Broken Oil Dipstick? You can remove a broken oil dipstick by assessing the tube opening, removing the oil filter, and lubricating the O-rings. Insert a magnetic tool, push it, feel a tug, attract metallic pieces with the magnetic field, and remove them.
An oil dipstick can break into pieces that can settle into the engine tube assembly. With a high-quality torchlight, you can assess its broken parts by plug removal.
Examine the broken dipstick
You can assess the broken dipstick by examining the tube assembly and valve. However, a few cars do not have compact tube assemblies, and their removal is not essential.
To examine it, assess the shattered pieces. Moreover, you can remove the parts which make the examination complicated.
For this purpose, you can use the heat technique and approach the broken metallic pieces inside the tube. It adjusts upside down inside the engine tube assembly.
During its examination, you can check the upper part first to assess the type of damage. Similarly, it breaks from the upper side, and the broken pieces do not reach the engine.
However, they can flow in the drainage pan of the motor.
Twist the broken parts
You can twist the broken parts of the oil dipstick to make them accessible from the upper side. For this procedure, you can adjust a wrench on its top section.
Then, you can twist the pieces outwards with specific force. However, you cannot apply excessive strength to pull the pieces because they can break into smaller parts, which are challenging to extract from the engine tube.
With the wrench, you can twist and pull the pieces from the opening of your vehicle engine. In these circumstances, you can take the assistance of another person to handle and monitor the complicated engine system of an automobile.
You can use a correctly sized and efficient wrench to twist its damaged pieces. However, the proper rotation of the wrench is necessary to maintain a particular amount of spinning force.
Without this force, you cannot twist and remove its broken pieces from the tube assembly of a car’s engine because it is narrow.
Moreover, a specific force is beneficial to rotate the pieces inside the tube. With proper rotations, you can twist its damaged parts without further damage.
Remove the oil filter from the engine
The oil filter removal is necessary to prevent more damage. Moreover, its removal makes the broken dipstick more visible.
For its removal, assess the cap of your air filter manually. Furthermore, you can remove the cap by spinning it in the opposite position with a specific force.
Then, remove the cap and hold the plastic ring with your fingers. In such circumstances, you can rotate it in anti-clockwise spinning motions for around 1 to 3 minutes.
For the oil filter removal, you can use a specifically designed wrench. With this wrench, you can pull the steel-based ring, which mounts in the bottom of the oil filter.
Sometimes, its removal is challenging due to a lack of lubrication. In such circumstances, you can apply a specific volume of lubricant around the ring.
Also, you can spray the lubricating fluid in the surrounding and topside of the oil filter. Then, you can move it in a counterclockwise dimension and pull it off from the automobile engine.
You can utilize the specifically sized pliers and adjust them on the cover of the oil filter. These pliers can spin the plastic cap with or without the lubricant.
In such circumstances, you can rotate this plastic cap and pull it from the adjustment position.
Lubricate the O-rings
The oil dipsticks comprise the O-rings due to their design. Due to their shape and specific functions, these rings can adjust the dipstick inside the engine block.
Its O-rings can work as a seal at the entrance position of the dipstick in the engine block. Their removal is necessary to pull the broken dipstick from the motor tube.
For these procedures, you can approach the hole, which is present at the corner of the metallic tube. Generally, the hole is in the upper corner, and you can assess it between the metallic tube and plastic cap.
However, you cannot approach the O-rings manually due to the dimensions of a narrow tube. Due to their design, they are on the bottom side to secure the tube with the engine block.
For their quick and non-resistant removal, you can apply the lubricating oil to the O-rings. However, these rings can detach from their adjustment points due to this fluid.
The free-flow fluid can approach the edges due to continuous flow. In such circumstances, the lubrication of O-rings is essential to pull them from the system.
Due to their lubrication, you can remove them from the engine within 3 to 5 minutes.
Use a magnetic field
You can use a tool that has a telescopic property to approach the hidden and narrow parts of the engine tube assembly.
The tool comprises a magnetic field that can attract its broken pieces. Due to its functions, you can push the tool inside the engine tube.
However, you can keep the movement gradual to avoid sudden damage to the magnetic tool. Then, push it slowly to assess the tug.
In such circumstances, you can assess the connection of the damaged dipstick with the magnetic tool. You can leave the magnetic tool inside the assembly for optimized connection of broken metallic pieces of the dipstick.
Due to the magnetic field, these shattered pieces attach to the tool, which you can assess through its telescopic technology.
With this method, you can remove the damaged dipstick without affecting the surrounding parts of the engine.
Collect drainage oil
The broken dipstick removal with a magnetic tool can affect the engine components due to incorrect use. The telescopic magnetic tool is a specific duct with retractable and extendable dimensions.
It can transform into different lengths according to its requirements. In addition, it has advanced telescopic features, and you can use a torch to remove the broken dipstick to protect the surrounding parts of the engine.
However, you can remove the bolt of the drainage valve. Then, you can open the valve and adjust the container under it.
With the oil pressure, the tiny pieces of broken dipstick flow out. From underneath the vehicle, you can remove the drainage container or pan.
You can remove the broken pieces from this drainage pan manually.
Related Articles: