
Here are 8 easy steps to attach a battery box to the trailer. The battery box is a covering of the battery devices. They are protective structures to prevent the internal battery from environmental hazards.
How to Attach Battery Box to Trailer? Attach the battery box to a trailer by adding iron rods and electric wiring. Select a precise spot to install the battery box on the trailer. Adjust a control panel in the electric passage of the battery box. On average, it costs between $300 to $450 to install a battery box to a trailer.
They help the external installations due to batterie’s security, and the battery boxes comprise excellent materials in their compositions.
How to Attach Battery Box to Trailer?
Few steps help in the installation of the battery box to a trailer. These are easy techniques, and you can perform that at your garage.
There is no need to take professional help on this procedure. The process can get costly due to negligence, and you cannot skip any step.
Tools required
- Drill machine
- Screws
- Iron rod
- Control panel
- Protective gloves
- Face mask
- Goggles
- Measuring tape
Select location of the battery box
Select a precise location on the trailer for the battery box. It should occupy enough surface area to settle the cover of a battery.
Take measurements of the trailer surface and battery box at least 2 to 3 times.
Always select a spot with maximum stability and excellent control mechanism. It should never allow the free-falling of this box.
You can take professional consultation during the spot’s selection, and they guide you about proper locations and patterns of connections.
There are minimum chances of error with these guidelines.
The attachment point of the trailer with the massive vehicle comprises iron structures. It is a location with the shape of the alphabet V in most of them.
There are approximately 2 to 3 joining points that combine to build such structures. You can adjust the box on any of these parts.
Take measurements
Use a measuring tape in this step and perform all the measurements, and take and calculate the dimensions of all the trailer parts.
Measure the sides and corners of the box. There is no need to measure the battery because it remains inside the box.
Take the dimensions only in lengths because the settling depends on the dimensions.
The height never plays any particular role in this procedure. Mark the measurements and make a clear layout on paper. It helps you to move forward to another essential step.
Cut and settle iron rods
Take 2 to 3 iron rods and check them according to their surface area.
These marking spots are suitable to cut the iron rods. Use a sharp iron machine to cut them according to particular sizes.
Always cut them on the marking spots for proper size and accurate adjustment. Make sure that both rods are of equal dimensions because a small error can lead to disaster.
The equal size iron rods should comprise a rigid material, and they must acquire the weight carrying capacity for the battery box.
They must comprise enough weight to stay in their installation positions, and the lesser instability makes the process convenient for the person. It becomes less time-consuming with a minimum chance of problems.
Make holes in the trailer attachment section
Take a non-permanent marker or colored chalk to make marks on its attachment point. You should mark at least 2 to 4 spots to generate holes in the metal structure.
Check the settlement of rods on these spots for better adherence and control procedure. You can repeat this process at least 2 to 3 times.
It seems time-consuming and irritating, but it saves you from various harmful conditions. It also minimizes the chances of any possible error after the attachment of iron rods.
Use a drill machine and start developing the openings in the RV structure. Keep the movement of the drill machine slow and stable.
There is no need to move it across the iron structure of the trailer. Move it through the marking spots and make proper small holes.
Check the size of screws with maximum stability and fitting capacities, and you should also make openings in the iron rods with precision.
The size of these openings must coordinate with each other because they are settling same size screws.
Carry out this process with the help of a precise screwdriver in terms of size. Keep the direction clockwise and tighten them firmly.
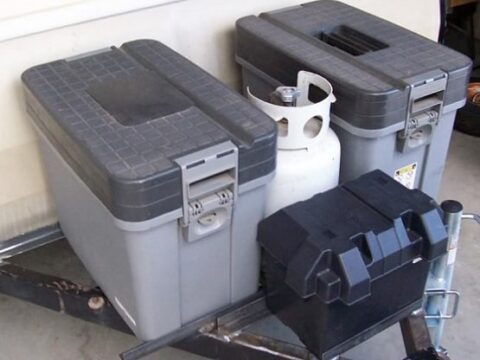
Add battery into the battery box
In this step, adjust the box on the metal rods and stabilize it. The sides of the rods help to stabilize and protect the battery box from various hazards. It is a bit unstable without the presence of a battery.
Settle the device inside this box and cover its lid, and secure the electric device inside the box. Check the stability of the setup before connecting it to the RV.
Secure the battery box
You can use the drill machine to make holes in the internal structures and draw spots with a pencil or marker before making these holes.
Adjust them in the same direction as the battery box on the outside surface. Measure the passage with a measuring tape for precise connectivity.
Make holes and remove every type of dirt from the surrounding area, and the clean surfaces offer more stability for the electric wire connections.
Crossing the wire
Remove the cover of the box and identify the connection wire. Bring out the electric wire from the battery and check its length, and cross it through the hole of the trailer’s wall.
There are minimum chances of any attachment problems in this procedure. Cross the wire to the section of the RV and leave it for some time.
If there is external space around the holes after the electric wire, then add filling material. Add sealant to cover the sides of the hole, and it prevents the entrance of bugs and other insects.
The technique keeps the internal side clean and hygienic. It also saves human skin from various allergies and deadly diseases. Make sure the electric wire crosses easily without any restriction or breakage.
Connection with control pane
Install a small control panel at the same point as the electric wire. Keep it near the hole and make few openings on its structure.
Use a drill machine to facilitate it with connecting points. Add screws in these openings and tighten them firmly.
Use a screwdriver to make the screws stable and keep them in position. Hold the control panel throughout the procedure.
Install it in the wall and attach the electric wires to it. Check the connection with testing tools and electric energy.
Stabilize the device in the wall, and in case of errors, add more screws. The electric wire of the battery is long and makes a connection near to both structures.
Coil and gather the remaining electric cable to preserve it. Use a zip tie and join the electric wire rings together.
Adjust this bunch of electric wires near the control panel. You can also add a hook and connector to adjust these wire setups.
The control panel gets the battery power, and it supplies it to the other appliances. It is a diverse device with several connecting ports and other joints.
It can gain and control the electric signals of the trailer’s battery. It remains stable and error-free mostly, and maintenance depends on the owner as well.
Test and remove errors
Testing the control panel and the battery is essential. Check the electric passage of both devices with techniques, and observe the dispersion of signals to all other internal tools.
These batter setups offer electric energy to the trailer lights. In those situations, when there is an error, then make modifications.
The changes and repair techniques remove such issues. Work on the electric passage until the system works precisely.
Check the external structure in case of errors as well. Tight all the connecting ports of the battery inside the battery box.
Attach the electric wire again to the control panel for the excellent route of electricity. It prevents future frustrations and adjusts the system stability.
Related Articles:
Where do I mount my RV backup camera?