

People use 12-volt sockets in their motorhome for various reasons. Here are 8 easy steps to install a 12V socket in your motorhome.
How to Fit a 12V Socket in a Motorhome? You can fit the 12-volt socket in both power systems of your motorhome, i-e, the leisure battery, and vehicle starter battery. Choose a perfect place for the socket, connect its wiring with the battery supply. Check the procedure using millimeters, and you can plug different devices in it like a USB port and some charging devices.
Motorhomes have a unique electrical system that helps users utilize different electrical devices for their convenience.
It is fascinating to use all the electrical systems like heating and lighting in your vehicle while being on the road. You can also connect different electrical outlets with your RV power supply and wiring.
How to Fit a 12V Socket in a Motorhome?
The 12-volt socket in the motorhome helps plug in different electrical equipment.
You connect with these with the USB port, Bluetooth devices, MP3 players, or charge a smartphone, illuminate light bulbs from them.
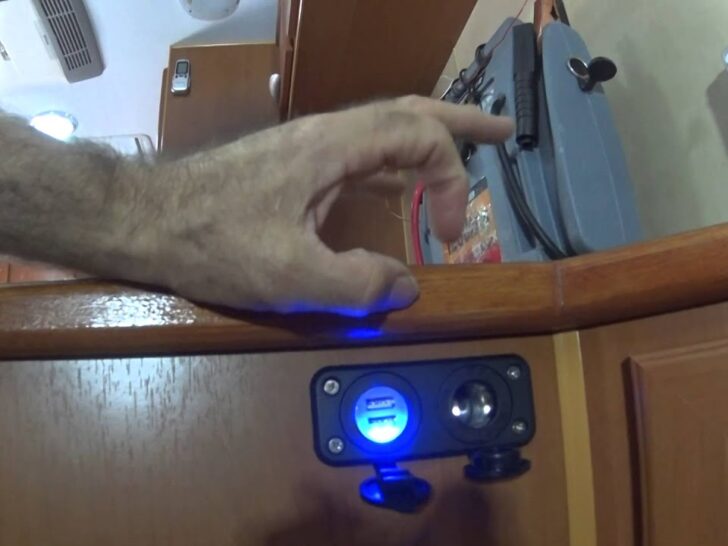
There are also some dual sockets available in the market.
The dual switches contain 12volt standard and 5volt USB outlets. Most of the dual switches have a cigarette lighter and USB port.
For installing a new 12-volt socket, you need to check the 12-volt circuit in the vehicle and carefully consider the electrical device you want to use through them.
The first step in fitting a 12-volt socket is to find the perfect electricity source for them.
Now find the place where these sockets are installed in your motorhome; then connect the socket with the electricity source.
Tools required
- Wire stripper
- Flat-blade screwdriver
- Stanley screwdriver
- Drill machine
- Insulating tape
- Spade terminals
- Cable
- Fuse holders
- 12-volt socket
Motorhome electricity basics
It is vital to know the basic information about motorhome electrical systems. There are two batteries present in the motorhome i-e the vehicle battery and a leisure battery.
These are supplied power by a leisure battery that gives electricity to light fixtures, water pumps, fans, satellite dishes, and 12-volt sockets.
The primary vehicle battery work with the electrical hook-up.
The main battery also charges its leisure battery, and all the high voltage devices fridge and air conditioning system run through it.
Fitting a 12-volt socket in the battery
You can fit a new 12-volt socket in both of the power supplies. For connecting the socket with the vehicle starter battery, you need some tools like:
Connecting the socket directly with the battery
The first step in connecting the socket with the vehicle power supply is to disconnect all the battery connections.
It is necessary for the safety of your vehicle and for yourself. After that, think of a suitable place for connecting the socket in it.
Find the place in your RV where there is no wire underneath the surface, and there is no route present for other cables.
It will save your camper from different holes in structures like metal dashboards and walls. You need to add your socket to the place where you use them to fulfill your need to plug in different devices.
After that step, find the vehicle starter battery, you can also do this procedure on the leisure battery of your camper.
The leisure battery can also run all the 12 volt electrical systems or devices.
Most of the batteries are present underneath the driver seat, you can connect a 12-volt socket directly with the battery because it is easy to install and safe.
Connecting wires for the 12V socket
After finding the battery, take out the new wiring you want to use for your 12-volt socket.
The wiring that comes with these switches is small, but you can extend its length by connecting it with some extra cable containing both red and black wire.
Measure the cable length by spreading it from your socket installation point towards your battery terminals.
After measuring them according to your preferred size, cut these wires with the help of a wire stripper.
Twist the 12volt socket wiring with the cable’s wiring that you use to increase its length. Add the heat shrinking wire connector or tubing on the wires’ naked connection.
Now shrink the tubing present on the top of the bare wiring connection with the help of a heat gun or lighter.
It will help protect you from electrical shocks while touching the exposed wiring.
After that, add the female spade connectors on one side of the wire and crimped it. You can also add some insulated tape on the spade connector’s metal to prevent electric shocks.
Connect wires with the motorhome battery
The other end of the cable must connect with the starter battery.
For this purpose, strip the end of the black wire of the negative voltage and add heat shrink tubing to it.
After that, add an eyelet connector and crimped it. Bolt the wire’s eyelet connector with the battery’s negative post terminal.
You need to add a fuse for the positive wire connection before fitting it into the battery.
The fuse needs to place as close to the battery terminal as possible to increase vehicle safety. Measure the current carrying capacity of the positive wire.
Suppose your wire has the capacity of carrying approximately 17-ampere currents. It would help if you chose the fuse that blows on 5-ampere.
It is essential for your vehicle’s safety; otherwise, the whole camper will catch fire. Attach the inline fuse holder on the positive wire by crimping the connectors.
Now protect the eyelet connector’s exposed metal by adding the heat shrink tubing. Add the positive wire eyelet connector on the battery’s positive terminal and bolt it.
Testing the process
You can check the procedure by connecting the wire with the battery for some time. For this purpose, you need a millimeter.
Set the reading of the multimeter to DC volts. Connect the multimeter probes with the end of the available wire towards the socket point.
The reading of 12 volts indicates that everything in your circuit is accurate. Also, check the wiring for any signs of plastic burning or smoke.
Fit the 12V Socket
Now make a hole for a socket in your preferred place. Use a drill machine for this task and fit the socket there.
Connect the wires with it by attaching a female spade connector with the socket. Make a safe route for running cable towards the battery.
You can also use some tape or wire holders for this purpose. After securing its pathway, connect the other end of the rope with an accurate battery terminal.
Ensure that your cable is in suitable plastic covering to conserve wiring crafting in them. After making all the arrangements, turn the battery ON.
Now you use this for plugging different devices like the USB port or smartphone chargers.
Connection with leisure battery components
You can also add your new 12-volt socket with any of the leisure battery equipment like a light fixture.
You can add the 12-volt socket to your leisure battery components like LED bulbs. You need to check the wiring of the LED light.
Use a multimeter for this purpose; fix it to voltage. Inspect the screen of the multimeter; it will show DC on it.
After that, connect its probes to the wires. The black shows that it’s negative, and the red one shows positive value. Use a four-way terminal block for adding new wiring in it.
Add the black and red wires that you connect with the LED light bulbs’ on one side of the terminal block.
Add its wiring on the other side of the terminal block that connects with the new socket.
After that, strips the wires with the wire stripper and twist them. Now add the spade connectors on all the ends of the wire.
Add the insulating tubing on the metal of spade connectors and crimp it with a wiring crimper. You need to tighten the tiny screws of the terminal block to secure the wires in it properly.
After making the whole setup, make a hole near the LED light bulb to connect the new 12-volt socket.
Fix the socket there and add all the positive and negative wires to their proper place in it. There is also positive and negative sign indicated on the socket.
After connecting the wire with the socket, click the wiring with the LED bulb wiring.
Check the process by turning the button of the LED light bulb ON in your motorhome. It will start to work perfectly.
Connect the charger or internet modem with them to check its functioning. You can also use the 12-volt switch by turning on and off the LED light bulb’s button.
Related Articles:
Why does my motorhome battery go flat frequently?