

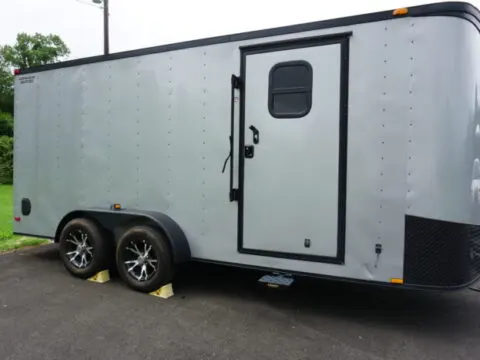
Windows are an excellent source of ventilation as well as natural light for your cargo trailer.
The installation of the RV window will make the traveling pleasant by displaying the natural scenery of the outside world.
How to Install RV Window in Cargo Trailer? You can install an RV window in the cargo trailer by cutting the wall studs to install horizontal sliding windows and make an additional wood frame to support its assembly. After that, cut the marked location with a jigsaw and fix it by tightening its screws. Finally, add sealing and waterproofing tape on the trailer to protect the RV window assembly from water leakage.
It will also keep the environment of your trailer fresh and breezy by maintaining proper airflow inside its internal compartment.
How to Install RV Window in Cargo Trailer?
Different RV windows are available in the market that does not require a separate frame and glass installation because they are a single unit.
It is essential to check the thickness of your trailer wall before adding such accessories.
You can also make durable wood frames for holding its assembly in the thin wall.
For this procedure, you will require a jigsaw, oscillating saw, painter’s tape, drill machine with appropriate size drill bits, waterproofing tape, and sealant.
Making window frame on the selected location
After deciding the location of your window, it is essential to note the location of wall studs.
If any of the wall studs are present in the center of your selected location, you need to remove them with the help of an oscillating saw.
Measure its length and mark its location on the wall stud with the help of a prominent marker.
After that, precisely cut the wooden stud of the trailer’s wall by running an oscillating saw underneath its wall connection to remove the old adhesive from it.
You need to make appropriate size joists according to their length and add a thick layer of glue to them.
Now connect these joists in such a way that they create a square-shaped frame for its proper installation.
You can also attach some wood blocks on the sides of this square-shaped frame to increase the integrity of the trailer wall.
Marking the area for window installation
After making a wood frame in the inside wall of the trailer, you need to use this frame as a template and make drill holes along the sides of its structure.
By following the outline made by drill holes, you can easily cut the area of window installation with the help of a jigsaw.
Now put a considerable amount of painter tape on the sides of that area and turn its lights ON so you can easily see drill holes from outside.
After that, follow the sequence of drill holes for estimating the initial cut size.
For more preciseness, you can use this frame as a reference point on the outside wall of the trailer and make the perfect cut out of the window with a different color marker.
Make sure that the outlines are present in the center location according to the dimensions of its wall.
Cutting the area for the window
You can precisely cut the installation area with the help of a jigsaw by swiftly running it along your marked lines.
It would be best to make perfect corners for its frame by adding a long wood blade in your jigsaw to cut the aluminum sheet and thick wood blocks.
If it does not fit perfectly in the installation area, you need to measure and mark the site according to its dimension and cut its extra edges.
Now remove painter tape from that area and add lag bolts in the inside joints of your supporting frame.
Adjustments before adding the window
You need to smooth the installation area with the help of a flat disc angle grinder and add waterproofing tape on it according to the recommendations of your RV window.
Now add a thick layer of sealing tape on the inside and outside borders of its opening to protect it from water damage.
Make sure to precisely adjust it in that area by adding screws in its frame and remove the extra sealing tape with a putty knife.
After that, add a thick layer of silicone on the edges to protect the wall and window assembly from water leakage.
Add an RV window to a Cargo trailer without cutting the wall studs
You can easily install vertical sliding windows in your trailer wall without cutting any of the wall studs.
For this purpose, measure the distance between the wall stud and purchase verticals windows according to your measurements.
After that, outline your window frame and make pilots holes with a drill machine.
These pilot holes will predict the appropriate cutout area of the window from the outside of the trailer.
It is essential to attach this frame to its outside wall with some adhesive and measure from the top and bottom of the wall.
Make sure to attach this frame to the center location of its wall and make a precise outline around its assembly, using a prominent marker.
You need to correctly add some masking tape around the installation area and the bottom of your jigsaw and make a drill hole in the corner of your selected location.
After that, appropriately use jigsaw in your marked locations and attach the window’s assembly in it by fastening the screws of its frame.
Things to consider when selecting the RV window for your Cargo trailer
It is crucial to protect your trailer’s rig from the continuously changing weather condition.
It will increase the safety and durability of your vehicle’s rig and prevent the repairing expenses of its owner.
Window size for cargo trailer
It is essential to calculate the center of your specified area from the bottom and the top of the vehicle to increase cross ventilation and visibility.
For resolving installation problems, measure every inch and centimeter of that area with measuring tape from the inside and outside wall.
There are different ways to install horizontal and vertical sliding windows with the recommended width of approximately 12 to 35 inches and the length of roughly 10 to 32 inches.
You can easily select horizontal and vertical options after measuring the distance between the wall studs.
Material and design of the trailer window
These factors are essential for the long-term use of the camper by increasing its durability and aesthetic appearance.
It is essential to choose the material and design of the window that corresponds well with the interior decor and external rig of your trailer.
Before purchasing them, check how much light intensity can enter your cargo compartment to prevent excessive heating and humidity issues.
The insulated glass decreases the heat intensity of the interior compartment and solves privacy issues by keeping the environment cool.
You can also select fiberglass and acrylic glass products that provide stability by tolerating harsh climatic conditions of different areas during short and long camping trips.
Panes and price of the windows
The price range of RV windows can easily affect the decision power of any buyer.
People prefer to buy products at low prices, but these products are unable to survive longer.
As a result, they need immediate replacement due to the continuously changing weather conditions that can easily affect their body.
You can also verify the insulating power of your selected window pane to provide a refreshing and soothing environment to your trailer’s cabin.
For peacefully enjoying your camping trip, you can select double-pane windows that efficiently provide insulation and protection from different environmental elements with superior noise-blocking quality.
Related Articles:
Is it easy to add the RV door latch on a cargo trailer?