

If the rubber seal on the RV window is not properly fixed, you can replace it with the new one. Here are 10 easy steps to install a new rubber seal on the RV window.
How to Replace the Rubber Seal on an RV Window? Replace the rubber seal on the RV window by removing all the screws and detach the mirror. Cut and remove the rubber seal from the window frame with a sharp cutter. Adjust the new seal and push it with a stable rubber fixer. Clean the surface and adjust the new screws. Tight and adjust the window frame back into the original position.
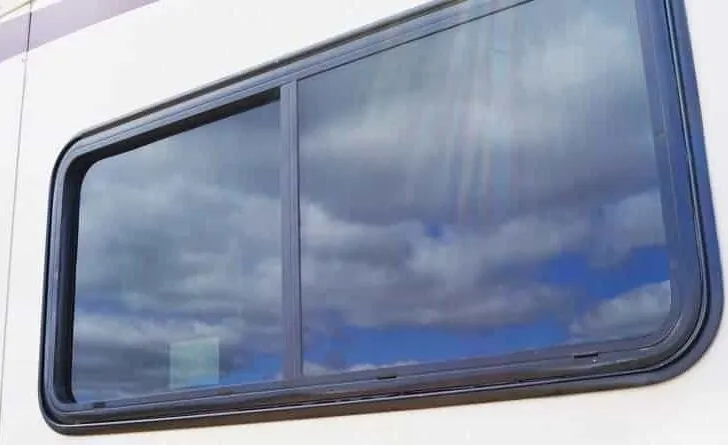
How to Replace the Rubber Seal on an RV Window?
There is an accurate method to remove the rubber seal on the RV window. The procedure comprises few efficient steps that help in completing the removal.
Tools required
- Screwdriver
- Rubber scratcher
- Screws
- Cleaning piece of fabric
- Spray bottle
- Fixer
- Non-permanent marker
- Protective gloves
- RV floor mat
- Sharp cutter
Access its location
Access the accurate location of the window seal in an RV. You cannot remove it before accessing the right spot.
Make sure that you are replacing a broken or damaged seal. If it is in the precise position, then the process becomes impossible.
They remain ix in their original position, and it is not suitable for the person.
They have attachment property, and they combine them with the frame. They are strong enough to keep both structures together with minimum chances of error.
The rubber can damage or shrink due to environmental changes. The constant striking of sun rays leads to rubber shrinkage.
You can access the shrinking spots with the naked eye. They lose their binding capacities with the window frame. Identify and observe that particular spot to proceed with the procedure.
Remove the windows frame screws
The window frame comprises multiple screws for better attachment and control. Access all the screws in this compartment and mark them for further convenience.
Use a non-permanent marker and spot these screws with numbers. These marking spots help in the reinstalling process.
Use an accurate size screwdriver and lose all the screws. Remove them one by one and keep them aside for further use.
If you do not want to use them, then discard all the old screws. Removal of each attachment tool is essential because it holds the structure in one place.
Remove the RV window mirror
In those circumstances, when you want to replace its window rubber seal, and mirror removal is essential.
Detachment of mirror makes the seal more visible to the person who performs such methods. The loosening of the screws loses the window mirror as well.
You can take the support of a friend during such procedures. The window mirror never falls on the ground after the removal of all attachment tools. You can detach the mirror with the help of a sharp cutter.
Remove and detach it from the sides of the window frame. Start from one edge and keep supporting the other sides of the mirror.
Negligence can lead to damage to the structure, and it is not suitable for the RV owner. You can lose the mirror, and repair costs are expensive on the budget.
Keep the mirror aside on the floor mat. It provides safety to the mirror surface and prevents any damages. There are minimum chances of any cracks in the structure with these preventive measures.
Remove the rubber seal on the RV window
Scratch the rubber with the help of a scratching tool. You can also use a screwdriver and a sharp cutter during such procedures.
The broken seals already lose all of their strength of attachment. A pull can detach the seal from the internal window frame.
Scratch every single portion of the seal with these sharp tools. The leftovers of the rubber can lead to inappropriate installation conditions.
They also make the processing time-consuming and hectic for the person.
You can take professional support to scratch the rubber seal, and the shrinkage of rubber can make different irregular patches. You can pull them off with a piece of efficient equipment.
Remove the old rubber seal
The seal loses all of its strength due to scratching of each portion. Remove the seal from the window frame with hands.
You can start from one broken end and keep pulling it. The process is simple in those situations when there is no middle breakage.
The rubber seal breaks from the middle or any other portion during such pulling techniques.
Start from the broken end and pull it towards you for the seal removal. Never leave a single piece with the window structure of the RV.
Clean its surface
Clean this surface after the complete removal of the material. Use a non-fibrous piece of fabric and a cleaner to remove all stains.
The method also removes the remaining components of the shrink rubber seal. The cleaning mechanisms enhance the availability of the window frame surface.
You can clean every part of the structure with these cleaners. The dirtiness can lead to improper installation of the new seal.
It is not a favorable condition because it harms the window mirror. The detachment of the seal occurs due to the presence of dirt.
The sealing material never fixes in the proper place due to dust particles, and it keeps flowing.
The attachment area resists against such durst particles due to repellant activities. Use a dry piece of cloth and rub the cleaned surface.
Repeat the rubbing process at least 2 to 3 times. The rubber never cooperates with the water, and it leads to various errors.
Adjustment of seal in the window frame
The adjustment of the seal in the window frame is a technical step. You cannot push the seal from any edge or part of the window structure, and there is an appropriate technique to perform such a procedure.
You can also take professional support to install these structures with minimum errors. The expert consultation is suitable to prevent time consumption during such methods.
Adjust the seal material on the body frame of the window. Start from one upper edge and fix it for some time.
Observe the attachment capability of the sealing material with the window frame, and identify any possible errors and make modifications in the structure.
Settle the seal on the frame temporarily, and check the length of the seal in terms of the window. You can change the rubber material before adding it permanently.
These are available in the form of seal kits. They have appropriate sizes and dimensions, but the external heating effects can modify their lengths.
Never take the risk during the process because it can lead to excessive frustration.
Use hands or a pushing device to settle the seal in the internal structure. Keep pushing the seal and move forward to the other sections.
Adjust it in the appropriate pattern with the security technique. The amount of force should never exceed the limit.
The rubber seal can penetrate the frame, and sharp edges can break it. The damages at this point are not convenient for any person. Move the pushing devices smoothly and fix the seal in the adjacent portions.
Cut its edges
Cut the edges of the rubber seal once you complete the attachment.
They are not easy to cut with a usual knife, and it depicts their strength. Cut the other end edge with the sharp cutter and discard the material.
Push this end in the internal structure and secure it. Make the firmness of the devices similar to each other.
Never leave one end flexible because it cannot handle the mirror in the original position.
They lead to instability and loss of control. The mirror fixes in the structure of the window, but it never adjusts accurately.
Tight the rubber seal
Tight the seal with different tools and check its stability. Adjust and fix in one precise spot and handle it.
You can add screws to tight the seal in those windows that have loose structures. The frame is not rigid enough to comprise the rubber seal.
Fix all the material with the help of screws and small iron nails.
Add window mirror and add screws
Once you have completed the replacement of the rubber seal on an RV window, reinstall the mirror.
Bring it carefully or take the support of a friend, and adjust it in the sides of the window frame and never apply force.
Fix it in the proper place and add new screws, and use a screwdriver and tight them.
Adjust the mirror in the relevant setup with these attachment tools. Check and observe its stability once it sticks inside the rubber seal.
Related Articles:
How to replace RV awning roller tube on your own?
What is the best place to hide a safe in an RV?
Where to put an inverter in RV?