

Many people do not know how to remove and install new drain tubes in RV refrigerators. Here are easy DIY methods to do it yourself.
How to Replace RV Refrigerator Drain Tube? In general, you can replace the RV refrigerator drain tube by turning off the device, adjust its position, remove the drain tube and replace the outlet spacer. Then, insert the new drain tube and connect the electric wiring with the rear panel.
Disconnect any power supply to the refrigerator. Leave it for some time, and it allows the device to cool. Always wear protective gloves when doing any task.
How to Replace RV Refrigerator Drain Tube?
The drain tube of an RV refrigerator is part of the whole structure. Therefore, you cannot perform the replacement without turning it off.
You cannot touch the hot surface of electrical equipment. It can lead to various disasters and accidental conditions. Turning off the refrigerator slowly deprive the electrical power.
The process is convenient for everyone, and you cannot avoid these instructions. Negligence can cause burning wounds, and people leave the method. You can also take professional help in case of assurance.
Move and change its position
The drain tube is usually at the bottom side. It is present in the rear compartment of the refrigerator. It is impossible to access it without changing the position of the structure.
Lock its door during such activities. It prevents the free-falling of the inner material.
You can also empty the structure during these methods. It makes the device lightweight, and you can move it without any help. Turn it and face the backside in front of you.
Access the drain tube of the RV refrigerator
Its assessment is essential during such mechanisms. Never touch any other system of pipes, and it is usually identical due to the appropriate size and structure.
These are the pipelines for the defrosting mechanisms. They have the storage of water for a few minutes. Unfortunately, the inefficiency of these pipes leads to their replacements.
It occurs due to corrosive properties and breakage. Leakage also happens in these, and eventually, the whole device stops working. Read the manual and understand the structure of the drain pipe.
The document offers pictures and relevant information about the structures. Therefore, you can approach it effortlessly, and it makes the process less time-reducing.
Remove ice and dirty matter
You cannot detach the old drain tube of the RV refrigerator without cleaning. In multiple circumstances, during the replacement procedures, you can find a layer of ice and filthiness.
The removal of ice is a tricky process. Never use sharp tools because they can damage the gas system of the fridge. Instead, always melt the ice layers with hot water.
The removal of water is also essential because it can accumulate inside the drain pipe. The process becomes impossible to perform due to such restrictions.
The cleaning of filth from the surrounding is also necessary. However, it holds the drainpipe firmly, and the movement becomes challenging.
Detach its panel
The panel has a proper attachment with the bottom side of the refrigerator. It has multiple screws that stabilize the equipment. You have to detach the screws for the removal of this panel.
Use a screwdriver and remove all the screws one by one. Keep them aside for future use. You can also utilize new screws in further activities.
Detach the panel and keep it aside. Cleaning of the grill section is essential. Use a fiber-free piece of cloth and an RV cleaner.
Clean the grill and remove all types of dirt. It enhances the stability of the tools, and you can insert new devices.
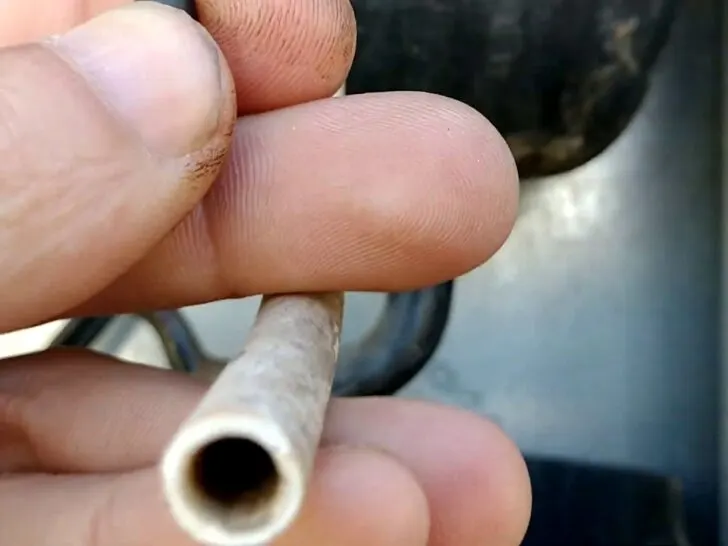
Remove the drain tube
The removal of the tube is a challenging step. First, detach the electric wires that surround the drain tube.
Pull them in the front side and then push them downward. It keeps them stabilized for multiple hours. Pull the drainpipe manually.
There is no need to utilize any tool in this step. It can lead to breakage of the draining tube. In addition, the removal of pieces is a dangerous activity.
Remove the tube edge from the outlet. Make sure about the corners and last parts of the structure.
Remove its rubber covering
Remove the rubber covering of the draining tubes. You have to replace them when you change the whole structure. They are easily removable and never use any sharp tool.
It can cause cracking and damage to the tube. Discard the rubber stopper, or you can keep it for future use.
It depends on the present condition and attachment ability of this tool. It prevents the entrance of the external dirt in the draining pipe.
The removal is necessary to understand the structure of this device. You can proceed to further steps after such changes.
Attach spacer in RV refrigerator outlet
There is a mew spacer with the new drain tube. Install the new spacer on the refrigerator outlet. It is essential for the accurate control and stabilization of the drain pipe.
Apply an amount of strength to push the spacer backward on the outlets.
It is beneficial for the security system of the drain pipe and outlet together. Next, attach the opening of the drain hose with the ceiling section of the outlet.
Never leave any edge or inappropriate corner because it can cause improper installation. Access the draining pan fitting section. Insert the bottom side of the pipe in this pan section. Check the stability of the drain pipe and adjust it firmly.
Secure its outlet
The security of the outlet is essential after such installations. Therefore, you can add screws in these sections.
They provide stability and maximum control of the devices. In addition, +the outlets keep the draining tube with it for longer times.
The system remains intact, and you can use the device without any error. There are minimum chances of any failure after the accurate adjustment of tools.
The outlets work in correlation with the spacer, and its connection becomes secure after these modifications. In addition, the use of new tools enhances the stability of the procedure.
Attach electric connections
In this step, reconnect the electric wire system with the refrigerator. Next, install and adjust the electric panel back in the structure.
Add the screws to install the electric panel properly. Push back the electric wires for a constant and convenient electric flow.
Attach the electric panel back to the bottom section of the refrigerator.
It has the proper adjustment in the rear compartment. However, you cannot change its position because it can cause damages.
Never make holes for the installation of these structures.
Check its Water supply
Turn on the device and allow the flow of water. Then, observe and check the leakage properties of the drain pipe for multiple days.
It provides a clear picture of the accurate installations of the structure. Make sure the layer of ice is not covering its inner side.
Regular cleaning and weekly maintenance can decrease the chances of drain tube replacement.
It prevents loss of money and time with preventive measures. Look after the RV refrigerator and prevent it from future hazards.
Related Articles:
How to replace the door panels of the RV refrigerator?
What is the average price of RV refrigerators?