

A stapler or staple gun is an essential tool to build or repair an RV frame. Its portable nature and easy-to-use procedure make it the first choice amongst RVers in their tool kit.
How to Use RV Framing Stapler? You can use RV framing stapler by selecting the appropriate size staples according to thickness and strength required. Next, set the driver depth on the stapler for shallow or deep penetration. Next, load its magazine with selected pins and lock it. Next, align the two material surfaces you want to join. Lastly, push the operating lever by keeping the stapler head on the top surface. It is preferable to use nail guns for joining thicker wooden pieces.
This article will serve as a guide to use a crown stapler to rebuild or repair an RV frame. We will also discuss its alternatives during the maintenance procedure. Moreover, we will describe the appropriate safety measures to protect yourself and the wooden frame of the RV while using the stapler.
Easy Steps to Use an RV Framing Stapler
RV framing staplers are easy to use by anyone without any special training required. Here is a 5- step procedure to make it ready and operate it properly.
Select the appropriate size staples
You can use staple guns with various sizes of staples according to the strength required and thickness of joining materials.
Moreover, they also have variable leg sizes and wire gauges to penetrate them in joining surfaces without bending. For example, if you need to install an aluminum sheet on the trailer frame, then medium-sized pins with ½” to ⅝” leg length will be most appropriate.
On the other hand, to fix the wooden pieces in the framing structure, use long and thick gauge legs for better penetration and durable frames. Its length should be at least 2 times more than the thickness of the top surface.
Depth of drive adjustment
Depth adjustment is critical for proper operation of the pneumatic or compressed air staple gun for an RV frame.
First, test it on a junk surface to observe the depth of penetration. If it pushes the staples too deep or shallow, use an adjustment ring on top or a screw on the push lever for its proper settings.
Rotate the screw to loosen it to reduce the staple depth while making it tight for increasing the depth. Ensure that the hosepipe of compressed air is disconnected and the apparatus is not in operating mode while adjusting.
Load the stapler
This step consists of loading the magazine of the stapler with staples selected in the first step. The method can vary slightly according to their types.
Next, you locate the feeding magazine at its bottom connected with the head. It has a cover or spring-loaded locking mechanism to keep them secured during operation and push them forward.
Pull the magazine cover or feeder backward by releasing the locking button and secure it at the end of the magazine. Few models have entirely removable covers.
Slide its nails into the magazine in a gentle manner to keep them in order. Any detached one can cause a jumble or jam at the head due to misfeeding.
Move the cover of the magazine locks softly in a backward position without causing any impact with the staples. Keep on moving until you hear a click sound.
It is crucial to close to prevent falling strips from the magazine. It will be helpful to master the loading technique as it can be frequently required while repairing or rebuilding the trailer frame.
Join the cover with its frame
The next step is to align the workpiece or surfaces you want to join before using the stapler. In the case of the RV frame, draw lines to place the wooden frame on the sheet.
Then, place the pieces according to the plan. If you are installing an aluminum or canvas sheet, put it on the surface of the walls without any wrinkles.
Operate the stapler
The last step is to operate the stapler to fire the staples into the workpiece. Connect the hose pipe with the air plug and turn on the compressor. In the case of its electric version, turn ON the power supply.
Press the trigger by applying pressure on the lever. Electric and compressed air types are easy to use with a slight push of the lever. In the case of manual design, the force of your hand acts to push the driver in releasing the staples. Therefore, you need to apply more squeezing pressure.
During operation, it can bounce back if you don’t hold it firmly. In addition, it results in poor connection or deforming of the device.
Therefore use it with firm hands on plain surfaces. Using it on the corner can also result in the loose joint or breakage of the material.
What is the purpose of an RV framing stapler?
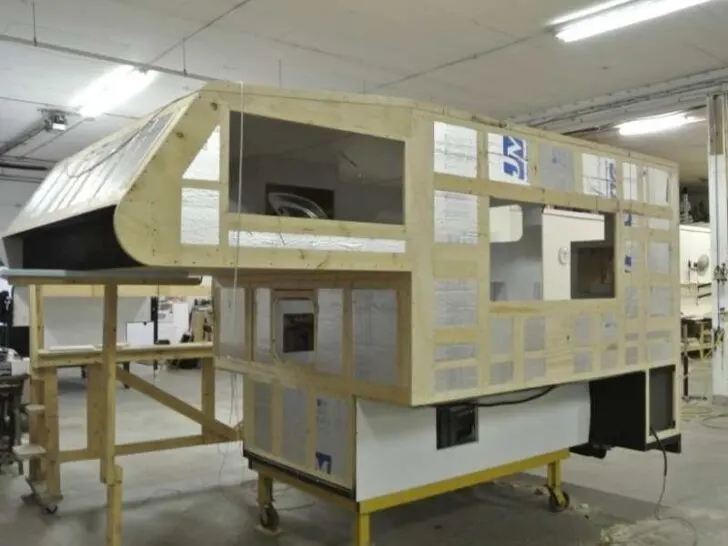
RV walls consist of a wooden frame with plywood or hardboard walls. Moreover, aluminum or canvas sheets on the exterior protect the wooden parts from harsh weather or moisture content.
A stapler is a commonly used tool for quick joining wooden structures with plywood or hardboard sheets and metallic covering. It is easier to use with no excessive force required to operate it.
Staplers use staples of various sizes and thicknesses. Each one has 2 vertical legs that push inside the materials you want to join and a flat head joining the legs called a crown.
Crown and legs size and their thickness depend on the materials you want to join and required strength. Commonly used size is medium crown staples with 17-19 gauge leg thickness for fixing aluminum/ iron sheets with the frames.
However, for better strength, use wide and thick pins of 15-16 gauge legs to construct RV frames that require joining wooden pieces.
Types of RV framing staplers
Framing staplers are available in various types and sizes according to their intended applications and driving power source.
Its 3 types are handheld/manual stapler, pneumatic stapler, and electric/battery powered staple guns based on the operating mechanism.
For RV use, pneumatic staplers are most common, and they need a compressed air source to provide the necessary force to the driver to push the nails. However, manual staplers are the simplest of all for light applications.
There are also 3 types based on the width of the crown. Medium and wide crown staples are suitable for use in RV framing and roofing applications.
Moreover, there are 3 types according to the gauge of the staple legs. A single stapler is capable of shooting multiple sizes of staples, specifically the powered designs.
Can we use staplers to join wooden pieces in the RV frame?
A stapler is a multipurpose tool used for various repair and maintenance tasks on an RV during camping.
However, RVers prefer it for joining light materials like vinyl, fiber, or plywood sheets with frames to seal any leaks or protect the wooden interior from rain or moisture and sunlight.
Another tool comes in handy when joining two wooden pieces in a frame. It is called a brad nailer or nail gun. It has a similar operating procedure to a stapler, but it uses a single-legged, long piece of metal as a fastening material.
I use screws to secure the RV frame on its foundation, heavy-duty nails with glue to join different frame sections, and large nails to fix wall panels with the frame.
Lastly, medium crown staples are my choice for furniture upholstery, kitchen cabinets, and aluminum covering of the RV.
What are measures for the safe use of RV staple guns?
Staple guns are a safe tool if used correctly with preventive measures. Otherwise, it can cause injury as it shoots staples with a considerable force, especially in compressed air or electric staplers. Here are a few instructions to follow to ensure personal safety.
Never face its head towards any person or colleague working with you.
Avoid putting multiple pins at a single point as it can result in significant recoiling of the gun.
After use, clear the magazine of any remaining staples.
Turn Off the power supply or air compressor while doing maintenance or cleaning tasks on the staple gun.
Use goggles or any other eye protection equipment while using the device.
How to clear Staple jam in an RV stapler?
Staple jam is a common problem in case of any misalignment or improper loading. To clear it, first of all, disconnect the air hose or whatever the power source is.
Next, open the blade guide and staple chamber to look for jammed staples. Remove them with tweezers or any flathead tool. Finally, reload it for the next operation.
How much force is required to operate a manual stapler on an RV frame?
The force required to operate a manual stapler depends on the size of staples you are using. A manual stapler is an excellent and economical choice for jobs like joining canvas with a wooden frame.
However, for large-sized pins, you need to apply more force. In addition, they require good grip and strength to hold and operate it to overcome the recoil.
Soon you will feel tired and feel cramps in your hands. Therefore, use any power tool while building an RV frame and keep a manual one in your tool kit for small repairing jobs.
Related Articles:
Why would you add a brake controller in your RV?