

Dura faucet products are designed for leakage-free water distribution in your RV. In case of leakage during usage company complies with its warranty and provides services and replacement of material free of cost to its customers.
How to Install a Dura Faucet in an RV? You can install a Dura Faucet in an RV to revitalize the area, like the kitchen and bathroom. Read the manual and disconnect the water supply and existing faucet. Add a shower box and connect the water supply line with an inlet tube of the Dura faucet.
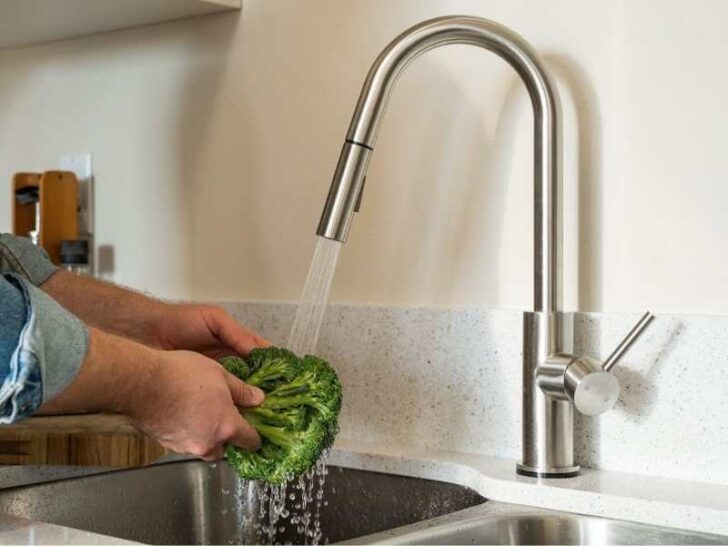
Regular maintenance is necessary to prevent future problems like clogged aerators, low water pressure, hose kinking, and faulty water filter.
If you decide about said product, you must know the installation manuals and parameters of this faucet. These parameters will enable you to add the required equipment to avoid any trouble in the future.
The client always gives you an installation manual, product specs, and warranty documentation to make things easier for you.
Things to consider when installing a Dura faucet in an RV
First, you need to cut off the water supply to the point where you want to add this product. Secondly, now you must have your shower box near you to fix it with great care.
Thirdly, you must ensure to place the inner inlet tube with the given tools in the tool kit.
Add a shower box connected with inlet tube for water input, so you need to tighten screws after ensuring a correct spot in the right direction for hot and cold water supply at the end.
Ensure all screws are tightened up, and then connect this setup with the water supply of your recreation vehicle.
Before choosing a Dura faucet, you first need to ascertain the material composition of said equipment.
Preferably, for water distribution, you must select equipment or regulator made up of stainless steel. The underlying feature of rust-free material will make it serve you for a period.
Hence, it is necessary to ascertain the compatibility of material used in its composition with specifications of available water supply.
Every technical equipment has its peculiar installation, operation, and maintenance manuals. A person eager to have these appliances and equipment must be well aware of these manuals.
Disconnect the RV water supply
Most people ignore this and face the messy condition and harm motorhome.
You must turn off the water supply before adding this product to your trailer. Without disconnections of the water supply, you cannot proceed with this method.
Remove the existing faucet input connections and old faucet
In this scenario, you should disconnect the existing faucet input connection. First, find the tubes that are the source of hot and cold water supply under the sink, so loose the connectors by the wrench.
If water leaks on the floor, place a bucket under those tubes to keep the mess to a minimum. You take care of the things while performing this action.
Remove the previous device by unscrewing the bolts by the wrench. Sometimes, silicone sealant excessive amount apply on this area, so pull it with more force.
Connect inlet tube with water inlet point
In this step, the connection of stainless steel or composite made inlet tube with a water supply line can regulate through an automatic or semi-automatic valve.
Sometimes people do not prefer a regulated valve at a connection point of inlet tube with the water supply of the motorhome. In this case, they connect the inlet tube with the water supply.
Install shower box
After the inlet tube installation with water supply, you must install the Dura faucet shower box connected to the inlet tube.
For the shower box installation, you must ensure its alignments are well straight and in line with the instructions of the manual.
If there is a misalignment, it can lead to poor water control, shower box falling, and leaking. Hence, you need to take utmost care for the proper alignments of the shower box before and during this process.
Next, You must tighten all screws associated with the shower box after its installation. Remember, do not miss even a single point to be screwed.
Tightened screws will not only maintain your shower box aligned throughout RV operation, but these will also prevent leaking from loose connections or seams.
Ensure knobs for hot and cold water supply
After the shower box installation for water regulation, now is the right time to have a trial run for water regulation and distribution from the Dura faucet. To do so, make sure that both the hot and cold water points can locate and attached to their position.
So, to check this, carefully trace the supply line or points for both options of water supply, then fit knobs with clear signs mentioned on the knobs of taps or showers.
Connect water supply with your newly installed Dura faucet
After all these steps, now the time is to connect the disconnected water supply with the inlet tube of the Dura faucet. After the water supply connection, now you perform a test run of water through all these installations.
Check for any leaks in the fittings, seams, or joints, as well as any component malfunctions. In addition, it will assure the equipment’s endurance for the intended purpose.
Problems associated with the RV Dura faucet
There are several reasons for malfunctioning. It can be damaged water valve and air filter, clogged aerator, and various others.
Clogged aerator
The aerator can work to mix air and water to keep smooth water flow. Components present in it include a rubber washer, housing, and screen insert.
Air entrap into the water line causes irregular water flow, lowers its pressure, and faucet to sputter.
Pump strainer can loose or crack also be the reason of it that cause air pockets responsible for the faucet sputtering.
Another reason is the damaged hose, loose clamps, or fittings. If the faucet sputters when using hot water, the issue could be with the RV water heater.
Loose water heater connections and tank has insufficient water level allow the air to trap inside.
Low water pressure
The low water pressure causes the flow of water more slowly than the desired volume. The reason for this is that the shutoff valve has an incomplete opening.
It is usually present under the sink, so find it and resolve the issue. Pressure will rise when you rotate the knob in an anti-clockwise direction.
The clogged aerator also impedes the water flow, so you can overcome this issue by soaking it in the vinegar for several hours.
Kinks in the hose
This problem usually occurs when your water supply comes from outside.
You go outside and inspect the hose any kinks; if present, you remove them. In this way, leakage can also be the reason for low water pressure and water flow decreases.
Close all the supplies and check the exact source of these leaks.
A problem in the filtration system
The filtration system is also responsible supply water into the Dura faucet. It keeps dirt and other unwanted material out of your drinking water. These become deposit and accumulate on the water filter and block it.
Due to this, water cannot properly flow and comes out from the faucet. A filtration system is in the form of a compartment usually present adjacent to the rear tires of the motorhome.
Make sure to clear it properly and take care of its regular maintenance. If it is too much damaged, then replace it with the new one.
Maintenance of the Dura faucet
It provides you reliable service, so maintain it from the start to keep it in a better condition.
Daily maintenance is the best way, so use a damp cloth and cleaner with mild chemical properties.
When using any specific cleaner, make sure to read and follow the recommended guidelines and instructions of the product.
Window cleaner, vinegar, or mild abrasive scrub can use to remove these. These are eco-friendly items that give and maintain the finishing of it.
Aerator clogged due to deposition of mineral and debris buildup. Clean it after six months or annually. These are inexpensive and easy to maintain.
For its cleaning, take it from the faucet while maintaining its other items aligning as these remove, and clean these with water.
Cost
Its installation is easy and depends upon multiple factors like faucets types, sink location, and pipe conditions.
If you do it yourself to save cost, but it is time-consuming. If you hire a professional mechanic for it, it can cost around $150 to $350.
Why would you add a Dura Faucet in an RV?
Dura faucet is the necessary part of the RV because you can get fresh water for drinking, kitchen use, and bathroom.
The difference between the RV faucet and the home faucet is the adapter. It also conserves water, which is significant during dry camping without any connections since it reduces freshwater use for a prolonged period and reduces grey tank filling.
Related Articles:
This is how you repair an RV bathroom faucet
What’s the minimum cost to replace an RV shower?