
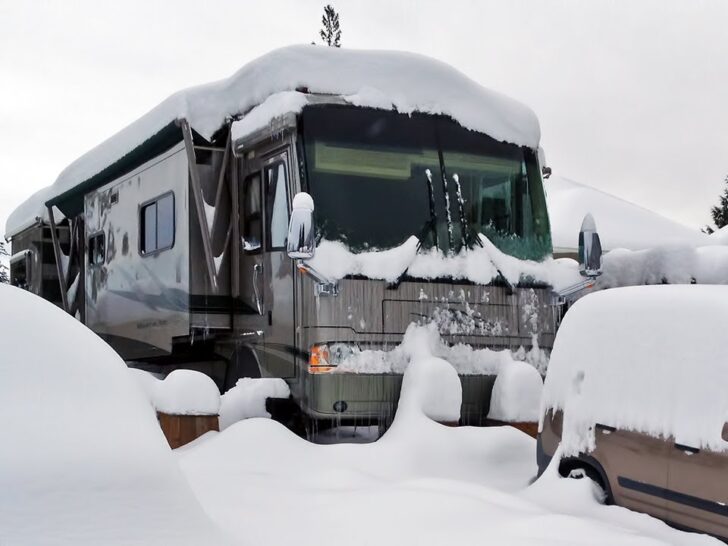
Many people ask when and how they should winterize their RVs. Here are 43 interesting facts that explain easy methods to do this at home.
Winterize the RV when it is going to suffer from climate change. In storage, conditions protect the vehicle by following the proper process. Utilize methods of compressed air and anti-freezing properties. The cold weather leads to winterizing the whole camper. Preparing it for hard freezing time is another reason for doing it. The temperature and travel conditions are the exact reasons due to which you should winterize your RV.
Winterize Your RV
It is a procedure that saves the RV from damage and environmental changes. It is all about preparing the RV for the freezing winter season. It is a process like plumbing the pipes and other equipment.
When should you Winterize your RV?
Here are the important points to consider when you plan to winterize your vehicle:
Temperature limits
In the circumstances, when the temperature in the surroundings decreases below 31-33 Fahrenheit, then it is time for winterizing.
It saves the pipelines and all other systems from freezing. The setup remains intact even in extreme temperature conditions.
Storage conditions
Few people are lazier than other recreational vehicle owners. They store their vehicles in the winter season and use them in moderate weather conditions.
The storage of the camper requires winterizing if the winter season is ahead. It helps in excellent storage without any damage. The process gives a sense of relaxation to all the owners of these campers.
Always choose the right places for the storage of your camper. The rain and constant cold conditions should not impact the RV.
Fear of repairing
The freezing pipes start cracking when they are reaching below the cold limits. The cracks are s damaging that some parts of the vehicle stop working.
This scenario leads to the fear of repairing that costs much on the budget. Winterizing the recreational motor home is one of the best choices. You can stay calm during the whole season that pipes are in their best conditions.
Faulty RV heaters
There are electric heaters in RVs that keep the temperature in moderate conditions.
These have a constant supply of electrical power through the vehicle’s batteries. Sometimes the batteries lose their efficiency to work.
It leads to poor functionality of the electric heater. The fluctuations lead to falling temperature conditions, and water starts freezing. You can winterize the camper at this time.
Inappropriate furnace
The furnace of the camper helps the vehicle in weather modifications. Few campers have low-quality furnaces that cannot bear such cold conditions. Winterize the recreational motor home, and it helps in solving the issue.
Long-distance traveling
In winters, long-distance traveling requires winterizing of the camper. The seasonal conditions impact the internal state of the piping setup.
You should carry out the process before leaving the place. When people do not carry out this particular process, and they suffer from irreversible harm while traveling.
Lack of heated tanks
Some RVs contain a heated tank, and these containers only work when there is a need. Few RVs lack these systems, and they require winterizing more than other campers.
No distance between floor and bottom of RV
Always winterize the camper when there is no distance between its bottom and earth. It happens in open grounds and parks when you place your vehicle overnight.
The whole setup starts enduring the cold temperature, and water leads to freezing. It is not a suitable condition, and you add separation between the ground and the camper’s bottom.
Lift your RV by a lifting jack when you park it for more than 24 hours in the winter season.
No hose of heated water
In the absence of a hot water hose, you should winterize the vehicle. Connect the water containers directly to a heater. They keep it warm all the time and prevent it from freezing. It is a tireless and effective method.
Connected containers with weather
There are few RVs in which the constrainers directly connect to the external weather. The open valves and inlets are a source of cold air intake. Disconnect the passage of this interaction and cover the opening with tape and fabric.
How to Winterize your RV at home?
Few RV companies offer manuals for winterizing them. Some of the methods are easy and convenient, and you can perform them on your own.
The proper winterizing of the RV requires expert guidance. The professionals handle the vehicle in the best possible way.
There are fewer chances of mistakes when you take your RV to the winterizing workshop. It may cost you a bit high, and all the proceedings worth the cost.
Leave the vehicle on an RV professional if you do not require future repairing. The workshops and their representatives know every minor and major detail about RV’s water systems.
The insertion of an anti-freezing agent is a technical process. Similarly, you cannot blow the air compression in an expensive motor home.
Tools required:
- Air compressor
- Anti-freezing agent
- Plugs for blowing
- Regulators of water pressure
Drain all the tanks and containers inside the RV. There is no need to store any quantity of water in the camper.
Open all the valves simultaneously and make sure there is no water inside the vehicle. Remove water from the heating areas and close the pressure pump at the end.
Plug the air compressing device with the electricity source. Attach the air compressor with the inlets of freshwater pipes in the camper. Never insert extreme pressure, and regulate the ranges by the regulating devices.
The suction of the compressing device brings out small droplets of water. This water is the other quantity that stuck in the pipelines. Never generate extreme pressure, or it can break the pipes.
Cross all the filters of water in the specific area. The manual tells about this area with an exact picture. It is present behind the equipment that moves freely. Remove water from the filtration areas as well, and drain it completely.
Open the bottom draining areas and when there is no extra water, then tighten them back.
Open the faucets one by one on both temperature settings. Insert the compressed air in the valves, take the help of a friend to carry out the process. Remove all the water from these areas by using air pressure.
Never allow the pump to run for long periods. Introduce the anti-freezing agent in all the pipelines by using the specific method.
In this procedure, add the agent in the form of cups and then cover the inlets with tape. Make sure that the bottom drain is close and there is no free-flowing water.
Save RV batteries
The method involves the storage of batteries from cold water temperatures. Winter is one of the dangerous seasons for the normal functions of batteries, and you can winterize the batteries by disconnecting them from the electric switches. Remove all the cables from the batteries and mark them for further installation.
There are two types of batteries in a camper, and one is known as a single battery. This battery is one of the casual pieces of equipment to winterize because of its less complexity and simple features.
Remove the water from the batteries, and if they have it in them. Always place them in a hot spot but never chose a concrete floor. These floors are harmful to the proper function of the batteries.
Never remove the large batteries from your vehicle. Keep them inside the camper, and observe their charging pattern. Always provide them heat and warmness by electrical power. It keeps them hot and safe during winters.
Dry the shelter area
The shelter area is the parking place of the camper during the winter seasons. When you choose the storage option for your vehicle in cold temperatures, then winterizing is essential.
The drying of the shelter and its fabric helps in generating excellent dry conditions. You can use an air compressor or other blowing pumps for this purpose.
Dry the shelter’s fabric from every corner by removing it to the sticking point. Never leave the awning’s fabric wet, or it can generate molds. The odor of the toxic substance is unbearable for anyone.
Settle water systems
Covering the RV is another way of winterizing. When we say covering the camper for winterizing, it means hiding every possible inlet.
People choose this procedure when they store their RV in the winter season. Use strong tape and draining process in this step. Open all the valves and pipes of the camper.
Drain every single droplet, then dry the inlets with suction pumps, and cover the pipeline’s ends with tape. Coat one or two layers according to your choice, and they provide excellent protection to the containers.
Hide all the possible valves like showers and toilet openings. A trap is also an essential option to protect the vehicle from snow effects. Hide the wheels of the RV by using a tough fabric so that weather cannot affect them.
Coating and insulation
The term winterizing comprises all the possible steps to protect the camper. If you want to use your RV in the winter season, then insulate it.
You should purchase a high-quality waxing or coating product. Clean the outer areas of the RV, and fill the splits and cracks with wax.
Spray the protectant all over the external surface of the RV. Never apply it to mirrors and windows of the vehicle.
Apply two to three layers if you have enough quantity of paint. It helps to protect against cold water conditions. It is one of the simplest but expensive ways of winterizing the RV.
Use a blower
Make sure that the machine connects with the electrical source when you use it. Drain all the tanks of the RV, and dry them by blowing.
The electric equipment carries high-pressure air that is non-toxic. You can blow-dry the freshwater and drinking inlets without any hesitation. Put the opening end of the blower on the starting of the pipe.
Start the tool and allow flowing air inside it. Repeat these steps 2 to 3 times in larger drains. Cover the ends with a protecting tape, and it is helpful s accurate security.
Cover your RV
Covering the RV with one or two fabrics or a plastic sheet is not a highly recommended process. Winterizing involves intellectual protection from weather conditions.
If you are using your RV daily, then drain the tanks every day. It is a time-consuming and tiring process because it’s a mega vehicle.
If you do this regularly, then cover yourself with a fabric of your choice. Place heavy stones on the sides of the shelter fabric to avoid air and snow.
Drain and antifreeze
Various things help to carry out this process. You can buy the equipment online or from any nearby market.
Tools/equipment
- Gallons of the required size
- A rig
- A kit to keep temperature moderation
- Screwdrivers
- Protective gloves draining plugs
- Pump alters
Read the owner’s manual to reach the heaters, pumps, and pipeline system of your camper.
Start draining the tanks of the RV, remove the grey and black water from the tanks. Open the valves and allow the waste to dump in the waste disposal center. Never add any anti-freezing agent at this step. Make sure that the vehicle is empty, turn off the valve tightly.
Open the last portion of the draining area and allow free-flowing freshwater. Enclose this drain as well and turn off the heating device.
Remove from the heater area; make sure that there is no heat or pressure here. Always turn off the heater at least three to five hours before doing it. The heater takes this much time to cool, and you can get harms due to hot water.
Turn off the pump and reduce pressure as much as you can. Remove the plug of the heater; allow the draining of water on the ground.
If you want to change the heater, then it is the right time. Tape the outer portion of the plug with strong tape and reinstall all the plugs ad valves.
Remove water from all the equipment that has water piping. Open the valves of kitchen tanks, toilets, and showers.
Use suction pumps to remove every droplet of water from the pipelines. Always use the pump in dry conditions, or it leads to breakage. Check all the relative drains and then close them tightly.
Always cross the pipelines from the heating areas. It should not contain 5-7 gallons of water because it is not suitable for the kit.
Use a non-toxic and anti-freezing substance in all the pipelines of the camper. Make sure the anti-freezing agent should not travel in freshwater containers and pipes.
Open all the valves and drains simultaneously and allow free-flowing of the agent. Cover all the pipelines that include kitchen, toilet, and external showers. You should turn off the pump to stop the flow of the anti-freezer.
Can RV antifreeze agent go down the drain?
Yes, RV anti-freezing substance moves down to the drain. You can dump it in your naturally drain system of the RV, but the cases are rare. The freezing element is harmful to the drain and its living creatures.
It is not suitable to dump the anti-freezing agent directly into a park or any other ground. It is harmful to all the plants and greenery in these areas.
The draining areas perform all the functions of removing the waste matters of the vehicles. The substances that help in anti-freezing harm humans and animal species
The anti-freezing agent has a free-flowing property. It moves on the phenomenon of gravity like any other liquid. The agent travels towards the drainage system to find its way. It reaches the drain and starts accumulating in the drainage tank.
These processes occur when you do not cover or hide the draining pipes and surfaces.
Consult the manufacturer of the cooling agent about this procedure. The substance is not toxic, but it is not suitable to dump in the hole.
The drainage system of an RV works on practical happenings like bacterial growth in the sewage system requires the living organisms that kill the pollutant and helps in cleaning.
The non-toxic but active agent helps in the anti-freezing of water, but it destroys the draining setup. The repairing of the system is heavy on the budget, and you need a measure to stop it.
How to stop the flow of agents down to the drain?
Stop the movement by covering all the possible passage of its flow. Hinder its movement by adding a block on the top of the draining system.
Never dispose of this substance directly on the ground. Choose the method of recycling the anti-freezing agent. Whenever you find that it is moving to the central hole, and consult the professionals.
Immediately recycle the substances by adding chemicals. It stops the flow of the material towards the drain, and bacteria remain alive. The draining system of RVs must contain the covering lids to prevent this mechanism.
What to do if it accidentally reaches down the RV’s drain?
The substance is non-toxic and does not contain immediate effects. Once it reaches the draining system, and it starts flowing in the pipelines. You can collect all the liquid in a large tank and dispose of the tank in a dumping station.
The animals reach the drains of RVs, so never leave them open. When the system contains the anti-freezing agent in mega amounts, close it instantly. The animals drink this water, and it is sweet. The substance is lethal for the lifespan of all animals.
Do they help in cleaning the RV drain?
They never help in the cleaning of the drainage system. Never use these elements on anyone’s recommendation for cleaning purposes.
They provide their maximum anti-cooling effect in this area, but they never play any significant cleaning role.
31 Examples of Best Antifreeze Agents for RVs
- Grey antifreeze agent – 1-2 gallons – $2500- $2900
- Phosphate free Zerex anti-freeze – 1-3 gallons – $1900 – $2000
- Splash antifreeze – 1-2 gallons – $ 11 – $15
- Star brite anti-cooling agent – 1-2 gallons – $20 – $23
- EVANS cooling agent – 1- 3 gallons – $4000- $4600
- Maxima anti-freeze – 1-2 gallons – $13 – $ 14
- Supercool red line agent – 1-3 gallons – $50 – $200
- Camco RV antifreeze – 5-6 packs – $170 – $175
- Windshield agent – 1-3 gallon – $70 – $79
- Thetford cooling agent – 1-2 gallon – $1000 – $1100
- Ultra concentrated TST antifreeze – 1-2 gallon – $15 – $17
- Biotherm antifreeze – 1-2 gallons – $25 – $27
- Century anti-freezing agent – 1-2 gallons – $14 – $ 13
- Zecol cooling agent – 1-2 gallons – $3 – $ 5
- RecPro anti-freezing substance – pack of 2 – $28 – $30
- Froggy antifreeze – 1 gallon – $17 – $20
What is the best anti-freezing matter for RV?
The best anti-freezing agent for an RV is propylene glycol. It is a non-toxic substance with no harmful effects on human health. It is an essential material for all the water drains, and it helps in cleaning. It increases the life capacity of the pipelines with freshwater.
Can RV antifreeze make you sick?
Yes, the fumes of anti-cooling thing in an RV are toxic for human health. These are not lethal, but they cause diseases. There is a pungent smell in the surrounding of this agent.
Symptoms of poisoning by anti-freezing agents
It does not happen immediately, and it takes multiple hours. The agent penetrates inside the human body, and a person starts feeling uncomfortable. Breathing is not only the source of intaking the fumes, and skin also takes part in it. You should not drink RV antifreeze.
The anti-freezing agent generally contains propylene glycol that is not much toxic. It breaks down into more lethal materials like formaldehyde, glycolic acid, and glycolaldehyde.
There is a pattern of symptoms and their appearance on the human body. Initially, it takes 25-35 minutes after inhaling the toxic fumes. The body gets immunity, and symptoms take more than 11 hours.
- In-excessive coordination between brain and body
- Difficulty in speech
- Blurry vision
- Constant headaches
- Migraines
- Nausea and vomiting
- Excessive Grogginess
- Fits and convulsions
- Constant high blood pressure
- Difficulty in breathing
- Kidney pain
- Restriction in urination
- Painful urination
How to protect yourself?
Always make a proper distance from the container of the freezing agent. Protective goggles and a uniform are essentials for the procedure.
Never touch the substance directly without gloves. Wear a mask and control your breathing in specific areas. Do not place your hands on other people when you move out of your working place.
Take immediate actions when you feel uncomfortable. Always perform the methods according to the manual, and protect yourself from uninviting events.
Is any form of anti-freezing element safe?
All of them have almost the same compositions. Ethylene glycol is one of the toxic substances that generate millions of fumes.
It is never safe around harmful substances. The agents that include propylene glycol are a bit safer than the other things.
Can you mix RV antifreeze with water?
You cannot add water to ready-made solutions of anti-freezing agents. Yes, you can dilute the concentrated form of this substance. There is a proper technique for this process; you cannot add two to three gallons of water without understanding the ratios.
It is necessary to add water to the concentrated anti-freezing compound.
Never move up to the guidelines, and it leads to a disaster. The excessive amounts of water degrade the anti-freezing properties of the agent. The pipes and other drains break when you add such an agent. The effects turn the opposite in such situations.
What are the ratios of dilution?
There are different theories about mixing the agent with water. Some people consider the mixing of water and agent in 50:50 ratios.
There are some formulas about 70:30 and 60:40 about the process. Some mechanics consider pure compound as a damaging substance for the vehicle.
In such circumstances, the ratios of dilution increase more than casual.
Are the RV anti-freezing matters heavier than water?
The cooling agent is heavier than water, and it travels slowly in water. The level of falling is slower than the tap water inside the pipes of a Recreational vehicle.
It keeps on flowing with its maximum properties. You can find its appearance in the specific hose or tank right after you added it.
What is the reaction of a freezing agent with water?
The mixing of both substances directly affects the temperature of the system. It fluctuates instantly, and the changes are drastic. The freezing point goes down to their lowest limit.
It ranges up to -34 to -36 suddenly. The boiling point of the solution rises gradually, and it reaches 220-224° Fahrenheit. The mixing of water increases the additional cooling properties of the system.
Does the anti-freeze agent dissolve in water?
It is not soluble in water because it is a liquid itself. The miscibility of the solution increases when you mix it with a small quantity of water.
Both liquid coordinates with each other, and heat changes occur. They can join together with the help of a bond. The freezing agent and water contain hydrogen bonds between them.
What happens when you do not perform mixing?
The anti-freezing agent increases the temperature of the vehicle. It reaches an accurate limit that you require much cooling effect.
Mixing the substance with water helps to moderate the heat of the system. Propylene glycol responds to this mixing activity more than ethylene glycol types of materials.
There is a reason behind this fact, and it is that ethylene glycol does not supply an excessive amount of heat.
Do RV antifreeze evaporate like water?
No, the anti-cooling agents do not evaporate in their pure form. When you place a freezing substance like ethylene glycol in open weather, it absorbs water.
The hygroscopic nature increases absorbance, and it is not suitable for the system. If you add water to the anti-freezing agent, it evaporates due to weather conditions and extra heat limits.
Do RV anti-freezing substance freezes on mixing with water?
The anti-freezing agent does not freeze by it, but mixing with water increases the effect. There is the formation of a molecular lattice during the process.
Most of the time, in the mixed solution, the anti-cooling substance inhibits the freezing of water. When the temperature becomes lower than 0-degree centigrade, then water inside the mixture starts freezing.
Does the RV anti-freeze burn on water mixing?
The high temperature decomposes the water molecules from a solution of freezing substance and tap water.
The water vapors start getting out of the mixer, and it usually occurs due to heat. The constant rise in the temperature conditions leads to the ignition of the freezing substance.
Although these are non-inflammable, the fluctuation of warmth leads to drastic changes. The fire in such a situation is short but harmful. You can see blue fumes and light during the self-ignition of the process.
Can RV survive in winter without winterization?
It is hard for the RV to survive in winter without this process. The pipelines get damages due to freezing water.
The cracks are impossible to repair, and when someone chose to alter, it costs them much. The cold weather conditions are not beneficial for the outer body of the RV.
You can see multiple cracks and lines on the exterior walls that lead to insecurity and harmful circumstances.
How cold is too much cold for an RV?
The temperature conditions below 35-41 Fahrenheit are too cold for an RV. If there are a small heater and pump in your RV, it cannot cope with the cold conditions. Add extra sources of heat to prevent your RV.
How much time does RV pipe take to freeze?
In low-temperature conditions, the phenomenon depends on the quality of pipes. A standard water pipe inside a motorhome requires 23-24 hours for freezing. Few pipelines have less insulation and cold bearing capacity. They freeze within 15 hours when the weather is cold.
The freezing of the whole water tank depends on the location of the equipment inside the vehicle.
The tanks that are away from the heater and furnace freeze immediately in cold conditions. The lack of waxing and covering of the tank’s wall also causes the tank’s freezing.
What happens when the pipelines of RV freeze?
When you do not carry out the protective measures, and the water starts freezing in the pipelines. It leads to a small crack initially, and then the damages prevail.
In some situations, the pipes burst with a loud voice. These types of lines and bursts are hard to deal with, and the repairing is costly.
You cannot cover the fissure with tape or fabric in such conditions. The water flows out with a specific pressure, and it is impossible to handle.
Cost of winterization
Winterization is a costly process, but it remains enough for one season. The average cost of a one-time process leads to $150- $290.
Related Articles: