

Here are 15 DIY methods to attach RV cabinets to the walls. You have to build out the cabinet because you can do it according to your choice. It is a cost-effective process and less time-consuming.
How are RV Cabinets Attached to the Walls? You can attach RV cabinets to the walls with different materials like wood glue, bolts and studs, Bondo glass, and epoxy resin. Cabinets construction and its attachment in the RV are simple but time taking tasks.
Traveling in RV gives you the best enjoyable time with your friends and family. It can provide you with the best adventurous experience if you have all the required accessories and a suitable storage area.
How are RV Cabinets Attached to the Walls?
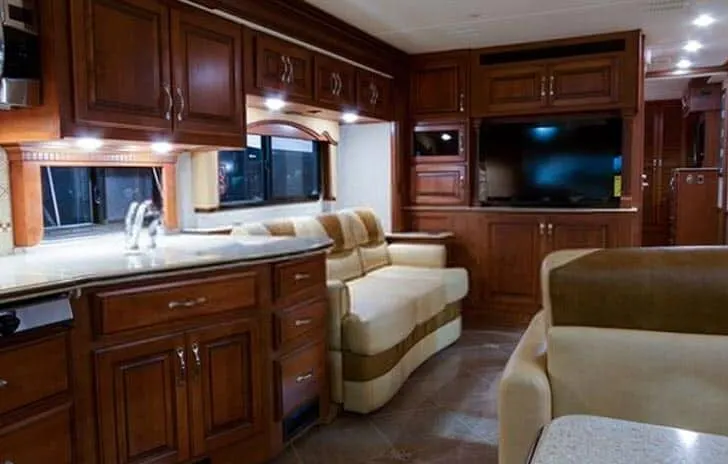
RV cabinet is the essential section in which you can store your required things. It also increases the appearance, makes it beautiful, creates the space, and gives a home look.
Types of cabinets suitable for RVs
When you are constructing the cabinets for RV, then two types most suitable for the vehicle. One is a frame type, and another is an integrated or skinned form.
Skinned and framed cabinets
Most of the people prefer framed cabinets because it is light in weight. Their composition and construction also easy, and you can mount them without facing any difficulty.
The material used for it includes wood, aluminum, and steel. Another advantage is that it makes a sturdy frame for cabinets. If you want to give the sides better support, then cabinets can fill with panels.
Integral cabinets
Integral cabinets are made up of plywood because it has good durability and resilience capacity. In this case, you do not need any frame to make your cabinets sturdy.
You can attach all sides upper, bottom, and other. It is best for your RV because these are sustainable and strong.
You can make it through the simple method. The cabinet installation depends on the material you use for it. Plywood cabinets are light in weight and easy to install.
Idealize the proper RV structure
When you are make up your mind building a cabinet in your RV, then make some suggestions before its construction.
First, you have to idealize the RV internal structure and find out the proper location for cabinets. If you make the wrong judgment, then it difficult to make a space in your RV for other required things.
Make a Sketch of the RV cabinet
You have to make the proper sketch of your RV cabinet before starting it. In this case, you have first to figure out the number of cabinets you want for storage.
In RV, besides cabinets other accessories like a bed, you have enough space. You have enough space to buildup or mount the upper and lower cabinets in each of 4 sections.
The cabinet’s requirements depend on the number of people traveling and the area of RV in it.
You have to decide what type of layout you want, like symmetrical or on the one side of the RV. Another critical point is what kind of things you store for yourself at the upper and lower cabinet portions.
Measurement of the cabinet
When you make your RV cabinets according to needs, then make proper measurements and planning for everything. First, you make the space and determine the storage requirements for the cabinet.
You have to make the adjustments to make the cabinet weight not cause any extra burden for your vehicle. You can design it in a manner so that you have to make no compromise on your RV space.
The items require for cabinets include plywood, pressboard, bolts or studs, screws, building square, and many other required accessories.
The cabinet size depends on vehicle space and storage requirements. In RV 2-3 cabinets, portions are sufficient because excess sections decrease your space. You can face difficulty with mounting and installation of cabinets.
Mount the upper cabinet
L-brackets cabinets frame are preferable because they contain a high capacity of weight and storage.
You can arrange the proper size screws and bolts and jigsaw drills for mounting the upper cabinet.
The number of frame brackets for each should 4-5, at least for the upper and lower section. You make sure that the difference between the 2-bottom and higher cabinets approximately 1/3-1/4 inches.
Mount the lower cabinet
The lower cabinet is beneficial for the bedroom section for easy access to the storage area. The cabinet width and length are like 7.5-8.5 and 10-12 inches according to your need, respectively.
You can put a frame for the bottom portion because it enhances the appearance and supports the stored things when RV moves on the road. You can attach these with the help of wood glue, nuts, and bolts.
While traveling, it not essential that the road will smooth so protect your storage things through some blockage. A tension rod is favorable to hold and support things and provide extra protection.
Use bolts and studs
Bolts and studs proper to attach the RV cabinets. Wall can push when applying the studs and dill the hole for bolts so that cabinets attach easily.
Use Wood glue to attach RV cabinets
Wood glue has PVA, which available in a different brand such as Elmer, Gorilla glues. When it applies to the wood, it adsorbs through it and strengthens the bonding.
Its strength and pressure bearing capacity are high, 3500-4000 psi and pounds per square inch. It most commonly uses in the furniture, cabinets, and boards tightly adjust through wood glue.
Weather condition affects the upholding capacity of your R cabinets in dry, hot, and cold conditions.
You do not have to put the pressure but hold it firmly so that the bonding between the wall and the cabinets remain robust for a year.
Another best wood glue brand is Titebond III, available in volume 15-16oz. If you have a cabinet door made up of plywood or paper board, then take it places glue, and assemble both doors.
Gorilla wood glue also has the best adhesive property and joints the cabinets firmly. You have to spread the glue on the cabinet’s board corners.
The time for proper adjustments of the bond to the cabinet’s corner requires 24 hours and then attaches to the RV walls. Titebond and Elmer are much preferable to the gorilla wood glue.
Use Expanded and Stainless steel screws
The name of expanded screws indicates that the bolts grow when inserting into walls or boards, giving the anchorage power.
Expanded screws can use to hold the RV cabinets tight. In this case, you can make a hole mark and, with a drilling machine, make the right size hole.
The hole size is according to the corresponding of the expanded bolts. Next, install the screw into the hole carefully and tighten the bolt so that the shell expands and fixes into it perfectly.
In the end, you have to unscrew the bolts and position the cabinets so that they match the fixing cabinets holes. Then, reinsert the bolt and screw it tightly.
You have to attach the backboard with wood glue like Elmer and screws. In this case, have the role of holding so that glue fixes the cabinet. Nylon is the best type of expanded screws.
You have to buy the expanded screws according to the thickness and the proper size for your RV cabinets.
If your pressboard thickness is around 1/7-1/8 inches, then purchase the screws according to it. For hanging small things like pictures and wallpaper, then 1.4-1.5 inches Velcro is most suitable.
Screws in your RV structure are an essential and vital component to holding things. A variety of RV screws are available, like the Pan metalhead, at a reasonable price, almost $5-$6. Another is the decorative rosette screws available in the cost range of $10-$11.
If you want to mount the TV bracket on the wooden rack, use the ss screws of a suitable size of number 10 and the rubber grommet and galvanized washer. These are costly but provide more durability and resilience as compared to the other screws.
Drilling to make a hole
You attach the cabinets to the RV interior wall with screws, bolts, or studs. When you do this type of adjustment, make the correct size hole through a drilling machine.
Drilling jig is suitable for making this because it is safe and effective. If you have plywood, then make a layout and attach a barrier to the corner so easily make the alignment.
West epoxy system
The epoxy west system is preferable to the polyester resin because of its high strength and more durability.
You can use it when attaching the wood pieces to the fiberglass. All epoxy resins contain different properties and formulations.
However, the epoxy west system has high performance and excellent for a composite structure. These products are available at various hardware stores.
West epoxies are usually made up of poly-amines material and also contain other functional elements like polyester. Polyamine use because it has a high capacity of curing and produces less smell while using it.
RV walls are not flat, smooth, and regular, but these are different such as irregular, rough surfaces, and curved.
Due to the wall structure, it isn’t easy to connect the wall and cabinet board and the epoxy resin. You have to use the thick paste and apply too much amount so that when joining the panel to the wall, the gum becomes gushes out.
The product you used for adhesiveness is high quality and free from silicon, mold, and any other which block the attachment property.
Through rivets
Another way to enhance the adhesive property of your RV cabinet is with the help of rivets. These are available in various forms blind, drive, flush, and friction lock rivets.
The pop rivet gun helps to mount things like cabinets, shelves, and many others. It available in verities like Astro pneumatic with a reasonable cost of almost $20-$25, and another is Milwaukee rivet with various capacities with the price of $80-$89.
The rivets and Panhead screws of numbers 8-9 attach the lower cabinet section along the angled C to protect against the wall. The upper cabinet adjusts through a curved aluminum strip and screws with frame and ceiling.
Use Bondo glass filler
Another suitable method to connect the RV wall and the cabinet’s board is the Bondo glass. It is also known as plastic body filler and consists of polyester and lightweight.
It has a maximum thickness capacity and applies on that surface which is almost ¼ thick. If the thickness criteria are low, it means the Bondo glass action reduces it and shrinks, and cracking occurs, leading to the loose attachment.
If you are deciding to use it, then make a precaution for it. First, you have to mark the proper location before fitting the board on its wall. You have to make the Bondo glass paste and apply it to the entire board surface.
It can fix on the board in 5-10 minutes. When setting the cabinets, block the RV wall with this filler. Then, hold it for approximately 15-20 minutes to adjust at once.
Sometimes for RV cabinets, combination adhesiveness shows excellent results. A combination like Bondo glass with tabbing provides high strength and secure it.
If you held the cabinet’s section tight, then screws it with fender washers to fix it. After that setting and tabbing, you have to remove the screws and fill the screw holes with the best fillers like Bondo glass.
You have to use the rough surface board for cabinets because they have the best adhesive property. The preferable board for the RV wall is the sawed board or its sides because the smooth surface has less capacity to attach.
Sometimes, the board’s proper adjustment to the wall fails due to the wall rough surface, so you have to wipe the partition with a wire brush.
For cleaning, you can also use the MEK but with caution because it is toxic. Acetone can also use for this purpose because it is safe in use and no harmful effect on the wall surface.
Vacuum-bonded walls
All the cabinets screw through the frame help. Most people use the wall vacuum-bonded and built on a vacuum table through studs, screws, and wood glue.
It means each side bonded together under pressure to make the best, firm, and light in weight in the RV world.
Re-insulate after bonding
This process can do for that time when facing weather changes temperature differences develop. The temperature difference leads to the condensation produces due to the moist ear, or warm weather can result in the rivets leakage.
You can overcome this issue through re-insulation. Re-insulation is ideal and done after you attach the new material.
Attach the cabinets to the floor
Through bolts and angle brackets, you can attach the cabinet’s base to the floor. You can join the cabinets to the wall with epoxy or wood glue or through fiberglass.
Conclusion:
We have explained all these easy techniques to attach the RV cabinets to the walls.
Related Articles:
How long it takes to Winterize your RV?