

Here are the 11 best DIY methods for adding decals on your truck. These vinyl decals look beautiful on the tailgate of your pickup.
Can You Install Decals on a Truck Tailgate? You can install decals on a truck tailgate by cleaning the surface, prepare the solution, moist the surface, use masking tape, position vinyl decals, and remove the excess moisture.
These printed markers are not durable, and when using outdoors, such as on a truck’s tailgate, they can persist only for a short time.
Can You Install Decals on a Truck Tailgate?
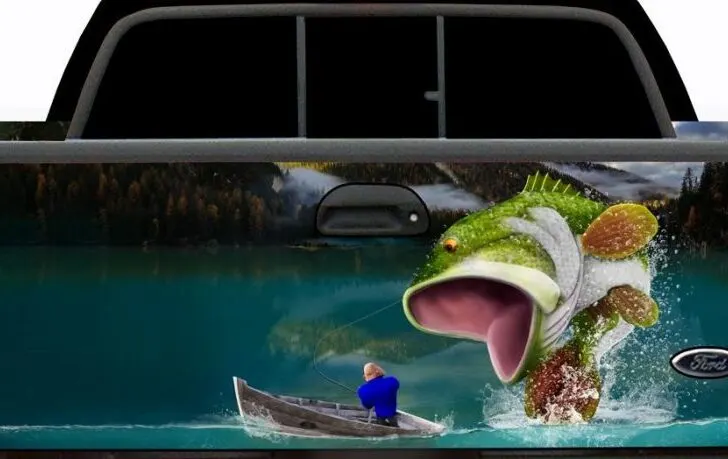
Decals show the basic practice of graphical depiction on truck trailers and bodies. People spent a lot on adding these decals to their trucks. These portraits are a particular way of identification and advertisement.
The vehicles move on long routes with these imaging marks, which are especially beneficial for commercial purposes.
Prior considerations
This technique includes some essential concerns that must be addressed before starting the process.
These primary parameters include the process of selection, which depends on whether the required design is smart so that it can fit on a small vehicle or the requirement is designing on the entire pickup.
Different decals designs are available
These graphics include clear, opaque, perforated, or permanent decals.
- Transparent design with the cut to shape quality. They are printed on vinyl with resistant ink. These have a transparent background.
- Opaque having cut to shape quality having a white background.
- Perforated designs with holes in the image.
- Ability to watch outdoor with the inability of others to look inside.
- Permanent with white background and have high adhesive property.
Sometimes a few primary and simple tints having one tone are preferred, while in other cases, the requirement is the rainbow effect, shades, or casts.
After deciding the above, the next step is the required duration of adherence. These can be used for a few hours or may last many years, all depending on the customer’s interest.
The maximum lasting time for these may vary from 3 to 5 years. You can add the matching seat covers in your truck.
Things required
This procedure usually takes half an hour. All we need are the gears give below
- IPA( isopropyl alcohol)
- Spraying bottle
- Simple water
- Dish wash liquid
- Tape
- Soft wiping cloth
Clean the tailgate
This is critical for the successful application of graphics. Before starting this, make sure that the surface is free from dirt and debris.
Usually, isopropyl alcohol is used to remove any patent fonts, oil, wax, or dirt.
If the above-given instructions are not correctly followed, it may cause
- Loss of adhesion
- Reduction in durability
- Less performance
If the surface is cleaned correctly, it will glow like a clear photograph. If it is not done properly, it can damage the impression.
For the proper practice of technique, the wet process is recommended. This method is also preferred for the appropriate configuration of letters on your automobile. You can add the same color on the exhaust of your pickup.
Prepare the solution
It is prepared by adding 4 to 5 drops of dish wash soap per 6 oz. of water in a spray bottle. Gently mix these properly for 5 to 7 minutes.
You should add more than the required amount; otherwise, it can damage the paint of your pickup.
Cover the tailgate with this solution
The above-prepared solution is used to moist the area. It is necessary to cover the whole surface with the solution.
The soapy water prevents quick adherence and helps to remove wrinkles or bubbles. The bubbles have a terrible impact on the image as well as its sticking property.
Use masking tape
These are available in the form of a sandwich covered by thick paper on the downside.
The paper which covers them from the above side is of thin texture, and the tint or cast is in the middle.
The thick paper side of the graphical design or letter is then covered from corners in the square’s form by masking tape. This tape is a flexible joint. You can turn a camper into a food truck and use this tape to adjust things.
The tint that is not applied by transfer tape should not be peeled off like standard stickers.
This tape helps to remove the hard paper without affecting the inner image as well as thin paper.
Then, remove the masking tape by placing the sticky side and spraying it thoroughly with a solution.
The masking tape should be removed carefully so that the image remains stuck to the thinner paper side. You can mount solar panels on your camper and never worry about the power supply again.
Position the Vinyl decals on a tailgate
The vinyl letter is then positioned carefully on the tailgate.
The required location is settled by soap solution before adhering it to the vehicle.
It is necessary to keep it wet so that it can be appropriately sited.
It should be positioned flat on the surface and remove any formed bubbles. Apply mild pressure to secure its location.
Support the edge of the vinyl-based letter by the thumb. Then, place the thin side with sticking ability on the vehicle.
Now, gently remove water by pressing the letter with the thumb.
Start this process slow so that there must be a margin of re-positioning the letter if it is displaced during squeezing.
The Felt edge process can be used for this purpose.
Remove the excess moisture
They quickly stick to the vehicle as the water is removed with each pass. There must be several lights passes over the letter when the correct position is settled.
This graphical sketch now adhered to the extent that it can not be separated without damaging.
The process of removing excess moisture should be repeated many times unless or until no moisture is left. Otherwise, this excess moisture may cause damaging effects to the tint.
For more letters, repeat the same procedure. The process should be followed in sequence.
After placing a complete sticker on pickups, apply the little bit pressure. The final step includes the proper image pasting with no bubbles on it.
These tints may last for ten years, their durability is enhanced with their proper procedure of applying.
If there is a risk of improper design sticking, autographic shops can do this by paying their specified charge.
Sometimes we want another pattern on our automobile, so we have to change the already patent design.
Re-install the decals if required
The reinstallation requires the following equipment such as heating gun, isopropyl alcohol/wax remover, drill machine, the wheel having an eraser, polishing machine, micro fabric, polishing material.
The first piece of equipment we use is a heat gun. The lowest heat point is usually enough. Don’t heat too much that there is a risk of damaging the surface. Now remove the pattern by starting from the edge.
Following sequence after removing one letter, remove another while the surface is still hot.
Then by applying wax remover or IPA on fleecy cloth, wipe the adhesive. The second method uses a rubber wheel with a drill in combination.
These are available on the local store of auto parts. They are usually cheap and easily accessible.
Usually, light to medium pressure is required while not much considering the speed.
Move rubber slowly over the whole pattern, thus removing it. This process collectively removes the tint as well as adhesive.
As a final step, use a hand polishing machine. So apply the chemical and dab it slowly on the surface.
Similar to the removal of oxidation marks, apply light and maximum to medium pressure.
As the protective layer is finished after polishing, so wax should be applied.
After all, it looks that there was no print on the vehicle.
Instructions
The pickup should be positioned in the well-lit region but avoid direct sunlight. The ideal temperature choice for Vinyl based decals ranges from 60-80 F.
Use the peel and stick technique.
Only use the wet method for vehicles.
These printed materials must be dried for 24 hours to ensure proper adherence.
No wetting agent comes in contact with them during this period.
The vinyl letters have a primary thickness of 2mm. This makes the durability and thickness standard. The minimum thickness range is 0.8mm.
If the consistency is more decreased, it will cause a problem in the application technique.
It is essential to use a non-abrasive and wet fabric to clean. This instruction will help to maintain quality.
The high power washing procedure should be avoided.
It is necessary to secure paint at least before 30 days because it can cause bubbling.
In cold weather, a hairdryer can be used for proper sticking.
The technique varies from labels, as the former is basically for decorative purposes while the latter is for informative purposes. So, their procedures must not be confused.
Some have a different response when exposed to UV light. When the tint is wholly applied and shown under UV light, it shows the proper adjustment.
So, light effects and diverse displaying images make it slightly different from the original sketch.
Related Articles: