

I have added 11 easy steps to install a digital thermostat in an RV, and it takes 1 to 2 hours to complete this process.
How to Install a Digital Thermostat in an RV? You can install a digital thermostat in an RV by selecting an appropriate location on the RV wall, connect electric wires on the terminals, and take equipment dimensions. Next, drill holes in the RV wall, fix the mounting backplate, and insert the thermostat. Finally, insert new dual batteries in it, connect with the shore power, press the power button and use it.
A thermostat works in an RV through internal batteries and electric power. The buttons, screen, and electric wires control the overall performance of the digital setup.
How to Install a Digital Thermostat in an RV?
Digital thermost can control the high and low speeds of heat and cooling control systems. The average cost of an RV thermostat is around $65 to $110.
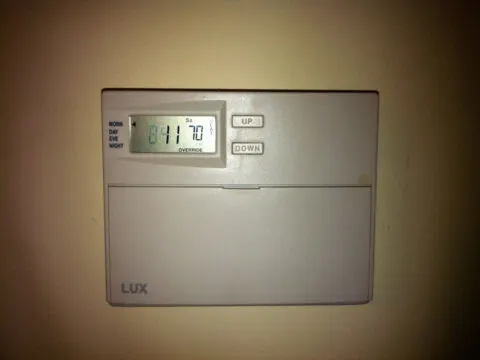
It can change the temperature limits with manual instructions, and the figures appear on the screen. In addition, you can collect data from the display section and modify it according to your demand.
Select a suitable location for RV thermostat
Access a suitable location in your RV for a thermostat. The digital equipment is sensitive in terms of external heat and environmental conditions.
Make sure you select a spot that is free from these harmful effects.
Always select the location near the electric connections, and it helps you to utilize the electric wiring. Wooden walls are also suitable with excellent drilling capacities.
The wall should comprise the ability to withhold the weight of the thermostat and screws insertion. The smoothness of the RV walls offers excellent installation without any free-falling or equipment damage.
Detach RV electric connection from shore power
The installation of a digital thermostat includes electrical wiring and other power connections. However, you cannot use them in the presence of electric power because it generates short circuits and accidents.
Cut off the power supply from the significant shore power of the RV. Leave the system for the complete draining of the electric power.
It also offers cooling conditions, and in this way, you can handle all the electric power connections without any fear.
In addition, the detachment of the negative terminal of the RV battery immediately removes all supply of electric current inside the setup.
Attachment of electric wires in relevant spots
There are several terminals on a thermostat on which the electric wires connect. There is a complete set of these wires, and all of them have a color that distinguishes them.
It also makes the installation and attachment of wires convenient and less time-reducing. Attach the electric wires according to the colors and first alphabets on the device.
Maintain a jumper between the Rh and RC on the system. The electric wire of brown color attaches with the variable alphabet, and all other have prominent signs.
Tightening of screws
The thermostat comprises slots to adjust the screws with efficient tools. These areas are sufficient for the insertion and tightening of the screws over the electric wires.
The adjustment of these things is according to the terminals of the new equipment.
The manual and expert guidance plays a vital role in the fixation of the electric cable in a relevant terminal.
You can fix it in one particular position by tightening if the screws.
Handling of thermostat terminals
Attach the first terminal of your RV thermostat in the ground connection.
The connection of the RV is neutral and usually connects the black and blue electric wires. Check the manual for the handling of the second and fourth terminals.
They are usually non-used phases for no adjustment, and you can bend them temporarily before the protection phase.
The third terminal of this system is crucial of all, and it derives energy from the 12 voltage system of the battery. It remains hot, and you can check the voltage with particular meters.
The fifth terminal of the thermostat is the electric power controller because it directly connects a wire with the air conditioning system of the RV.
The connecting wires go from this system to the compressor of your air conditioning setup.
Make sure you make the connection of yellow electric wires in this configuration.
The other terminal is the controller of fan speed, and it also handles the blower sections.
The HVAC of your RV depends on this particular connection. For example, it can increase the speed of a blower fan when there is suffocation.
The ventilation process enhances, and the RV stabilizes for the passengers. Finally, the seventh section handles the low-speed conditions of the blowing fan.
It occurs when there are variable conditions in an RV. For example, the last connecting section on the thermostat comprises a white color electric wire.
It connects with the heating systems like the heater and furnace of your RV. It also controls the performance of these setups, and you can check it through the specific meters for voltage control.
Security of unused terminals
The second and fourth terminals of the digital thermostat are not in use. You can protect them and the electric wires with any protective material.
Use tape and wrap it around the wires and also cover the terminal openings with similar material. Hide them properly and make sure that no external dust particles or unnecessary air enter them.
Drill holes according to thermostat dimensions
Flip the thermostat and face the bottom side in front of you. Use a digital measuring tape and take the dimensions of the backplate. Record this data on paper for further steps.
You can also adjust it on the RV wall and mark the relevant spots with colored chalk. Then, use an electric drill machine and make holes in these particular spots.
Never harm the appearance of the RV wall and protect the manufacturing material during drilling. Make sufficient deep holes for the insertion of bolts and screws.
Place the thermostat and secure it
Attach the backside of the thermostat on these spots and check the alignment of holes. Then, add a bolt in one of the openings and cross it through the gadget and RV wall.
Push it inside and then use a tool for the fixation. Adjust it over the bolt and rotate it clockwise with a maximum amount of strength.
Repeat the similar procedure for the other openings and bolts. Finally, tighten the mounting plate in one specific position to enhance the stability of the overall system.
Always use new bolts for these attachments because they have more strength to fix inside. In addition, they can hold the overall system without any falling or damages.
Adjust it on the mounting back-plate and fix it properly. Add screws in the relevant spots in case of their presence.
Few of them have more than 3 to 4 openings for the tightening and hold of the equipment. The stabilization is necessary to protect it from damages and offer a controlled future use.
There is a power button on the digital thermostat that handles the turn-off and on conditions. Access the button by reading the signs or consult the manual of the equipment.
Install batteries
These batteries are small and offer power to the digital system. They have a separate section on them, and you can adjust them within 2 to 3 seconds.
Both have opposite-side installation methods. First, open the door and then check the adjustment pattern. Next, insert one battery in one part and the other in the next section.
Adjust them firmly so that none of them pop out of the installation section.
Attach thermostat wires with cells
Make sure there is a connection between the electric wires and the cells of this system. Then, turn it on and identify the link through the handling options.
The connection of the negative terminal of the RG battery with the shore power is also necessary. It supplies power to the electric wires, and the cell also works automatically for this heat and cooling controller.
Press the power button of the device until the display screen offers data. Then, multiple buttons on it control the temperature changes and air conditioning systems.
The fans work according to the standard limitations of speed due to these items. Learn the signs of the buttons that are in the form of an arrow and up and down.
Handling of speed limits connects with these upper and lower arrows. The power button is slightly considerable than the other options. You can press them manually once and set them according.
Adjust settings and observe performance
Adjust the settings of this system according to your requirement and then check the results on the linked setups. If the other things are not working according to thermostat digital instructions, then modify the internal settings.
Use the automatic gadget after these changes and observe its performance after every 5 to 6 hours. Thus, it prevents a constant pattern of electrical or handling complications.
Related Articles:
How to confirm GFCI tripping of RV electrical outlets?
How to get rid of grease from trailer rims?
Can I install an RV door latch on my cargo trailer?
Can I install a ceiling fan in my RV?