
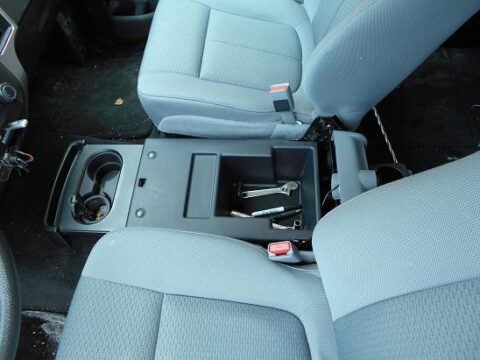
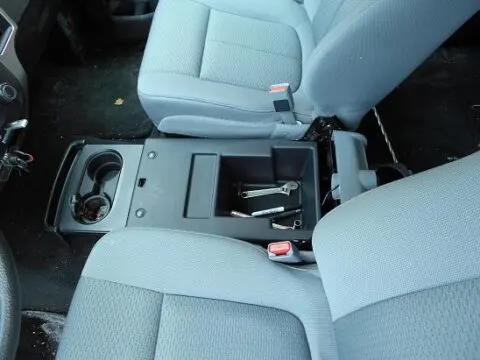
The center console of the Ford F150 is beneficial for the placement of different things. It is a piece of supporting equipment and present in its middle section.
How to Remove Ford F150 Center Console? In general, you can remove the Ford F150 center console by turning off the Ford F150 and disconnect the electric power supply. Next, remove all screws, move the trim panel, and remove the center console.
The Center console is one of the essential instruments in the truck. The removal is necessary due to breakage and other such issues.
How to Remove Ford F150 Center Console?
I have described 9 easy steps to remove the Ford F150 center console through various techniques.
Park and stabilize the Ford F150
The removal process of the center console requires stability. You have to park the Ford F150 in a garage or parking station. Turn off the truck by the ignition key.
Stabilize the structure on the smooth ground and leave it for some time.
Park this structure at a place that allows convenience in such removals. Stability is necessary to perform such activities. Sit inside the Ford F150 and then start the process.
Disconnect its electric wires
Disconnect the electrical passage of the central console. You cannot detach the electric wires in the beginning. Turn off the engine and batteries.
It restricts the passage of electricity in the console. As a result, there are minimum chances of any short circuits. Follow the same step when you remove the overhead console.
You can use the ignition key and power buttons to reduce the supply of electric energy.
Adjust the automatic power levers through the disconnecting activities.
Stabilize the internal system with the electric disconnection. Allow it to cool down before touching the sections.
Access its panel and remove tools
Access the first panel of the center console, use a prying tool and detach the first panel with it.
Multiple clips allow the attachment of such tools. In this way, you can grasp the front side of the panel.
Use hands to bring the top surface of the panel upward and start removing the clips.
Use a sharp screwdriver that can penetrate inside the clips.
The system comprises two attachment tools on each side. Remove them through the screwdriver and keep them aside.
Remove its plug
There is a transmission plug underneath its panel. You can remove it through the various detachment tools.
The plug is removable even with manual efforts.
Make sure there is no electric energy in such devices. Hold the plug and then pull it outwards. Discard it from the attachment point and keep it aside.
The accurate plugs are beneficial in the installation procedures of these devices.
Disconnect the connector from the electric panel.
Use the Push-button
The side panel and one direction of the passenger seat comprise a button. You have to access it to reach the other electric connections.
The button is also available on the forward edge of the structure.
Push it and then pull the buttons outwards. It is beneficial for the removal of such tools.
Pull it from the console and detach it conveniently. There are 3 to 5 clips to attach to the backside panel.
All of them have different orientations, and you can remove them with a screwdriver.
Removal of the side panel
Remove the side panel and then proceed to other steps. Make sure there is no other clip on the side of these panels. The detachment becomes convenient after such modifications.
Always follow the guidelines to detach the tool from the ford f150.
Remove its screws
Multiple screws attach the trim panel and other electrical passages.
There are three screws on the gear shaft section of the Ford F150. Use a high-quality screwdriver and detach them from the structure.
Detach the panel from both sides of the seat. Access the screws of the passenger seat and driving seat simultaneously.
Discard the trim panel
Remove the trim panel and discard it. It also depends on the present condition of such instruments. They have sliding abilities which make the removal convenient.
You can slide the panel from this direction and remove it from the center structure.
Remove the center console
Remove the center console with technical expertise. Next, detach and remove the electric panel of the gear shaft.
The front area of the radio section also comprises the connections. Therefore, the disconnection and removal of such attachments are also necessary.
Remove all the attachment bolts from the panels.
Use a bolt puller and remove the bolts from the significant device. Lose the structure with manual pulling.
Never apply an excessive amount of strength on the front cover of the console. It can break the outer layer, and damages occur to the central device as well.
All of these conditions are not beneficial, and instant removal is essential.
Detach the device from the internal portion. Use hands to pull the device from the central structure and keep it in one corner.
10 Examples of Center Console for Ford F150 with their size, weight, and price
- RAMPAGE PRODUCTS Universal Console, Charcoal – 19 x 10 x 11 inches – 13 ounces – $49
- Pilot Automotive Universal Truck Center Console – 13 x 23 x 10 inches – 15 pounds – $53
- TSI Gray Contractor Console – 21 x 13 x 13 inches – 11 pounds – $160
- RAMPAGE Seat Console – 19 x 10 x 11 inches – 13 ounces – $55
- TSI Products Clutter Minivan Console – 29 x 16 x 11 inches – 10 ounces – $46
- RAMPAGE Locking Center Console – 30 x 16 x 11 inches – 15 pounds – $86
- Vertically Driven Products Black Locking Central Console – 26 x 11 x 14 inches – 12 pounds – $88
- Go Gear Mini Console – 12 x 11 x 7 inches – 18 ounces – $25
- Aoneparts Center Console – 9 x 9 x 6 inches – 11 ounces – $35
- Go Gear Console, Charcoal – 16 x 11 x 7 inches – 3 pounds – $32
Related Articles:
How do you remove the cup holder in the Ford F150?