

Here are the 9 easy methods to repair and replace the RV city water connection.
It helps the RV to connect with any other water hose or container. You can get water with a particular pressure with this small device.
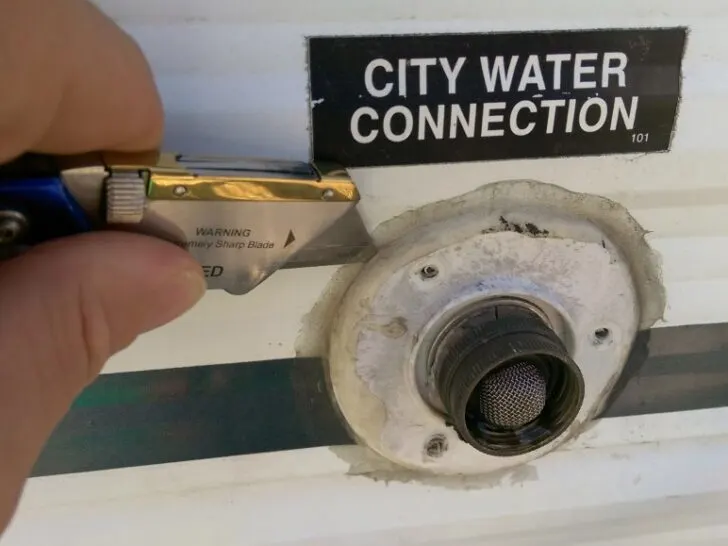
How to Repair RV City Water Connection? Repair the RV city water connection by tightening it, tape wrapping, and other such techniques. Repair and remove all the damaged parts, and install the new city water connection in case of intense damages.
Always check and maintain your RV weekly and monthly. It protects against the leakage and destruction of this efficient water connection.
How to Repair RV City Water Connection?
The RV city water connection is like any other external device. It is a small tool, and they have an external installation point.
Leaking problems and methods to repair
In few circumstances, the city water connection of an RV stops working precisely. It loses the performance and quality without a known reason.
It is your responsibility to check and repair the broken device. There are enormous ways to fix the water connection in RV.
They also comprise the replacement of the damaged sealing portion, service, maintenance, change rubber of the valve, and replace it.
Access the location
It is essential to repair it in the first place, or the disasters are deadly.
You can lose all the necessary water from the freshwater tanks. The vehicle becomes abnormal for casual water connections in the RV stations.
The continuous dropping and water removal harm the functions of water appliances in your camper.
Few people are unaware of these small external connections. If you are one of them, then take help from the manual.
There are maps and pictures of all the essential portions of an RV. In some circumstances, the owner sees that the water tanks are getting empty.
They cannot find the genuine reason for this abnormality. The manual helps you to access the accurate location of this connecting port.
Once you find out the area of the issue, then the solutions are easy. It is one of the first and leading steps to repair a broken water appliance.
Tight the leakage area
The leaking of the water devices is sometimes due to the constant use of the tool. It loosens all the parts of the connection without any significant indication.
The internal part loses power every day, and eventually, water starts flowing. The instant solution to such problems is the tightness of the tool. These parts keep the water flow in control, and now they help in fixing it.
Use a wrench of appropriate size, and check it on the connecting section.
Settle it on the outer surface of the round area and move it anti-clockwise. Make sure that you never put extra force because it may break the tool.
The firmness of the circular surface controls the water pressure and keeps it inside the tank area.
Keep repeating the process until it stops dripping water droplets.
Wrap with a powerful tape
There is a water-resistant tape that offers maximum security to the system. It is of silicon material, and you can buy it from any casual store.
Wrap this tape around the leaking area with a forceful grip. You can make multiple layers by repeating the process three to four times.
Join the connecting point with the circular parts of the water city equipment. It suddenly stops the flow of water, and people sue it for instant remedies.
Always purchase high-quality tape for these kinds of repairing. They are not expensive but highly efficient in their performance. You can cut a long patch according to the measurement of the problem.
Always place it in one corner and then wrap it in a circular motion. Stick the small patches of silicon tape on the suspect holes.
They do not allow the flow of water outside, but the device requires proper management.
You can do this method if you are in a distant place. Take the vehicle to a mechanic or consult professional help for such issues.
Repair the cracks of the internal hose
The internal hose of the RV means a large container of fresh water. People normally fill these compartments for their daily and weekly use.
They have enough space to accommodate multiple gallons of water. These containers can get damaged due to some unusual problems with the RV.
The tank breaks from the surroundings, and the walls become fragile. The water system gets various lines and cracks on the external surfaces.
It makes the container vulnerable to external water flow. The water creates more pressure to move out of the tank.
It results in the dropping of water droplets, the water tries to flow out and it uses this passage.
The water pressure increases above the limit, and it is not suitable for the setup.
It is a leakage condition and starts to empty the water hose. If the process proceeds, then it gets the container empty anywhere.
It is an issue in terms of identification when the vehicle is moving. In those conditions, when it is in the parking station, then you can hear the sound of water on the ground. Fill these cracks with plastic glue or change the container immediately.
Decrease the water pressure
In some situations, the RV remains in excellent condition without any damage. The city water connection starts to leak at any point during traveling.
It occurs in the hilly areas because the water tanks have pressure. Water requires a passage to flow, and when it finds an external way, it moves out.
The pressure increase with every road jerk and water insert force on this small external opening.
Resolve this problem by reducing the pressure of water. You can collect a volume of liquid in another container.
Open the valves of the massive container and fill multiple small containers. It instantly lowers the pressurizing force of water in the hose. The water calms down to its lower limit.
The dropping of water slows down in the begging, and then it stops. It is one of the best solutions to repair this connecting area.
You cannot take a risk when your RV is on the mountain roads. The bursting of the connecting device is a deadly issue. You can lose all the volume of water within fifteen to twenty minutes.
Remove the faulty water hose
There are few water containers in the V that are not appropriate in different aspects.
They cannot hold the massive quantity of water with firmness and control. They are fragile due to the worst quality conditions.
A low-quality water storage container is one of the leading causes of water leakage. The only passage is the city connection, and the droplets come out.
The solution to this particular issue is to remove the low-quality equipment. Replace it with a new container with better capacity, strength, and accommodation.
Observe and maintain the new instruments in terms of water holding capabilities. The removal of the old tank is not an easy process.
You have to remove water from this compartment. In this way, the water carrier loses its weight.
Remove all the connections and detach them. Install the new and high-quality stuff and does a water leakage test.
These tests provide complete information about the quality and control of the new equipment.
You can perform this process at your garage or take professional help. The tanks are heavier, and you can also take the friend’s help.
Replace the damaged sealing portion
The city connecting device has a particular ending point with the RV wall. All of them have a seal that you can see without any effort.
The old-age connection loses its power to withhold the exchange of water sessions. They lose strength and start damaging.
Time harms such tools, and the consecutive use also makes them vulnerable.
The seal breaks, and the whole device becomes nonfunctional. The water flows out of this passage without any restriction. The only solution is to repair or change the seal.
These are inexpensive parts of this functional section of the RV. Always keep an extra seal in your vehicle, and you can use it in emergencies.
Cut the power supply to stop the water flow. It is an essential step because the one you remove seals the water rush out.
Empties the storage tank and then starts the repairing. Remove the old seal with hand or through a wrench.
Pull it out and cleans the surface area with a fiber-free cloth. Install the new seal with a particular force. Tight it with a screwdriver, and test it for leaks.
Service and maintenance
The service and maintenance also include the check and balance of the city water connection.
Make a permanent record of the installation date of this small device. It helps you to identify the ratio and chances of problems.
The old tools are vulnerable to mega damages without any particular sign. It is a repairing and control process of this tool.
Take it to a mechanic shop and take professional help.
You can also do the service of such machinery in your garage. Always gather proper guidelines and then start this process.
It keeps the equipment safe, and you should purchase a compatible device. Make sure that the water container and external tool are in the coordination of water pressure.
Change its rubber
There is a rubber valve at the ending section of this water transport channel. It provides maximums support and never allows the flow of water without the owner’s requirement.
The RV stations and their representatives are aware of the utilization of this valve. In few conditions, it remains close and holds its positions. The rubber breaks with tome and loses its strength.
Sometimes it breaks from the middle area, and it is one of the worst conditions. Immediately turn off the water conditions in the RV. Never open the inlet during this repair and remove it instantly.
Pull it with a wrench or any such device and discard. Install a new rubber valve, and press it back to adjust.
Increase the water flow and pressure and check the compatibility of the new valve.
You can purchase a rubber valve without the whole equipment. The parts are not expensive, and you can change them after three to four months.
Replace the RV city water connection
It is one of the best but tricky methods to repair a city water connection.
You can carry out this process when the device has lost all of its efficiency.
The only remedy is to remove the old one. It stops the leaking and loss of water at the spot. Discard the water from the internal hose or store it in different containers.
Remove the water connection with efficient tools. In this step, use a screwdriver and a wrench simultaneously. Unscrew the connecting nuts and bolts.
Keep the directions clockwise, and detach the device from the RV wall. Extract the rubber valves, the seal, and external rigid plastic.
Clean the hole with a clean fabric and start reinstalling. Purchase high-quality connecting tool in terms of the tank’s pressure. You can install it at home or ask for a mechanic.
They fix it properly with minimum chances of future leakage problems. Remove the plastic cover of protection and check its performance.
Perform leakage tests manually and with different tools. Make sure that it is not allowing the flow of water in fluctuating water pressures.
You can fix this tool with professional guidelines and get the same model as the previous one. It helps in better fixation and control.
How much does it cost to replace RV city water connection?
The cost of the repairing process and replacing depends on the type of tools. It is a cost-effective process, and you can perform it every six months.
Small tools like silicon tape and rubber seals may cost you up to $5 to $15. The average cost to repair and install and new city water connection on an RV is between $80 to $200.
Related Articles:
Best RV parks in Texas for families?
How much weight can an RV slide-out hold?