

Here are the 12 easy methods to repair and replace the RV bathroom faucet. Never compromise on the quality of equipment and change the faucet in case of irreversible damages.
How to Repair RV Bathroom Faucet? You can repair the bathroom faucets with different efficient techniques like tightness and filth removal. Make the system stable with the replacement of metal coils and reduction of water pressure. Take professional help to replace the faucet.
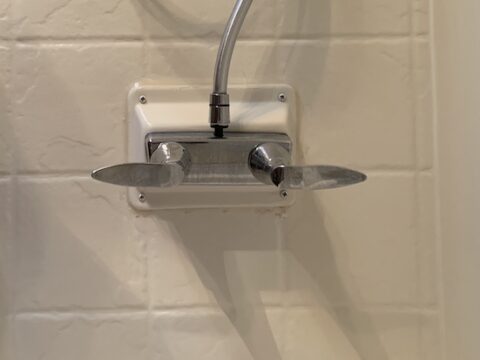
How to Repair RV Bathroom Faucet?
The RV bathroom faucet is like any other water supply system. It attaches to the sink and allows the flow of water.
These are efficient water control systems and helpful in the time of need. The shapes and sizes vary according to the RV bathrooms.
There are lighter in weight, and you can clean them anytime. The showering faucets are mostly part of RV bathrooms. The owners also prefer fancy and appealing equipment for such setups.
Tight the elongated part
It is one of the easiest and efficient ways to repair the bathroom faucet. Use a screwdriver and wrench to carry out this process.
Always utilize a wrench with size following the faucet surface.
The elongated water suppliers join with the bottom portion. All of these appliances are in a direct link with the mega water system.
Sometimes these parts stop working, and they leak water. The continuous dropping of water is suitable for the RV water tanks.
You can lose water availability on long-distance trips. Always select the accurate wrench and put it on the circular area of the faucet.
Move it in an anticlockwise direction with a particular force. Repeat this for at least three minutes, and it offers accurate firmness.
The water droplets suddenly stop flowing, and the system gets active. It is less time-consuming and costs nothing on the budget.
You can perform it without any technical help. In case of leakage, always check the firmness of this device.
Remove the dirt
The problems of RV bathroom faucets occur due to internal filthiness. The mineral occupies massive space in the passage.
They change the water pressure and contaminate the water as well. The removal of this dirty matter is the only solution in such cases.
Use a long cable or thin rod to carry out the repairing. Insert this in and rotate it for three to four minutes.
It is beneficial to remove large masses from this area. You can add the harmless chemicals that clean the water supply ways.
The cleaning of this tool results in repairing. The water stops flowing outside, and there are no particles in the water.
The appearance of water indicates this problem. Remove the issue before it leads to irreversible damages.
In few situations, the overall cleaning requires opening the parts. You should access professional guidance to operate and reinstall the arrangement.
Change the metal portions
In some circumstances, the constant flow of water is due to the rusting of coils. These coils are the support system of this water passage.
All of them are metallic and are vulnerable to corrosion.
Leaving the system without any service causes these disasters. Remove these coils and repair them if it is possible. Mostly, it is not possible to fix the metallic rings or portion.
They lose their strength due to corrosion, and the only option is their replacement. Measure the particular area sand Purchase new coils.
Remove the uppermost part of the water server and start the installation. Put them on the middle structure and tight them with a wrench.
Adjust them properly to avoid any time of leakage. Turn on the faucet to test the leaking process.
Never pull these coils with force because it can result in breaking. The pipes can also damage in such forceful activities.
Maintain water pressure
The fluctuation of pressure on the RV fresh water hose leads to damages to its parts. The bathroom sink loses its performance and starts leaking.
The water flow is sometimes like droplets, and in few conditions, it is a massive loss. The valve can empty the whole tank within an hour.
You should always maintain the pressure changes in these compartments. Never allow the fluctuations to cross the casual limits.
You can repair this tool by decreasing the water pressure. Turn off the water supply for few minutes. It calms the waves and force of water flow towards these openings.
Always check the pressure conditions before repairing the faucet parts.
It is a significant process with the least effort. You should have accurate expertise to identify the issue at the spot. The observation and assessment offer instant control over the issue.
Change it with sink
There are many people who change the RV bathroom sinks but not the faucets. They install the old devices in the new setups, and it turns into disasters.
The arrangement lacks the compatibly to work in collaboration. The sinks discard water accurately, but its valve can act abnormally.
They lose water in the form of droplets, and it is an initial stage. The water flow increases with time, and you can hear it in your vehicle.
The only fixation option is to change the faucet with the sink. Never use the old tools and check the compatibilities.
Always utilize accurate tools to test the leaking properties. You must link it with the new sink, and it provides complete protection from water loss.
Add a plastic or rubber ring
Sometimes the central connecting point of the faucet and lower section leaks.
It is an uninviting state because the water flow increases with time. It is not in the form of droplets, and a specific volume of water flows out abruptly.
The freshwater hose of the RV starts losing its level, and it is a frustrating situation.
It requires immediate fixing and happens due to the detachment of equipment. They lose their power to connect firmly, and you can add a connecting thing.
Use a rubber ring with appropriate size and depth. You can cut it from a rubber ring or purchase it from the accessory stores.
The installation is easy, and you can put it manually in the desired location. Remove the upper portion and insert the rubber ring.
Push it inside the position and then tighten the top part. Connect them by moving it in the closing direction.
Keep the movement firm and test the arrangement. It is an instant fix, and rubber rings are cost-effective.
Thread as an instant solution
Use high-quality and thread with maximum length to fix this issue within minutes.
The leakage occurs due to the loosening of the tool from the water supply passage.
A hollow space allows the free-flowing of water in the sink. It has a particular speed of flowing, and it is not favorable for the water system.
Attach the top tool with the middle section and control the water flow. You can take the help of a friend in severe conditions.
Wrap the thread around the linking spot and make five to six layers.
Check the firmness of the connection by moving the faucet in both directions. Never apply excessive force because it can tear the setup.
It is a beneficial repair process and takes three to four minutes.
You can control the loss of water until you reach the maintenance and repair station. Take steps to rectify the problem from the roots.
Repair the washer parts
The washer parts are powerful to control the setup of freshwater supply in bathroom sinks. They are high-performance tools, but sometimes they damages.
The presences of harmful and toxic chemicals stick to the walls of these washing tools. They make them vulnerable, and the equipment loses strength.
The layout begins to leak from any direction. It happens within minutes, and the water flow rate is high. You should access the cracks and damaged areas.
Cover and fix them with water-resistant material. It can be tape or wrapping paper. Make three to four layers to stop the water loss.
Take the camper to a mechanic station to repair this massive issue. It may cost you a bit, but the fixation worth the cost.
The problem is technical because it involves the dominant water sections. You cannot resolve it without any help, or other issues may happen.
Repair assemblies
The assemblies of the bathrooms are supporting structures. They have a direct link with the electrical systems.
All of them can get damages without any notification, and water starts flowing abruptly. Repairing such issues is tricky because the first step is the identification of the problem.
Access the location and then start fixing. The replacement of these parts is beneficial in many ways.
You can repair the damaged part, but it has lost the original strength. The compatibly decrease, and it is an alarming situation.
The system remains at the risk of water loss at any time. Change them with brand new ones and install them according to the manual.
You can bring it to the mechanic, and in these fixings, the chances of errors are negligible.
The repairing cost is a bit high in such cases because you have to buy new instruments. The fixation saves the volumes of water and keeps the arrangement in a series.
Repair broken faucet parts
A sudden jerk or accidental situation damages few parts of the faucet setup. The cracks are severe, and it instantly leads to free water flowing.
The bathroom starts to fill with water, and the tanks empty. Repair the broken parts with instant solutions. If you have extra tools, then replace them immediately.
Change the water direction and connect this broken section with the storage compartment. Fill the cracks with rubber stoppers of plastic filling.
Stop the loss of water in such massive volumes.
Cut the electric power supply of water, and it reduces the water pressure.
It settles down in the mega tank and flows in the form of droplets. Take fixation steps within minutes and consult a nearby repair center.
The experts resolve these disasters and identify the severity. The repairing process is costly because it involves changing tools in an emergency.
The mechanic also cost you for the process because he controlled the situation. Learn the basic techniques to avoid such expenses. Perform these fixations without any help or charges.
Replace RV bathroom faucet
It is one of the best but challenging processes to repair the worst faucet. Replace it with a brand new one with maximum compatibly.
Perform all the control procedures, and the water keeps on flowing and then use this procedure.
Remove the old structures with the help of a wrench and other such tools.
Clean and dry the surface and install the new equipment. Add a rubber seal in this process for better firmness and control.
Tight it with the right tools and applies the amount of force. Never cross the force limits because it results in a loss. It is a costly process than many other methods but prevents it from severe damages.
Cost of replacing an RV bathroom faucet
The cost of the process relies on the method for fixation. The average cost to repair and replace an RV bathroom faucet is up to $45 to $275.
Related Articles:
How to repair RV city water connection?
How much weight can you put on an RV slide-out?
Can you repair the travel trailer exterior wall damage?
How to repair a hole in RV interior wall?
What is the average cost to replace an RV shower?