

Here are the 6 easy methods to repair travel trailer exterior wall damage. The outer walls are usually of fiberglass or aluminum of these trailers.
How to Repair Travel Trailer Exterior Wall? Travel trailer exterior walls can be repaired by detaching the molding. You should cut the new aluminum pieces and attach them with staples and glue. The fiberglass walls should be cut according to the damaged area, repair the insulation, and attach the plastic panel using liquid nails to fix the damaged area.
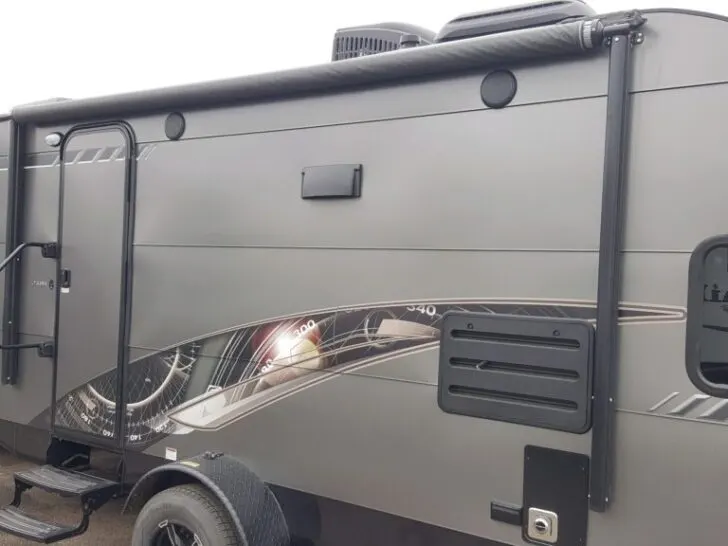
Travel trailers are the most rewarding thing you provide to your family. The old trailers do not provide such luxury. Their body frame is made up of steel.
The steel frame starts to corrode and rust with time. Due to this reason, the body line of RV starts to change.
The body frame also needs your attention for gaining accurate practices of maintenance.
Otherwise, the outer component starts to fall apart due to the continuous availability of natural element that is dangerous for your trailer outer body frame.
Aluminum comes in place of steel because it is lighter and cheap than other metals. Aluminum does not rust easily.
How to Repair Travel Trailer Exterior Wall?
Most of the trailer is available in the aluminum body line. The manufacturer makes the body line with some material that should provide some weight so that the trailer does not move.
Most of the old campers are of aluminum body lines, but all the new trailers come in fiberglass body frames. Both of them are present in fifty-fifty percentage between RV body lines.
The first step in repairing a compartment is to find out the reason behind its damage. The most common cause of damage is water leakage.
The cracks also appear due to the ultraviolet rays of the sun. For this reason, place your RV in an area that contains less heat from the sun.
Proper covering also helps in protecting from the outside damages of the vehicle. Inspecting the place of leakage is a tricky proposal that requires your concentration fully.
The place where leakage occurs is meters away from the damaged area. You should check the whole region accurately.
It usually occurs in an area that contains slight resistance i-e, a place where sealing is tired. The first step is to inspect the flooring.
Get under your RV and locate the spot for any damages that allow water to move into the trailer. If there no leaks in the base of your camper, now check the roof of it.
Most of the leakage occurs due to the cracks in the ceiling because it is the area that faces continuous damages from the elements of nature.
The best way to check the roof of your camper, use a foldable ladder. This ladder can stand on its own and does not put weight on the trailer.
Check the wall and ceiling junction that mostly fix by using J-rail. Check all the seaming areas of the roof carefully.
After finding the culprit of leakage, accurately sealed them by using the best quality adhesive. Do double coating of this adhesive, and use sand to make the area smooth.
Inspection of damaged exterior wall
The inspection of the damaged area must start from the ceiling, then the outside walls to the flooring. If the exterior part is made with fiberglass, you need to repair the insulation also.
When you open the walling, the insulation damage also.
The insulation can prepare by using cellulose-based foam sprays. This foam sticks to every gap and depression. They are economical and are easier to do.
Process of repairing the exterior sides
The first step is to remove the damaged side of the trailer. The camper usually develops with the framing that staples together.
Then the interior panels are fixed in this frame. Then the whole framing compartment attaches to the base of the travel trailer.
You can fix the damages to the trailer exterior wall by removing the outer framing and then inspect the inner compartment for damages.
Remove all the accessories attach to the exterior wall. Remove the staples pins that hold all the inner and outer body together.
You can perform this task by using a screwdriver and nose-shaped pliers.
After removing the exterior covering, inspect the damaged area carefully. It is better to check it entirely.
Most of the time, the damage that seen is due to deterioration inside. You need to find the root of the problem.
Use accurate sealant
After removing the frame, you will see that the signs of interior damage. If the sealing damage, it will affect the interior and exterior of the wall.
A single hole in the roof can cause a lot of destruction. Sealing is vital for this purpose.
The exterior that develops fiberglass damages more often after one or two sessions of rain.
Try to seal the edges and joints precisely by using epoxy adhesive. It will help the moisture to do not inoculate in the internal compartment.
The aluminum walls corroded due to elements of nature after some time. You can seal them try to use manufacturer sealant.
Replacement of the damaged area
Use the old framing of the wall as a template, and then cut the new one according to the size.
The frames usually clasp together in place with the help of staples and glue. If the damage huge, you need to replace the whole wall.
The replacement of the whole wall is so costly. The reason it is vital to check your trailer for any damage regularly.
For the replacement of fiberglass, you need to be very cautious.
The installation needs to handle because it is very sharp and can injure you. Improper cutting and fitting of plastic panels mean you have to start again.
Fiberglass is made of hard plastic that combines to give proper thickness. When fixing it, use a liquid nail and accurate pressure. Then add sealant in the edges and gaps. The aluminum metal is hard and resilient.
When you do their installation, do not put so much pressure during cutting and fitting them. It will make the exterior surface displeasing.
You can fix the trailer exterior walls with the help of staples and sealants. After completely drying the adhesive, now sand out the repair area accurately. Now repaint the surfaces to protect them from the damages of nature.
Aluminum wall repairing
They are less expensive than the trailer made up of fiberglass. You can find out the body line by determining the texture of the framework.
The fiberglass is smooth and flat from the outside, and the aluminum contains ridges in its body frame.
The best quality of the aluminum body frame of the trailer is the malleability of it.
Sometimes when accidents happen that result in some damage or dents, you need to change only that section of the trailer wall.
It is easy to change one or two slates than changing the entire side of the trailer. Aluminum provides better insulation than fiberglass.
The walling arrangement of this exterior trailer consists of an aluminum layer outside, a wood frame inside.
There is insulation present that has dead air space between them.
The dead air space is an excellent medium for providing warm air during winters and cold and refreshing air during summer.
This space also protects from elements of nature that corrode the walling of the trailer.
The repairing of aluminum walling repeats the same process. For removing the damaged part, you should find the molding of the trailer that holds the metal pieces together.
You can use a screwdriver, detach the molding and see the metal seam and remove it. These metal divisions join with the staples. Remove them with a hammer.
After detaching, the metal frame tries to straighten them to remove dents. With the help of a cutter, scrapes away all the corroded area.
You can cut the new metal fragment according to the dimensions of the old one. Join them together with the help of screws and staples.
Install the metal sheets from ceiling to bottom. Trim away the metal sheets from the area of window, molding, and roof with the help of a saw and fix them with sealant and staples.
Repair Fiberglass exterior wall damage
Fiberglass is becoming the choice of everyone because it is easier to clean and maintain.
They do not attract dust and dirt on them and have a bright and glossy look. The fiberglass helps its owner a lot when he tries to sell its camper. They hold better resale value than the aluminum exterior.
The aluminum inclines scratches and damages. Every dent decreases the resale value of your trailer travel.
They are lighter in weight, and as a result, they provide better gas mileage. They are usually present in streamlined frames that supply better aerodynamics than aluminum.
For fiberglass replacement, you need to be very careful. The fiberglass is very damaging to your eyes and gets stuck to the skin.
The reason, it is essential to use eye protection, gloves, and a mask. You can cut a new fiberglass panel according to the dimensions of the old one.
When you remove the old fiberglass walls small amount of insulation layer also damages.
You need to fix the insulation before attaching the plastic panel. Use the expansive foam and completely dry it and remove the excess.
Use auto body filler to fill up all the gaps in it, and then sand it out properly.
Repaint the area by using the original shades. Try to use maintenance techniques to prevent the exterior wall from future damages.
Related Articles:
Can you repair hole in the RV interior wall?