

Fuel filler neck is a small structure but has various advantages for Ford F150. Unfortunately, the fuel filling section becomes inefficient in the absence of these small things.
How to Replace Fuel Filler Neck on Ford F150? In general, you can remove the fuel filler neck on a Ford F150 by disconnecting the electrical connection. Lift the tuck and store the fuel in a separate container. Detach the brackets, bolts, and screws from the system. Move the clamps and remove the fuel filler neck.
How to Replace Fuel Filler Neck on Ford F150?
I have described a stepwise guide to replace the fuel filler neck on a Ford F150. These structures have a circular appearance. They remain in a fixed position behind the fuel filling door.
Park the Ford F150
Stabilize the Ford F150 on a stable ground during such replacement activities. The stability of the structure is necessary to provide various issues.
You can park the tuck in your garage. The parking under shady conditions prevents frustration.
Disconnect the battery
Disconnect the negative connection of the battery and shut off the power supply. The detachment of the electric passage is necessary during the replacement activity.
It prevents various accidental conditions for the performer. Leave the Ford F150 for at least 13 to 15 minutes and allow it to cool down.
Lift the Ford F150
Use the lifting jack or lifting block to raise the truck. Adjust the lifting equipment under the structure and elevate it to a specific height.
You can remove and replace it due to access and control.
Store the fuel
The fuel remains inside the containers, and you can store the remaining volumes in a separate tank. It prevents various losses and other harmful circumstances.
The budget remains in proper control due to such activities. These storage conditions are like preventive measures before initiating such procedures.
Remove its cap
There is a cap on the fuel gas filler, and it requires removal. You cannot proceed to the next steps without removing such tools. Use a sharp tool to detach the cap from the fuel compartment.
Insert the tool beneath the cap and pull it outwards. Keep it aside to install it again in the system.
Discard its brackets and screws
There are mounting brackets that hold the fuel filler neck and its tube.
Adjust the bolt puller and remove these bolts from their original points. Next, remove the screws with the help of a Philips screwdriver. Finally, remove the brackets with wrenches and sockets.
Remove sheets of the fuel tank
Discard the metal portions from the fuel tank with the help of proper tools. For example, the wrench helps to discard the bolts from these shield components. You can also heat the metal sections and discard them from the attachment points.
Remove the lower bolts
There is an arrangement of hinges that attaches with bolts. Apply the oil for smooth flow on the tank straps.
These straps are holding tools with excellent stretching. In addition, they tie the fuel tank with accurate adjustment.
Use a bolt puller or a wrench and remove the two bolts of the hinge section. Take the help of a friend when the fuel tank loses.
Adjust the fuel tank on a stable surface after its removal. It protects from the sudden falling of the fuel tank on the ground. The avoidance of instructions can cause damages to the fuel tank.
You can also use an uplifting jack to stabilize the fuel tank on it.
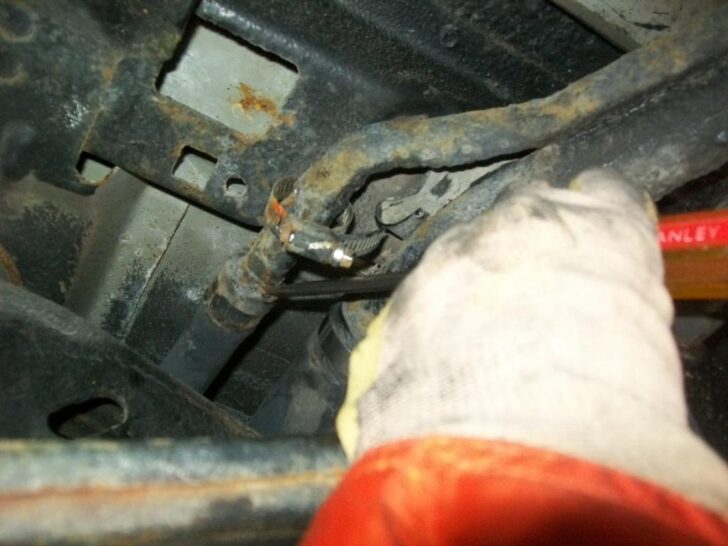
Use a tool to move the clamps
Detach the clamps from the hose of a fuel tank with a screwdriver. Remove all the holding points and add a bolt on the opening.
It removes all the errors of leakage and preserves the fuel inside the tank.
Disconnect the electric passage of the system by removing the electric wired.
Observe the connections and remove them accordingly. The spring connections are pulling, and you can disconnect them conveniently.
Detach the fuel and gas tank and adjust them aside.
Hold the bottom side of the filler neck tube and push it outwards. The pressurized fitting of the filler neck is removable in such ways. Detach the hindering clamps during such procedures.
Twist the filler neck tube when the removal becomes challenging. Remove and discard the O-shaped ring from the fuel filler neck. Detach the rubber hose from the tanks and then lead to the next steps.
Remove the broken fuel filler neck
Remove the fuel filler neck with its tube from the attachment point.
Make sure you never leave a small piece of metal in such detachments. The presence of remaining parts can make the installation tricky.
Greasing
Apply greasing oil on the O rings and other clamps. Then, adjust it in the groovy section of these fuel tanks.
The greasing offers smooth flow and stability of the equipment. You can attach everything without any problem.
Adjust new device
Adjust the new filler neck tube in a precise place. Adjust the brackets for accurate adjustments and never allow their sliding.
Ask a friend to hold the fuel tank and then adjust the top side brackets of the neck. Next, adjust the screws in the openings and tight them with proper tools. This also helps to fix the loose fuel door.
Reconnect the removed parts
Reconnect the removed straps around the fuel tank. Adjust the electric wire system, and put back all the bolts.
Replace the shielding material and fix it with wrenches.
Fill the fuel tank and then connect the batteries. Turn the connection on and then check the performance of the device.
Why would you replace the fuel filler neck on Ford F150?
Here are the main reasons:
Leakage of fuel
The leakage of fuel occurs due to a broken fuel filler neck. It is not a suitable process because the fuel tank can get empty.
The replacement of such structures is necessary to prevent the levels of fuel. The fuel leaking properties are a costly process. The owner’s budget gets disturbed due to such activities.
Loose fuel filler neck
In few cases, the fuel filler neck loses due to various problems. For example, it happens due to the rotation of the parts without any purpose.
Corrosion
The corrosion can occur around the fuel filler neck due to the presence of metal material. These corrosive properties are not suitable for the excellent performance of the fuel filling section.
The filling neck starts damaging and tears into pieces. The metal pieces can also lead to severe and irreversible damages.
Age damages
The age and excessive use of these structures have a direct effect on their performance.
The surrounding starts breaking, and it is a leading cause of replacement. Negligence can cause deadly damages, and the repairing costs are expensive.
Related Articles:
How can you remove the Ford F150 air vent?
How to open the gas cap on a Ford F150?
How to remove the Ford F150 glove box?