

If your RV ceiling lights are not working properly, you should replace them with a new one. Here are 10 easy steps to install new light bulbs.
How to Replace RV Ceiling Lights? Replacing RV ceiling lights is easy, remove the old device and disconnect wire connections. Install the new ceiling light of the accurate size and proper lights. Cover the external surface and make an efficient connection with the RV ceiling.
How to Replace RV Ceiling Lights?
The accurate method to replace the RV ceiling lights comprises a few steps. They are beneficial to reserve the time. You can perform this without any professional help. The avoidance of a single step leads to mega-disasters.
Tools required
- Screwdriver
- Electric wire cutter
- New ceiling lights
- Screws
- Protective gloves
- Fiber-free cloth
- External covering
- Measuring tape
- New socket
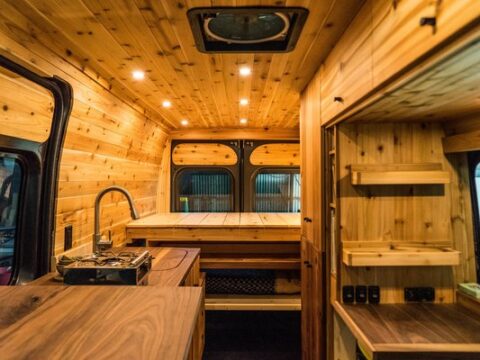
Locate the RV ceiling lights
Read the manual to understand the proper location and system of the RV ceiling lights. Anyone can see them in the roof area, but they do not just exist.
There is a complex electric wire system behind every ceiling light. It is a tricky process when you are locating the issue. In some situations, the lights may not work accurately.
People like to change them with other efficient lights as well. They are in a direct connection with each other, and the whole ceiling goes through various modifications.
You cannot remove and replace one light without any physical damage to the roof area. There are multiple layers of the ceiling section, and the lights are in particular spots.
The identification is the first step that leads to other methods gradually. The manual also provides images for precise information.
Take measurement
It is a system of measurement that directly links with the selection of new light.
Use a measuring tape or electric device to find out the area. The other parts are separate, and you need to find out the internal diameter.
If you have old existing lights, then choose the same model and size. It allows proper adjustments of these small devices.
The surrounding parts require repair once you remove the light. Always take precise measures to follow this step.
It is essential for the other guidelines because a minor mistake leads to a disaster. The repairing cost is much more than the replacement of the light.
Remove the external body of the old RV ceiling light
Identify and locate the external portion of the ceiling light. It is a protective cover that protects the light lamp.
It also saves the internal lens from environmental hazards. It has triple screws that join together and keep the system firm.
These lights are upside down, and they require accurate attachments. The outer covering is plastic or metallic. It is enough to surround the small devices without interfering with the light passage.
Use an accurate size screwdriver and start losing the screws. Remove them one by one and give manual supply.
A sudden removal process leads to the device’s falling on the floor. It happens in few procedures, and you require proper care. Remove the outer body and keep it aside.
You can discard it after the completion of this step. Use a fiber-free cloth and clean the bulb. Remove the dirt from the surrounding corners. It provides an excellent installation of the new device.
Disconnect the internal wiring
The disconnection of the internal electric wiring is a tricky procedure. You have to comprehend the network precisely, and a tiny wrong cut leads to massive damages.
All light stops working instantly, and the vehicle gets dark. Use the wire puller and wear protective gloves.
Make sure the camper is not on ignition during the process. It prevents various human harm and other problems.
Use a cutter and disconnect the light from the ceiling. Remove electric wires accordingly, then pull the device for better removal.
Remove the lights
Remove the whole structure of the ceiling light. Pull it in the anticlockwise directions, and it detaches the light lamp part.
You can discard it due to the worst lens conditions. Never throw them casually in the dustbins. Always smash the device and then demolish them properly.
Install new ceiling lights
It is a simple process if you have already discarded the light completely. Place the new ceiling right in the same area.
It should fit the place in terms of size. Push it slightly and then move them clockwise.
Keep on rotating until you reach the tightening point. Never remove your hand without placing it accurately in the right place.
Connect the wires
Connect the light with the electric channel with electric cables. It allows an excellent connection with the main electrical panel of the RV. It has the turn on the power with a single button click.
Cover its sides
Use a screwdriver and add new nuts and bolts. Cover all the sides of the lid to protect the external body of light.
It prevents it from road jerks and other such issues.
Test the new device
It is a simple test, and you can perform it after the replacement process. Turn on the power button and check the efficiency of the light bulb.
In those situations, when the light is dim or flickering, then retighten it. Move it in clockwise directions until it works precisely. You can change the device when it lacks efficiency.
What factors lead to the change of RV ceiling lights?
Few actors lead to the replacement of RV ceiling lights. It is not a simple process and requires expertise.
You can perform it alone or take the help of a friend. The reasons behind this procedure are determining factors to a change. They are broken lights, old lights, light dimming, changing of light material.
Broken lights
These lights are in a direct series, and a broken RV light is not suitable for the proper functions.
One broken device affects the casual performance of the other instruments, and it results in flickering effects.
It is disturbing for the passengers, and they feel frustrated. The solution to such issues is the replacement of the device.
In some situations, the tightening of the electric device leads to the proper efficiency of the tool. It is an optional thing that can resolve the problem.
The permanent solution is the identification of the issue and removal. The replacement quickly charges the other ceiling devices as well.
They start to work in correlation without any interruption. The light lamps of the ceiling lights are the most vulnerable part to damages.
It has a protective covering that loses its power. It results in an internal breakage. The lamp does not break completely, but one broken side makes the setup inefficient.
Old lights
The old-age ceiling lights are not suitable in terms of performance. They lack quick turn-on features due to excessive use.
They suffer through high heat conditions that destroy the internal structure of the small device. They get more damages with time, and it is not suitable.
In few situations, the RV owner does not change one device in a row. It affects the efficiency of the rights in the series.
The old lights provide less light, and it is not sufficient. The flickering effect prevails on the internal and external surface with every passing day.
It works inaccurately, and the passengers feel annoying. The replacement of old lights is the only solution to get rid of this particular problem. The light maintenance record tells about the age of the ceiling device.
Light diming
These lights require one tiny droplet to lose their efficiency. The splashing of water or a sudden drop movement leads to the blurriness of the lamp. The light gets dim, and it does not work accurately.
It is not favorable for the floor and other compartments. It can happen with one tiny device and require instant remedy.
The change is an excellent option in such situations, and you can alter the lamp section without detaching the device. Tight it firmly in the original state, and it starts to work efficiently.
Changing of light material
It is a leading factor that causes the replacement of RV ceiling light. The owner needs changes and freshness for the massive structure.
They like to replace the old simple ceiling lights with light-emitting electrodes.
They are efficient than the other lights and change the heat bearing capacity of the system.
The brightness enhances from the causal limits, and it enlightens the whole RV with one tiny change.
Related Articles:
How to install new clearance lights on your RV?
How to keep mice out of RV during winter storage?
How to install new ceiling panels in your RV?