

Here are 12 easy steps to replace RV ceiling panels. We have also added different types of materials that are used in making the ceiling panels.
How to Replace RV Ceiling Panels? Replace the RV ceiling panels with waterproof and non-flammable material. Install them with proper guidance and professional expertise. Remove the leakage of the ceiling compartment and settle them with adhesive substances. Take accurate measurements to prevent money and time loss.
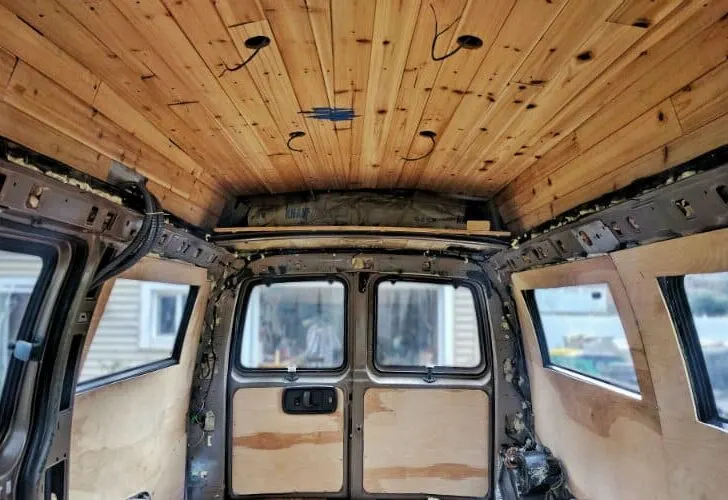
How to Replace RV Ceiling Panels?
People carry out the replacement process due to damage to the RV ceiling panels. The assessment of the damaged location is essential.
The water leakage decreases the work efficient y of already existing panels. You can find them manually, or they start falling. It is not a suitable condition and requires immediate remedies.
Remove with scratcher
The removal of the old panel is essential because you cannot paste the new layer on it. Use a sharp scratcher for paper and plywood panels.
The metal panel removes with pulling. Remove the old substances from every edge and corner.
Never leave a small patch because it reduces the appearance of new material.
Rub the scratcher on every corner and remove the material.
Clean the surface
Use a fiber-free piece of fabric and clean the ceiling compartment. Never leave a small portion because the dirt is not suitable for mew pasting.
The adhesive substance does not work accurately on these surfaces. Clean the dirt and old panel scratches.
Attach the RV ceiling panels
Attach the paneling material to the RV, check the adjustment without pasting it permanently. Take measurements of each portion and make a layout on paper.
Cut the paneling material according to these dimensions. Paste the panel pieces on the edges and corners, and then move to the center.
Add adhesive
These materials are suitable to attach the panel with the internal roof. Use a brush and paste this stuff on the back of the panel piece. Settle it on the proper protein and press it with force.
Allow it to dry
Leave the material for at least 1 to 2 hours for proper drying. In those situations, when you find improper pasting, add more adhesive substance.
Fill the edges and sides of the ceiling because they make the appearance ugly.
Allow the material settlement and leave it without touching, and check it after the mentioned time. Make modifications, and adjust them without any error or take professional help.
Plastic panels
The plastic panels are suitable for the RV due to enormous reasons. They are lightweight and easy to clean in any situation; these panels are available in the form of long sheets.
They can settle on the roof compartment without any resistance. The tools make a pattern of tiles on the ceiling area.
You can cut them with scissors. They are suitable due to their easy adhesion. Settle them in the right shape with precise control.
Never leave edges and other corners because they decrease the quality. The adjustment of plastic tiles is through an adhesive substance.
They hide the cracks and other such issues of the ceiling. They are convenient for cleaning because they absorb moisture.
Water cannot penetrate from their corners due to water-repellent property. They are economical, and you can change them every year.
You can choose the right color according to your massive setup. The structures also allow the paint facility and change the relevant color of the RV.
They are suitable for long-lasting effects, and the plastic panel tiles protect the ceiling surface. They are less durable and require maintenance.
Cut them according to the measurements of the ceiling area. Adjust the tiles near to each other attractively and cleanly.
Paste them accurately, and clean them weekly. Make holes in the tiles near the ceiling lights and other devices.
Polyvinyl Ceiling panels
It is one of the significant paneling materials for the RV ceiling. They allow the options of customizations, and people prefer them.
The panel material is smooth and water résistance. They are excellent on those surfaces that are leakage-free.
The crack-free structures also enhance the adhesive properties. They vary in colors and sizes and allow the paint facilities for the ceiling.
They are elegant and provide the texture of leather material. These panels are durable and long-lasting and offer maximum protection, and are easily adjustable.
Cut the polyvinyl sheets according to the ceiling area. Tuck the sides and corners, then move to the central compartment. Paste the adhesive material, and push them in their position.
Allow the drying process for at least 1 – 2 hours, and check the fixing. Add more substance for better adjustment.
The material resists water in the best possible way, and people prefer them in those areas that have maximum moisture content.
They are beneficial in the bathroom and kitchen compartments. They are expensive but the performance worth the cost.
RV ceiling panels made of fabric
These are sheets of fabric that make the panels of the ceiling. They have various designs for such arrangements.
You can cut them in long sheets, and they are available in ready forms. Start from the sides and corners of the roof section.
They require adhesion material for proper pasting. You can cut or mold the sides of the sheets at the edges.
The colors vary, and they do not allow a paint facility. You can cut them with a fabric cutter, and they are lightweight.
They hide the damages to the ceiling but are not water absorbers. The water leakage and improper ceiling compartments destroy the look.
They are economical, and you can also buy them online.
Plywood RV ceiling
They are beneficial for the smooth and woody paneling of the RV ceiling. They give an excellent appearance to the roof area at first glance, and people select them for their fantastic adhesion.
They are also available online, and you can select them according to the required size. They allow painting conditions, and it offers matching colors.
You can cut them with scissors and cutters in the desiring shapes.
The plywood is lightweight, and you can perform this process without any help. The patterns and shapes depending on your choice.
They hide the cracks and other damages to the ceiling area, and they never tolerate water in their surroundings.
The water can destroy the material performance of the plywood panels, and they never absorb moisture.
Cut them according to the required size and shape, never join the pieces on the floor section.
Place them on the ceiling and check their adjustment. Paste the adhesive material on their backsides.
Paste it on the ceiling with a slight push. You can also use a wall presser, and it offers a maximum settlement.
The plywood panel destroys due to water leakage, and you should maintain the damages.
The wood catches extreme care in this step. Check the wiring network of the ceiling section to avoid unfavorable conditions.
Metallic RV ceiling panels
The metallic panels are one of the most famous, and they are durable and long-lasting.
They offer strength to the ceiling and provide protection, and they have molding capacities, and you can cut them inequalities.
The ready-made metal panels are also available. They do not require any adhesive material.
Start from the ends of the ceiling compartment and add the equal size metallic tiles. The pattern depends on your choice, and you should keep it smooth.
They have nails on their back and settle on the ceiling. Place them on the position and push them. Always follow the precise fitting patterns.
They are metallic with a specific color, and you can change them, and panels allow the paint facility, and they are smooth.
The metallic ceiling looks adorable, and they are water-resistant, and it turns the cleaning procedure easy, and you can clean them regularly. The material never absorbs water, and continuous leakage can damage.
Fibrous glass material
They are like plastic or paper panels and the material is economical and lightweight.
You can cut them in any shape with a cutter or scissors, and people use them to hide the damages and bad spots.
They preserve the spots with long sheets. Small patches cover the sides of the ceiling lights.
They are durable, but water affects their performance settles them on the ceiling, and adds the adhesive substance.
Settle them in their place with the wall presser. They allow the paint condition, and you can clean them.
Special panel mechanism
It is a material that covers the RV ceiling. They are ready-made materials with maximum adhesion capacities.
You can cut and mold them in blocks and different shapes, and they are excellent protectors and hide the bad ceiling.
They are not absorbers of moisture and reduce their work efficiency. The Placement of these panels depends on your choice. Select and pattern and adjust them accurately. They are easy to clean but avoid the use of water.
Related Articles:
How to add new lights to RV ceiling?
How to replace RV clearance lights?