
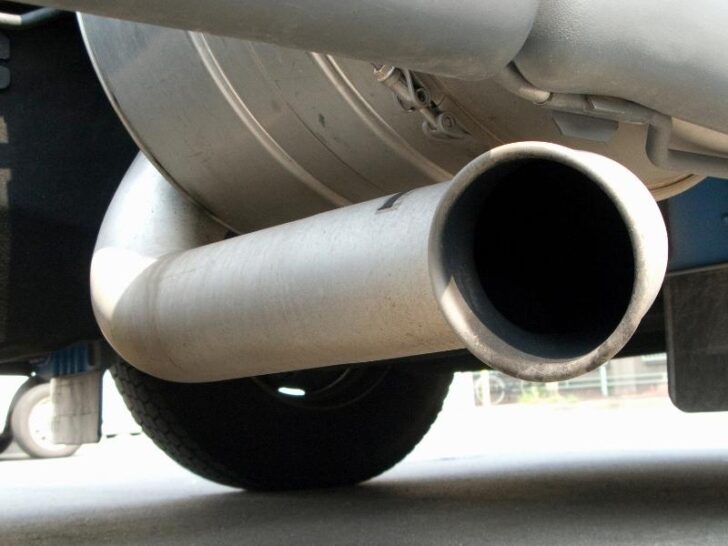
Flowmaster Muffler on Ford F150 is beneficial for the reduction of unwanted sound due to its manufacturing material.
How to Install Flowmaster Muffler on Ford F150? In general, install a Flowmaster muffler on a Ford F150 by approaching the exhaust pipe under the truck and stabilize the new Flowmaster muffler with support. Adjust the steel connectors with modifications and fix them on the exhaust tailpipe. Join both steel joints on the muffler inlet and outlet. Fix the clamps on the connecting joints and tighten them.
Without these small items, the Ford can produce high levels of engine sounds. The engine efficiency also declines due to the impact on the fuel quantities.
How to Install Flowmaster Muffler on Ford F150?
Install it with efficient equipment and professional knowledge. Observe each connecting point after adjustment to reduce fixing complications.
Find a muffler that is compatible with your Ford F150 model and cab style.
Purchase a Flowmaster muffler
A Flowmaster muffler is available in different price ranges, and the size varies according to customer demand.
Few of them have plastic designs, and others are of steel material. Consider the configuration and apparent condition of your Ford exhaust pipe section.
If you are installing it for the first time, then consider the help of an expert person. It saves the Ford F150 from unnecessary cutting and welding conditions.
Access the appropriate location
Find the appropriate location for the muffler on your Ford F150. The users are usually aware of these spots, but beginners need a guide.
Check the documentation of the Ford to understand the setting of the exhaustion pipe. These are present at the bottom side of your truck.
The handling of acceleration noise becomes convenient due to this layout. First, check the location by leaning down on the ground.
A professional guide also offers instructions about the internal layout of the system. If there is an already existing muffler, then the process of comprehension becomes convenient.
In other situations, understand the spots and take measurements of all these sections. Finally, make a proper plan on paper and then select the attachment things accordingly.
Gather installation tools
The presence of a tool kit makes the installation process less time-consuming and comfortable for the user. It includes the screwdrivers, sockets, and bolt puller.
The connecting pipes are smaller, and they have a specific diameter. As a result, they adjust inlets conveniently with the exhaust pipes.
The fixing of clamps is also suitable on these connecting pipes rather than directly on the muffler. However, the clamps can move freely on their surface that makes the process challenging.
Also, every Ford has a different bottom layout, and they need a right size attachment tool for better insertion. Finally, the control of the overall setup gets comfortable, and you can handle each section of the new one.
Get under a truck or uplift it
Lay on this moveable stand and roll under the truck. In this way, you can get an excellent explanatory vision of the truck’s bottom side. You can also uplift the truck with lifting jacks or stands.
The visibility of the bottom side is necessary because you cannot adjust the new tool without it. The truck handling is challenging in these conditions, but you can select it if you cannot move under due to technical problems.
Find the spots and check the settings of the previous muffler. If these spots are new, mark the exhaust tailpipe and add marks on the adjustment section. Then, get yourself out of the truck at least 3 to 4 times for wound-free entry and removal.
Attach the connector with muffler inlet and check
Three are two steel pipes that are small with dual openings. These are suitable for the connection of both sides of the muffler.
The insertion of the pipe on the inlet is testing for the check of adjustment. Next, attach the other steel pipe to the outlet section and observe the fixation.
Rotate it on the inlet and outlet of the muffler and test the tightening ability. If there is an adjustment problem, remove them from these things and alter them with new devices.
In these situations, when the connecting pipes fit, then insert them with a maximum force so that the other end of the steel pipe fits with the inlet muffler end.
Secure the new muffler with supporting material
Adjust the new muffler on the underneath of your truck and settle it at one point. Next, add a supporting material like a wooden box or any other tool to support such materials.
The support material can handle the weight of these items without any vibrational effects. It also protects you from sudden accidental situations.
If you can tuck it in one end of the exhaust pipe, then perform it accordingly. It also supports it without any falling or other disturbing conditions.
Modifications in the connecting pipe
There is a usual problem that occurs at the fitting stage of these connecting pipes. Few of them have a different diameter than the exhaust tailpipe.
In these conditions, the insertion and adjustment become tricky. You cannot attach a moveable and loose connecting tool to the exhaust pipe because leakage occurs.
The modifications in these attachment materials are beneficial to control the tailpipe and the overall installation activity. Take a sharp cutter and make cuts on these sections of these steel pipes.
You can make equal spots on the openings of these items. Make these cuts on both ends and then fold one edge inward.
It offers a floral shape, but the adjustment power enhances. Repeat similar activity for both connecting steel pipes.
Check them on the exhaust pipe during the process. It restricts several errors and preserves the budget.
Adjustment of exhaust hangers
The adjustment of muffler hangers is necessary to adjust the bolts and other tools. Few of these pipes require long bolts with a steel tail attached.
It goes inside the system, and the size depends on your requirement. These are suitable bolts for the fixation of these inexpensive items.
The new exhaust hangers are beneficial due to their high performance and maximum quality. Purchase them from the hardware store and always buy spare hangers during these procedures.
Adjust them and settle the bolts on the relevant openings of the exhaust pipe. They increase the stability of overall connections without any sudden problem.
Attach pipe and fix clamps
Attach the steel connecting pipes with the muffler inlet and add the clamp. Tighten it to enhance the attachment capability of these items.
Add 1 to 2 clamps on these joining points according to the requirement. Insert extra pipe if the distance between the muffler and exhaustion pipe is long.
Cut and modify any used pipe or purchase a new item for these procedures. Push the new pipe inside the steel connector and then add the exhaust flow line.
Combine them and add a clamp on this point. Adjust all the bolts and screws of the clamps with efficient tools.
Join it appropriately with the exhaustion pipe of your Ford F150. Make a stable and continuous passage for the flow of exhaust gases and the flow of engine sound. Observe the connecting points at the end of the procedure for the removal of errors.
Why would you install a Flowmaster muffler on a Ford F150?
Flowmaster muffler reduces unnecessary engine sounds. It also enhances the acceleration ability of your Ford. As a result, they are a dominant supporter of the exhaust system in a Ford F150.
The work efficiency of the exhaust pipes increases with time. You can also adjust the sound level according to your requirement. As a result, they decline the frustrating sound and offer a peaceful traveling condition.
What is the average cost of the process and tools involved?
The average cost to install a Flowmaster muffler on a Ford F150 is around $95 to $280.
It varies with the conditions of the overall procedure and can reach around $145 to $310.
Also, the cost of protective goggles is around $45 to $60. The cost of clamps ranges from $35 to $56.
The tool kits are expensive, but you can hire them for around $30 to $35 per hour.
It varies according to design, material, and company name. However, few of them are expensive to a range of $170.
The addition of extra things like lifting stands and moveable statures can add $10 to $25 to the total budget.
Related Articles:
What is the average price of dual exhausts for your Ford F150?
Should I add Cherrybomb Glasspack on my Ford F150?
Can you hotwire a Ford F150 at home?