

Install a cherry bomb glasspack on a Ford F150 through expert techniques. Always use protective gadgets during welding procedures. Hold them carefully and never break the ends.
How to Install a Cherry Bomb Glasspack on a Ford F150? In general, you can install a cherry bomb glasspack on a Ford F150 by accessing the exhaust location, clean the tubing, and take measurements. First, cut the exhaust tube according to the size of the cherry bomb muffler, adjust it inside and tuck it. Next, add clamps to stabilize it firmly.
The proper adjustment is advisable for the removal of leakage. The exhaust system remains stable due to these installations.
These are cost-effective products with excellent performance.
How to Install a Cherry Bomb Glasspack on a Ford F150?
I have mentioned a step-wise guide to install a cherry bomb muffler on a Ford F150. However, professional help is a better way to reduce the chances of installation errors.
Access location for a Cherry Bomb
At the beginning of the procedure, you have to locate the standard location of a cherry bomb muffler on your Ford F150. It exists in the engine section near the exhaust tubing compartment.
The access is convenient if you take expert help. Read the manual, and approach them. They are mufflers and have standard performance in these areas.
You can approach them with a single cleaning process. First, remove the layers of dirt from the top sections and then access the spot.
Remove attachment tools
There are welding materials and other clamps in the location of the cherry bomb. These materials are the attachment tools of the older devices.
The previous instruments leave their remaining parts in few situations. You have to remove the clamps, open them and discard them.
Remove the welding material with a bristle brush.
You can clean the location for your satisfaction and prepare the surrounding exhaust tubing for this tool fixation.
Detach old device (if any)
It is an optional step for those mufflers in which an old device exists. Hold it firmly and detach the attachment points.
You can use efficient tools for such removals. Never touch it in hot conditions. Wear protective gloves for the security of human skin.
Detach them from the original position by reducing the attachment power. Discard these items from the overall setup and demolish them.
You cannot utilize it in the reinstallation process. People remove them due to their broken conditions and malfunctioning of these tools.
Take measurements and check for the required space
There is a left-out tubing of the exhaust system in the machinery setup. As a result, the cherry bomb muffler requires adequate space for its proper adjustment.
Take the dimensions of your muffler with a measuring tape. Write the size of this particular tool on paper.
It provides a layout about the adjustment of a tool in the exhaust section.
Use a digital measuring gadget and take the dimensions of the section.
The space in the exhaust area should offer enough dimensions for the settlement of this cylindrical device.
These are some of the longest mufflers and differ from the standard items.
It depicts that the cherry bomb requires more space for adjustments and standard performance.
Therefore, take the dimensions carefully and note them down on paper for the prevention of future losses.
Trimming and cutting of Cherry Bomb Muffler
If the cherry bomb is larger than the inner space of the exhaust tubing, then you have to do modifications.
The cutting and trimming of the tubing are one of the best ways to generate adequate space.
Use a sharp tool for cutting the edges from one or both sides according to its dimensions.
You have to spend time on this step because it requires effort and care.
Also, the lack of adequate space with inaccurate trimming leads to time consumption and other such errors.
Offer extra care during the cutting activity and take professional help for error-free activities. Consider the method of installation as well.
You have to cut the tubing of the exhaust system accordingly. First, inform the expert person about the installation plan and then proceed with further steps.
Observation and testing
Insert the new tool in the particular tubing space after cutting.
Repeat this activity if you are not sure about the trimming skills of the exhaust tubing. It can prevent irreversible losses of the tubing and other parts.
You have to replace the exhaust tubing due to trimming errors. It is a time-consuming and expensive method.
Lift the Ford F150
You have to elevate the Ford F150 from its standard position.
Use the jack standard of appropriate size and adjust them under the Ford F150. Uplift the truck’s front side to access the engine, exhaust system, and other such points.
The uplifting jacks are the best options for the upward movement of these heavy trucks. Make sure that the jack stands can handle this heavy mass of the tool.
You can add 3 to 4 jack stands under the Ford F150 for the proper device stabilization.
Adjust the new Cherry Bomb Glasspack
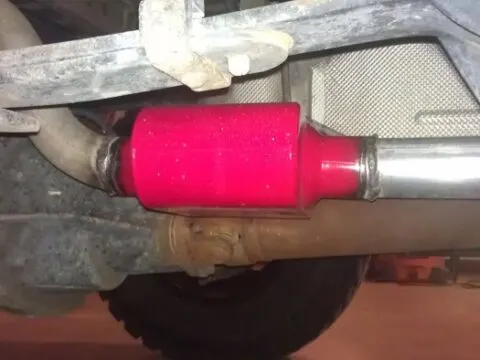
Insert the cherry bomb in the tubing section. First, you have to adjust it so that the front and rear side of the muffler faces both ends of the tubing.
The size adjustment requires accuracy in this step because the loosening of the Glaspack is not advisable.
Adjust it on the backside of the tube as well and tuck it completely.
Welding or addition of clamps
Wear protective gloves and goggles to perform these procedures. Use a high-quality welding tool for the beading of them.
Take a start from one side and then weld it to the next corner on the other side.
The overall beading and welding of the ends are essential because they restrict the leakage problems.
The leaking of the exhaust system is not advisable after these installations, and you need to weld it from all ends.
Welding is necessary to reduce all types of errors and enhance the stability of the new device.
They have attachment ability for these mufflers. Adjust the new device between the ends of the tubing. Add the clamps one by one at a distance and close them.
Tighten them firmly to avoid the problems of exhaust leakage. Secure it inside the tubing and tighten them again at the end of the procedure.
Pull and test its stability
Pull the installed device manually in both types of installations.
Tighten the clamps or bead the sides in case of any errors. Enhance the stability of the tool and keep it firm to restrain leaking and destruction problems.
How much does it cost to install a Cherry Bomb Glasspack?
The average cost of a cherry bomb muffler is around $31 to $120. Also, the professional person charges around $36 to $45.
The welding process costs you around $35 to $40. So overall it costs around $140 to $190.
The clamps are inexpensive products with an average price of around $20 to $99.
Protective gloves cost you around $17 to $26, and the goggles during the welding process range from between $40 to $75.
It takes 40 to 50 minutes to complete this procedure. However, an expert person can complete the activity in around 25 to 35 minutes.
Related Articles:
What is the price of dual exhaust for a Ford F150?
How do you replace the ignition coil pack on your Ford F150 truck?
How can I install a bull bar on my Ford F150?
Is it easy to use Apple CarPlay on Ford F150?
Can a Ford F150 pull a dump trailer?