

If your camper’s stereo system is malfunctioning and you need a replacement, you can install a second-hand or spare audio system from your car.
How to Wire a Car Stereo in a Camper? Installation of a car stereo system in a camper is pretty much straightforward. Steps involved are installing the head unit, connecting with speakers, installing the antenna, and providing a power source to enjoy the optimal sound.
Moreover, you can replace any component of the camper stereo system with that of a car by considering a few key points, including impedance matching of speakers and compatible power source with the head unit.
How to Wire a Car Stereo in a Camper?
There are 4 major parts of a car stereo system having different functions and you should consider these when adding it to your camper.
Their installation requires making room for individual components and then wire them all together for proper functioning.
Tools Required
For installation of a car stereo system in your camper on your own, you need a tool kit or the following tools:
- Drill machine
- Connector strips
- Few yards of wire (16-18AWG)
- Screwdriver
- Jigsaw
- Crimping tool
- Insulation tape
- Screws
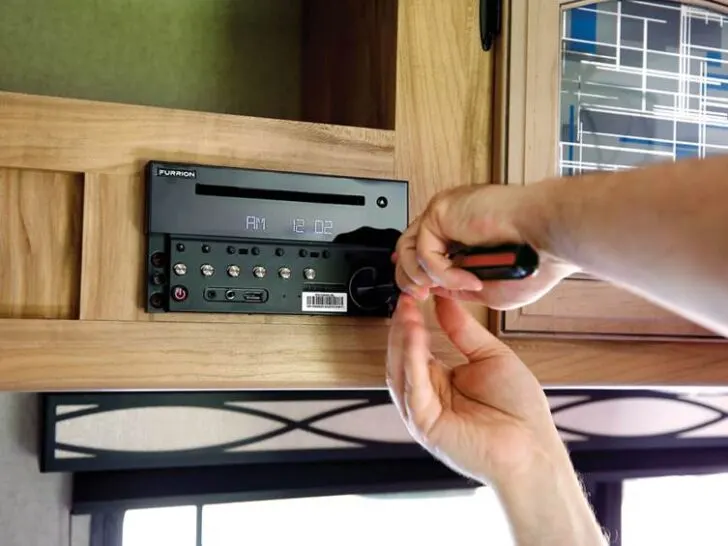
Make space for installation of the Receiver set
Both audio source and amplifier come as a single unit known as head unit or receiver. The receiver acts as an audio source.
The amplifier aims to enhance the audio source’s electric signal to transmit it to speakers that will be present away from the head unit.
The receiver also acts as an interface for selecting source media, volume and bass control, radio tuning, and navigation through the contents to access them.
You can install the headset in multiple ways in a camper, like cutting through space according to the unit’s size, installing a bracket on the sidewall, or installing with the help of screws or bolts.
Cut Whole Through any Cabinet or Space of Existing Stereo System: Place marking according to the car stereo system’s dimension. Cut the space with a jigsaw perfectly according to the size and fit the unit into it.
Install a Bracket on the Side Wall: Another easy method is to install the receiver with the help of a bracket where space is not available to cut a hole through the cabinet or dashboard.
There are brackets available of multiple sizes and designs for the installation of stereo systems. Install it with the help of screws and fit the head unit with it.
Drill Hole for Installation of Screws: Another simple and inexpensive method is to install the stereo system directly with the help of screws on any fixed frame structure. Drill holes in the frame and fix the unit with screws.
Wire Routing for speaker
The speakers’ purpose is to convert the head unit’s electrical signal to sound within audible frequency range for human beings.
You will need to find suitable space for multiple speakers in pairs, quads, or more according to the sound level required.
Speakers will be installed in the rear, center, or corner of the cabin to provide full sound coverage.
You need to put 2- wires for each speaker to the head unit. In the case of more than one speaker at a single place, connect them in series or parallel to match the amplifier’s impedance and run only two wires to the stereo system for the whole combination.
Use 16-18 AWG according to the resistance and power requirements of the speakers.
It is safe practice to use lower gauge number wires for longer distances for rear speakers to reduce signal loss.
Power and Wiring of stereo system in a camper
Stereo systems can require either AC or DC power sources according to specifications. Some work on 12VDC, while others require 110VAC.
If an AC power source is needed, you can power it with a shore power supply or an inverter.
Look for a power source in the nearby areas like any light and connect it by installing a connector strip with the stereo system.
You can separately run a wire through the main circuit breaker panel to power it up.
However, it is good to install a separate switch for the stereo system to turn it ON/OFF, resulting in energy conservation.
There are multiple wires in the stereo system’s connector, including memory, power, ground, and 2 wires for each speaker, and connect each wire accordingly.
Ground wire
Ground wire serves multiple purposes in an audio system; therefore, it should be connected appropriately to avoid malfunctioning or low-quality sound results.
Check for the ground wire in the wiring harness with a screw connector.
Connect it with any screw nearby on the metallic part of the camper chassis or frame to provide a common ground for the system.
It will act as a low resistance path to ground interference or noise signals for cleaner audio signals with a high signal-to-noise ratio. Therefore connect a 12-14AWG wire for grounding purposes.
Connection and installation of antenna
It is an optional component as a part of AM or FM radio systems to capture the channels. You can install it on the roof of the vehicle with a cable running to the head unit.
You can tune the channels to listen to music, news, or whatever you like according to your taste.
Antennas come in plug-and-play settings with connectors or jacks available.
Install the antenna on the rooftop or other suitable location with its wire reaching the stereo system’s receiver. Insert the jack in the relevant port to access and tune radio channels.
Connect the proper power source according to specification
Due to AC power availability from the shore power supply or via an inverter, most of them have AC-powered CD/DVD players, while car stereo systems work on DC power in the range 11-15V.
Therefore check for the specifications of the system before making wiring for the stereo system.
There is the primary power wire to be connected with a 12V power supply during the engine start.
Another memory wire needs a constant 12V power supply from the battery. Connect both with a 12VDC power supply from the battery for the sound system’s smooth operation and energy saving.
Use matching speakers
In multiple speakers, make sure that they have identical impedance and power ratings to achieve a better quality sound.
Otherwise, their series or parallel combinations result in impedance values not compatible with the amplifier unit.
Moreover, the same signal from the head unit will result in different intensity sounds, compromising the sound system’s overall harmony.
Impedance matching of camper speakers with amplifier
It is essential to ensure that the camper speakers’ impedance should be compatible with the car stereo system.
Check the impedance rating of speakers that is 4,8 or 12ohm and match it with the rating mentioned on the head unit’s connection ports.
If there is a mismatch, the power loss will occur, and the speakers’ input signal would be weaker, resulting in low sound or noise.
A solution to this problem is getting new speakers or using existing ones in series or parallel combinations to match the amplifier.
Color coding of wiring scheme of car stereo
The car stereo system’s wiring connector has 10-12 wires of different colors having different functions.
The table given below shows the color scheme of cables in the connector with the stereo system. You should identify these when you install a stereo in your camper.
| Wire Color | Function |
| Red | Main power (12V) |
| Yellow | Memory wire (12V) |
| Orange/Orange with white stripes | Dimmer/Illumination wire for head/dash lights (<12V) |
| Black | Ground |
| 4 solid color wires | One for the positive terminal of each speaker |
| 4 solid color wires with black line/stripe | One for the negative terminal of each speaker |
Avoid any loose or hanging wires in the cabin
It is an excellent practice to tuck all the wires from speakers to stereo receivers with cable ties or clips.
Loose or hanging wires result in their entanglement with anybody entering the cabin. Moreover, there are chances of their breakage when they get pulled or come under the feet.
Properly Insulate All Joints
You have to make multiple joints while connecting speakers and power supply with the stereo receiver.
Instead of twisting the wires with hands while making joints, it is a professional and safe way to use connector strips.
In the case of hand-made joints, properly insulate them using insulation tapes wrapped around the joint. It will reduce the risk of any short circuit or unnecessary noise from speakers.
Can any car stereo system be installed in a camper?
Yes, you can install any car stereo system in your camper on your own by finding a suitable place for the receiver and the speakers.
The next step is to wire the speakers, power, and antenna with the stereo system’s appropriate ports. Take care of the voltage levels, the impedance of speakers, and their wiring.
Related Articles: