
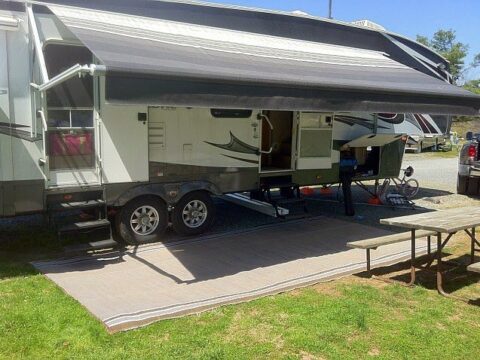
Here are 17 easy methods to secure your RV awning from flapping. Many people complain about the flapping of RV awning in severe weather conditions, and water pooling happens at its top.
They provide a shady environment to protect you from the hot weather, rain, and heavy storms.
How to Keep RV Awning From Flapping? You can keep RV awning from flapping by using a de-flapper, anti-flapping kit, stabilizer kit, ratchet strap, and by installing binding poles.
These are available in different colors, sizes, and shapes which operate by two methods. These are electric or need manual assistance.
During bad weather conditions, wind gust or heavy rain cause more damage, so you have to secure it when the weather condition becomes worse.
How to Keep RV Awning From Flapping?
If you have an RV with a canopy or awning, you have to take precautions while using it.
You make sure that no hole, breakage, or damage occur and gather detailed knowledge about the weather forecast.
In this case, you can download the weather application on your phone, which gives you notifications for heavy rain, wind, and incoming storms.
You also use some gadgets like a radio it helps you when you are staying in an area with less phone access.
This care allows you to become alert before the storm hits. You should take care of your canopy before time and prevent it from blowing, ripping, or causing other problems.
De-flapper
You can use the De-flapper method to reduce the flapping issue. These are available in a plastic clamp with appropriate sizes to make the awning firm on both sides.
You have to use the Velcro strap, which secures the awning rafter.
These are available in two different styles like Caravan and pop-type style.
Its firmness depends on your ability to stretch when tightening it. The advantage is that it reduces the noisy whipping and prevents the fabric tearing problem.
Anti-flapping kit
The Awning stabilizer kit protects the canopy movement and stabilizes it from flapping.
There are many anti-flap kits available, the best of which a heavy-duty aluminum kit extrusion.
It can increase the strength and stability of the vertical arm of the canopy awning. The stability power high when you used it with the rafter to hold the canopy clamping.
You have to make the extension adjustment for the easy slide and tension to make the extension adjustment.
Stabilizer kit
The stabilizer kit is cost-effective and gives protection to your awning.
It comes with spiral stakes that make the firm connection with the ground and are suitable for all types of soil. When you use it with a clamp, it gives a solid appearance.
Use Bunge cords
In the electric awning case, use the bungee cords which contain metal hooks. It can install on the sides and hookup onto the arm notch.
You connected it to the ground with the screw-in auger help. You need to confirm that the cord has some yield. When the pressure becomes high, it can bend the roller.
Another one is the awning ball that is different from the cord and simple but effective. It can loop and tied together with a ball. It prevents the mess which occurs due to its entanglement.
Awning repair tape
Awning repair tape uses when the hole or fabric tearing problem occurs. You have to buy those which compatible with the color of it.
Awning rafter
Roll out awning is a convenient facility but also causes some drawbacks. After a heavy storm, it can collect rainwater and dirt that makes it bulge with the weight.
The Aussie traveler awning rafter prevents high-intensity flapping. This method can solve your problem associated with your equipment.
In this case, you need screws, rivets, brackets, and self-drilling sheet metal screws. You have to measure the dimensions before installing it.
You have to screw the brackets into a metal strip which tightens the awning. Drill a hole according to the requirement to fit it to the roller.
It is better to use self-drilling sheet metal screws. You have to take the roller measurement and make a hole with the drill where the rafter pin aligns easily.
Rafter attaches to the roller tube by a pin inserted into the hole. You can also use the cradle to secure it by adjusting it around the roller tube.
Install the binding post screw
Binding post screws are also named Chicago screws or fasteners that contain two components like cap and the barrel post.
It requires no binding equipment and secures the camper awning top parts. There are holes in the bracket top position that you can enlarge according to your need and adjust.
When you retract it, these cannot interact with it. Use the strap which anchors the freestanding part below the awning arms to the ground.
By using this tool, it can withstand the heavy storm and secure it carefully.
Adjustable pitch awning
It is better to use the adjustable pitch awning because it is ideal when you decide to stay for a prolonged period than the flat pitch.
Use ratchet strap
The electric awning can anchor by another way, such as the Ratchet strap. These give the sturdy and withstand capacity to it.
You have to take precautions while holding it through this method. If you tight the ratchet strap, too much can cause damage to it.
Secure domestic electric awning
There is another way which can secure the domestic electric awning. You can use the corkscrew, which tightens and tie down the straps.
You can use some other accessories which can protect it from the breeze or a high mph wind. In this case, you require the following components.
It includes two PVC sliver line pipes of different sizes, Tees, end caps, two galvanized split ring hangers, thumb screws, and Regular clear PVC cement.
With PVC pipe, you can give adjustable support to your awning on each side.
Bungee strap
There is another way to stabilize it by using the bungee strap. It gives protection against bouncing and flexing during bad weather conditions.
When you have the small size of it with a support arm positioned at 45 degrees, tie it tight to protect the wind range around 30-50mph.
However, in some cases, the breeze overtakes the arms, and it will go away.
Use the Corkscrew anchor
The corkscrew anchor design provides the fixation strength and easy to insert.
You have to use it along with the spring and tie down the awning at its extended position. These are affordable, and the available cost is around $15 to $16.
OC brackets and poles
Tying down the awning is a hot topic nowadays because heavy storms cause a lot of damage. The OC brackets and poles are the best methods used with advanced features.
When it is fixing completely, you can use famous painter’s poles and fabricate your telescope poles.
These are available at Home Depot and the lower stores you can purchase from it.
For its installation, you need a pole bracket kit that includes essential components, like hitch pin, Pop Rivets, nylon bolts, pole nuts, screws, and upper poles.
The pop rivets use for the lower brackets and SS upper poles for the attaching brackets. Sometimes, people use adjustable painter’s poles.
These tools are made up of Aluminium and withstand the wind holding capacity of around 20-30 miles per hour.
How much wind can an RV awning withstand?
According to the RV style and kind, their awnings differ in the quality and capacity to hold the windy weather and pressure.
Each has different withstand abilities like electric and manual. During bad weather, the withstand capacity of both around 5-6mph and 20 respectively.
Can rain and wind damage the RV awnings?
Wind and rain caused damage to your awning during a heavy storm.
Fabric tearing
If the awning is fabric in nature, the high-speed wind can cause damage to it, like its tearing and ripping.
When you do not focus on it, the hole becomes large with time.
You have to use the repair tape, which should invisible to the naked eye. In the wide hole condition, purchase the color-matching patches, which adjust easily into it.
RV exterior damage
When the weather turns rough, RV and its awning can encounter wind pressure.
Sometimes it can cause damage to the vehicle exterior, its walls, and roof.
Wind pressure and water weight can lead to its breakage and causing it to bend and curve downward.
Sagging
The awning becomes saggy due to the water and the long time of its use. You have to fix it by using the adjusting screws that attach it to the mounting brackets.
In this case, first, you have to pull out the awning from the roller.
Its sides edges fix with a hex screw and tighten with a ratchet that adjusts it at its position. Repeat this process also for another side of it.
Water pooling
Water pooling problems arise when its corner is not in its proper adjustable position, like both ends are at the same level.
Water accumulates on the top surface causing it to sag and bends downward as a result of weight. You have to do some preventive measures to avoid this issue.
In this case, you have to set it in a proper position, like one outer corner of it is slightly lower than the other. If you neglect this issue can lead to mold and mosquito growth.
Cleaning of RV awning
When you do not use it for a prolonged period, the dust and mildew develop stain on the awning, so you have to keep it clean.
Avoid to do scrubbing, damages the acrylic and the water-resistant finishing from it. The best way is to use the fabric cloth or sponge to help remove the mildew and dirt spots.
The manufacturer’s recommended cleaners are the best option to avoid using oil-based or abrasive cleaners, which enhance the adhesive property.
Domestic DIY like bleach is advantageous, and you can make the mixture in which dish detergent, Clorox, and water in the correct proportion.
The use of Baking soda is also intense, but it does not affect its texture. You have to sprinkle it and then wipe it with the soap bar mixed water.
Another way is to buy the synthetic cleaner and follow the instruction.
The most popular are the Starbrite and Camco ( it needs dilution before cleaning). These are safe in use for any delicate awning like fabric, acrylic, or any other.
RV Awning types
These are available in different sizes and shape with specific features.
Electric awning
Electric awning equips with the direct response electronic and button. It detects the movement and retracts when the wind pressure exceeds the limit.
Manual awning
In the manual awning, you have to operate it manually. In this case, you have to unlock the Velcro strap travel lock on both of its arms.
There is a rafter arm inside the awning arm unlatch and slides it up. You have to put pressure and tighten it on both sides.
Roll out awning
Roll-out awning gives you shelter and privacy. These are available in different brands like Thule, Fiamma.
It is lightweight and best for taking a short break when traveling and not want to use the entire opened awning. These are easy to install and fix with the poles and screws.
Acrylic awning
These are widely used and provide various advantages. It can provide better air circulation, repels water, and dry fast.
It has the excellent ability to tolerate weather conditions like wind, dirt, and dust.
Vinyl awning
Another form of material used in RV awning is vinyl. It protects from scratch and stains and waterproof. It shows resistance against UV rays, pollution, and road grime.
Related Articles:
How to install a cable-operated RV dump valve?
How to adjust the tension on RV day-night shades?