
Many people complain that their RV awning fabric is damaged. Here are 9 easy steps to replace RV awning fabric on electric awnings. We have added the required tools in this detailed guide.
How to Replace RV Awning Fabric on Electric Awning? Replace RV awning fabric on the electric awning by removing the old material. Remove all the screws and bolts and install a new awning fabric. Roll the awning material tightly and adjust the caps. Tight all the covering and roll arms back into their position after installing new material.
How to Replace RV Awning Fabric on Electric Awning?
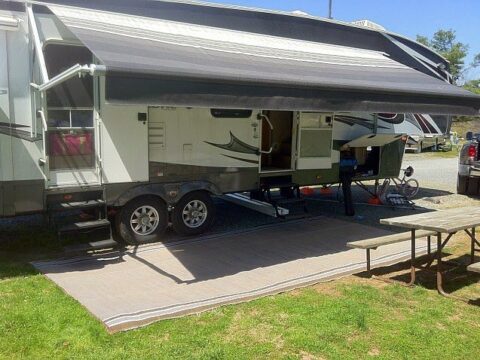
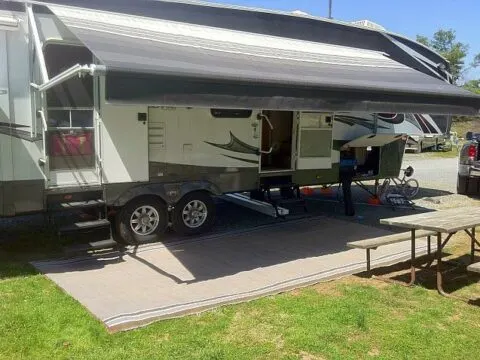
The RV awning fabric is a shelter during camping sessions. This electric awning can move out and hold in a specific position.
It prevents sunlight and other weather hazards. It is an extended portion of an RV with an electric control system.
Tools required
- Measuring tape
- Screwdriver
- Drill Machine
- Bolt puller
- New fabric
- New screws
- Springs
Select RV awning fabric
In case of replacement of the awning fabric, you need to purchase a piece of new material. It is a tricky and leading step because, without it, you cannot proceed.
Measure the awning area with a measuring tape. Always consider all the caps and screw areas in case of dimensions.
Purchase a high-quality fabric with excellent weight quality. It should comprise the waterproof quality and should resist all the weather conditions.
Always consider the guidelines of the manufacture before choosing the awning fabric.
Access all screws and remove them
Access all the bolts and screws that hold the fabric in the awning roller. There are usually two pairs of bolts on both sides of the tube.
Use a bolt remover and a specific drill to remove all the bolts at once. The ends of the awning fabric move downward, but they never touch the ground.
Use an accurate size screwdriver and remove all the screws from the bracket compartment.
These screws are usually two, and each of them present on both sides. Always select anticlockwise directions in such situations.
These are the supporting factors to join the fabric with the internal brackets. Once you remove them, and it loses all of its strength.
Detach the old awning fabric from RV
It is an essential step in the replacement of awning fabric. You cannot add new fabric to the old material. Use a ladder and reach the arms of the fabric roll.
They are usually inside the bracket, so you can also insert some pressure. It allows the detachment and free movement of the fabric out of them.
The removal becomes convenient than before, and you can perform this step with the help of a friend. The awning fabric is heavy, and you cannot pull it alone.
Both sides require equal pull, and you need someone on the other end. Pull the ends of the roller tube and remove it from the system. You can replace the RV awning roller tube with this easy technique.
It is beneficial for the removal of fabric because it is a tightening tool. Once the awning fabric loses the strength of the roller awning tube, and it moves downward.
Pull its ends
Hold the ends of the awning fabric and pull them downwards to the ground. It is a time-consuming process and requires enough amount of strength.
Pull it gradually from both sides, and you can also cut it. The replacement involves the addition of new fabric. The older material is useless in the procedure, and you can cut its pieces.
Roll the fabric
Take the help of another person to roll the pulled fabric on the ground. Make sure you have enough space in front of your massive vehicle.
The awning fabric requires maximum space on the ground because it is no more in the roll. Ask the person to make a roll after the removal of the material.
Always keep it folding until you remove all the stuff from the massive vehicle and its brackets. Adjust the roller tube aside for future use.
If you do not acquire enough people as support, then use heavy masses. Utilize bricks and other such materials to control fabric on the ground.
Remove all fabric
Remove all the fabric material and discard the handling caps. These are lids of the brackets which keep them in one spot.
You can remove the caps with a screwdriver and adjust the tool there. You can also add some tape in the same compartment, and it keeps the device safe.
In the absence of such preventive measures, the awning tube cap can scatter into pieces.
Always repeat the process on both ends of the rolling tube, and remove every scratch of the old fabric. Never leave the extra material because it makes the process difficult for the person.
Attach and install new fabric on electric awning
Clean the old surface and install the roller tube back in its position, and you can also add protective materials like silicon on the protective portions.
Cover the channels of the awning place with the silicon material, and use a spray bottle of this material and cover every portion of the channeling sections.
The material moves freely on the roll, and in the absence of silicon, it becomes impossible.
Always apply the silicon in a thin and smooth layer. The trigger of the nozzle can apply a thick layer that is not suitable.
Keep the bottle a few inches away from the channels and then perform this process, and adjust it evenly sprayed on all the equipment with expertise.
Mold the sides or comes off the material and insert them in the bracket.
The central portion of the roller tube allows smooth and straight movement of the fabric.
The sides require few modifications, and you should perform it according to guidelines. If you avoid such small instructions, and then the process becomes time-consuming.
Adjust it in the middle section in case of errors. Initiate the process of fabric rolling on the awning tube and keep the moving firm.
Keep rolling the electric awning fabric until it reaches the positions. Make it firm as much as you can, and it is one of the most suitable conditions. The addition of helping hands makes the process far convenient.
Insert springs and roll
Roll the fabric and increase the force of tightening. It also enhances the protection of the awning fabric from falling to the ground.
Handle the side level of the awning tube and insert the springs on both sides. These springs are the supporting factors that keep and control the fabric in one place.
You can add new supporting tolls on the sides of the roller. Add the caps back in their shape to secure the system and tight the springs with specific tools.
Use clockwise directions to perform the spring control. Keep the rotation firm and tight during such a process and repeat it at least 2 to 3 times.
Attach the arm potion of the awning fabric with the tube. Remove the piece of tape from the bracket and add the arm back into its original position. Tight all the relevant parts and add screws back into shape.
Use an accurate screwdriver to tight these small tools. Never use a drill machine in this process because it can detach and harm the awning fabric.
Test its electric connection
The awning fabric joins with the electric connections of the RV system. Check and observe the pattern of electric links after the installation.
Always consider the awning fabric is rolling out and folding again with a single push of an internal button.
Identify that the movements are slow, but they are not sudden. It can harm the fabric most dangerously. You can lose all the new RV awning fabric due to the sudden down falling of RV awning fabric.
Related Articles:
How to keep food from falling out of RV fridge?