

A bathroom in an RV is an essential part, and keeping it free from leaks and water disasters is extremely important, which you can achieve by waterproofing it.
The shower area maintenance is necessary for a spoilage-free and healthy on-wheel home without the filth and nastiness that occurs due to moisture.
How to Waterproof an RV Bathroom? You can waterproof an RV bathroom by coating the walls with an appropriate waterproofing product. In addition, you can use a shower pan and surround for additional protection. Moreover, install water-resistant wall panels and keep an eye on the caulking on all the edges.
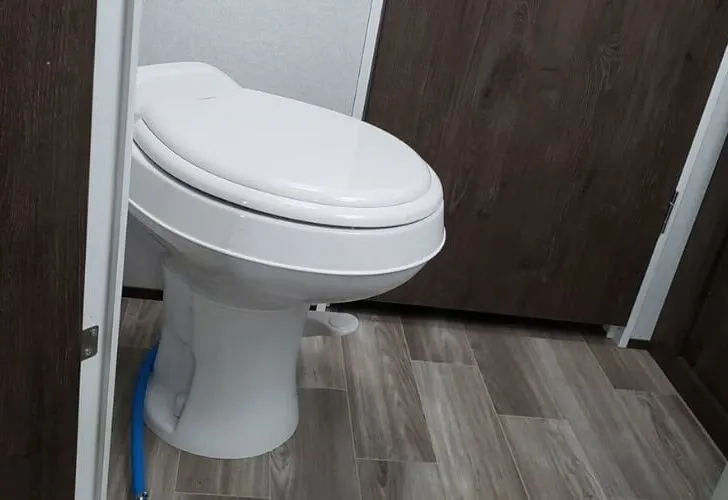
A bathroom constantly exposes to water which means it is most vulnerable to moisture attacks and has different sewage systems than the homes.
The shower and sink water drains into the holding tanks, and the owner must empty this gray tank manually, present underneath the RV.
The drainage should bring to the dump station for emptying and treat the tank at least once a month to prevent odor and algae production.
Excessive moisture absorption and leakage is the concern of all the owners that leads to degradation like cracking, ruptures, corrosion, deterioration of the interior components.
It usually occurs when you can not maintain the unit properly and neglect drainage for more time in response to the busy schedule.
These problems exaggerate with time, resulting in irreversible damage that needs much expense and hassle to make modifications and replacements.
It will take around 4 hours to 2 days to complete the procedure and the expense can be high or low, depending upon the technique you use.
Installation of shower surround
The surround is a boundary or cabinet that acts as a wall to the area, and some have additional specs like soap holders and bars shelves.
RV experts and designers say, ” adding surround in the bathrooms will prevent various damages and give a more updated and well-crafted look.”
The cheaper ones cost under $100, which excited you for the price but is a complete loss, while supreme quality ones range between $500 to $600.
You will need to spend around 3 to 6 hours on proper installation, so do not rush to finish the process soon and fix it on all the sides.
You can also paint it with a suitable product that looks more visually appealing because most of them come in neutrals or white colors.
Moreover, it comes in different materials like glass, acrylic, plastic, tile, and all of them are waterproof to keep the walls dry.
You will need tools like Drill, Cutting tool, Seam glue, Screws, and Caulk. Follow the steps for its installation:
- Valve off the water supply and wipe out all the water on the floor.
- Remove all the equipment from the area and measure using a measuring tape.
- Do not forget to mark the spots where you install the equipment and water hoses.
- Drill holes and locate the surround in the area with the help of another person.
- Secure with the screws and add glue at the back for extra attachment.
- Do not compromise on adding glue to all the edges and corners
- Leave to dry for around two days and then caulk around the edges.
- Reinstall all the shower equipment and check the areas for improvement.
Add waterproof coating to the bathroom walls
Painting and coating with a moisture-proof product is the cheapest and easiest technique under a low budget but with little effort.
You will have to spend hardly 2 hours on the process, but drying will take more time while you can perform all this for under $100, which is an ideal scenario for everyone.
Start with gathering all the requirements like:
- Waterproof coating of a good brand
- Roller for equal and even dispersion on the surface.
- Brushes of medium to small size for the edges and corners
- A paint tray is a must item for even distribution of coating on the roller.
- Any spare cloth or plastic sheet to protect the floor from the fallen coating drops.
Prepare your RV bathroom walls for the process by:
- Covering the floor from the boundaries with the sheet.
- Cover bathtub and other equipment with a towel or newspaper to prevent stains.
- Remove the lid of the paint box and use a wooden or metal stick to mix and stir the material.
- Add enough amount of coating onto the tray and rub or dip the roller on it.
Application steps involve:
Apply the first coat on all the nooks and surfaces using the roller in a sweeping motion and be generous with the material.
Use brushes for narrow spaces and refills the tray from time to time. Leave the wall to dry for around 1 hour.
Recoat the surface using the same pattern. Remember you have to be more careful in neat in the second layer.
Leave to dry for several hours and test by tapping hand softly onto it.
Check by splashing water onto the water to see whether it worked or not.
Caulk all the edges
Usually, the leakage starts when caulking begins fading and splitting away, and the water resides in these areas.
It lasts for only a few years even if it is the best quality one, so you need to check by touching it and re-caulk timely.
Sealing and caulking are different in materials and designed for filling the gaps and cracks in surfaces.
They also act as bonding agents and joint two parts together, which is necessary while installing any structure, especially in the bathroom.
Caulk consists of latex and acrylic materials because they are rigid and prevent water leaks, while sealants have more elasticity and flexibility towards weather and temperature fluctuations.
Use always a caulk gun for better application and position it at an angle of 45 degrees. Remove the old wear material first using a knife or a blade.
Its nozzle has the market line to indicate the location of the cut. Put the nozzle into the joints and start caulking with less pressure.
Clean and even the surface using a clean cloth. Let it cure for three days at least, and do not use the area for this time.
Add a shower pan
Acrylic shower pans are the new trend for RV bathrooms because of their unique, sleek, and sturdy look and protection from leakage.
These bases are arc-shaped and fit perfectly narrow spaces, which is the major problem in motor homes.
It has a 90-degree corner reinforced with MDF to the bottom and remains in shape without sogginess and early damage.
Usually, 20 to 30 inches pan settle in most areas and provide the required function because of better resistance.
Other materials are lead and vinyl, and both of these are equally good in catching the water from seeping through the floor.
Remember, you need to clean, maintain and repair it time because it may start to crack and deteriorate with time.
They cost around $200 to $300, which lasts for 2 to 3 years if choosing a supreme quality one while you need to seal it to the walls with a flashing tape or sealant.
Shower panels are the ultimate option
Almost every RV has these panels that serve as a barrier between the bathroom and other compartments.
High gloss modern wall panels and solid surface panels are on the top of the list because of their resistance towards the cracks, fading, and scratching.
They are durable and thick of around 5 inches to provide sufficient moisture-proofing functionality, and you can choose between several style options.
FBR panels are the first choice of 90% of the owners, concluded from the online RV forums, because of easy installation with glue or fasteners.
These thin, flexible, lightweight, and high-quality barriers consist of strong polyester resin with fiberglass that is easy to clean.
You can install them on the dry and non-dry walls and are almost 4 feet wide with varied length options from 8 to 12 feet.
Use Backer board
Cement or heavy shower backer boards are heavy and are not preferable for the RV because they are towing structures.
However, several other types of boards are available in the market that acts as a waterproof membrane, and you need to attach them on the walls.
Foam board is most suitable among other options because of its lightweight and easy installation options.
They are around 1 inch thick, and a single sheet of 3 by 5 weighs only 50 pounds but is slightly more costly.
It consists of a polyisocyanurate core which has high density and is a closed-cell foam. On the other hand, most of these have polystyrene.
Make sure you have a suitable showerhead
Usually, the showerheads for RV are slightly different from the conventional ones at home because you need the flow to be linear and not angular or splashing.
The more water flows with the pressure, the more it gets absorbed in different materials, and the chances of damage increase, so consider this factor.
Moreover, they should use less water to maximize the reserve of your resources by providing a clean bath.
Several companies and brands manufacture products for onboard use and have perfect water control and flow features.
They come with a valve that runs with a hit to shut off the stream and are convenient for the person using them.
In addition, you will find a wand option, so you can hold it in your hand and bring it down to rinse the body, which is 50% more feasible than the fixed ones.
With time, they begin to gunk up and leak, which can cause a lot of contamination in the unit, and you need to replace it soon.
You will get them for under $100, while the most affordable ones will come in a range of $10 to $50, so you can choose one of your desire and budget.
What are the RV Bathroom walls made of?
Usually, bathroom walls are of plywood, medium-density fiberboard, and vinyl, and all the furniture, decorations, and equipment should correspond to them.
Its walls are around 2 to 3 inches thick, which is significantly thinner than usual home walls, and it usually has an insulation pad between two walls.
Plywood: It is strong, and does not bend easily, and looks more natural. It feels more soothing and easy to decorate with different paints and wallpapers but is susceptible to water damage.
MDF: the affordability is the best feature of these, along with the lightweight, versatile and flexible features. However, you can not expect them to stay undamaged for a long time.
Vinyl: It comes in many shapes, colors and is easy to install in an RV while it is less in price and more durable than plastic. It will start wearing after a short period of around two years which makes it the least valuable.
Why do you need to waterproof the RV bathroom?
We ask several people for the need, and 90% of people worry about leaks and spoilage while all try different techniques to prevent this problem.
We concluded from several RV forms and owners that they add waterproofing elements during the installation or renovation.
It means they do not have to do anything in the future, but maintenance while the less population has no protective approach in this scenario.
Usually, people spend less time in baths in these motor homes than in a ground house because of less water pressure and limited water supply.
However, there is still use of surplus water in few minutes, which can damage different compartments in the shower unit.
The moisture remains in the walls, causing them to weaken and crack after some time, which means you have to get a permanent solution.
Also, the durability and longevity of an RV greatly depend upon the degree of refraining moisture and dampness.
Related Articles:
Is it expensive to replace an RV shower?
Is it a good idea to put a bidet in RV toilet?
Is it a good idea to install peel and stick backsplash in your RV?